Published: Mar 29, 2023
This is the third post about securing Rails GraphQL API app. The topic is CSRF protection for GraphQL API. CSRF is an acronym of Cross-Site Request Forgery, and one of well-known vulnerabilities and a type of session hijack.
If an attacker succeeds to hijack session, the request from the attacker looks a proper one from a victim. The attacker is able to execute state changing operations using victim’s identity.
According to the document, Securing Rails Applications:
CSRF appears very rarely in CVE (Common Vulnerabilities and Exposures) - less than 0.1% in 2006 - but it really is a ‘sleeping giant’ [Grossman]. This is in stark contrast to the results in many security contract works - CSRF is an important security issue.
Above being said, we should think about CSRF protection.
GraphQL needs CSRF protection?
OK, we had a basic idea of CSRF attack. Then, the question is whether GraphQL API needs CSRF protection or not. If it is truly API only app, the app doesn’t use a cookie nor session at all. There should be no session to be hijacked… Well, developers might have a vague belief that there should be no session skipping actual HTTP response headers checks.
Some GraphQL clients, such as GraphiQL, don’t handle HTTP request/response headers well. People might miss what are passed in HTTP response headers. In contract, Insomnia (https://insomnia.rest/) or Postman (https://www.postman.com/) does a good job. Postman’s handling is awesome. By default, Postman adds meaningful HTTP response headers to HTTP request header automatically. Besides, those are controllable. We can choose what should be sent back with GraphQL request. Postman is famous for REST API client, however, GraphQL support is also good.
Once we check HTTP response headers returned with GraphQL query result, cookie and/or session might be found.
For example, the previous post, Make it Secure 2, GraphQL by Rails and Devise
uses Devise for authentication.
To make it work, cookie and session setup was added to config/application.rb since Devise needs that.
The Rails app was created with --api option, so the addition of cookie and session was done manually.
We knew that GraphQL response would come back with the session.
If GraphQL API app is created without --api option, the cookie and sessions might come back with GraphQL response unknowingly.
The blog post, What’s Old Becomes New Again: CSRF Attacks on GraphQL APIs,
mentions “misconfiguration,” which would include the case of “unknowingly.”
The answer to the question, GraphQL needs CSRF protection?, depends on what gems are used.
CSRF Protection Setup for GraphQL
Rails provides CSRF protection out of the box, however, it is based on traditional web application. The meta tag is used to embed CSRF token. It uses flash UI when the session nullify option is used. API only, GraphQL app needs tweaks to make it work.
How Rails CSRF Protection Works
Before moving on to the code, let’s revisit how traditional Rails app does for CSRF protection.
- Rails app creates CSRF token
- Rails app ties the CSRF token to a session
- Rails app passes the CSRF token to a client using HTML meta tag with the session
- A client sends back the CSRF token using X-CSRF-TOKEN HTTP request header with the session
- Rails app compares the CSRF token returned as X-CSRF-TOKEN and tokens in the session
- Rails app does what protect_from_forgery specifies if the token is failed to verify
Among the steps above, API only app should do something else for step 3 and 6. In general, the cookie is used to return a pair of CSRF-TOKEN as key and the token as value. Using the cookie might be controversial in terms of better security. Another way is to return the token as a part of GraphQL login/register mutation response body. This might be better than the cookie, however, other queries and mutations lose a chance to get updated token. It is recommended that the CSRF token should be updated in every interaction to the server. Given that, using cookie would be an agreeable solution.
When the CSRF token verification fails, three below protect_from_forgery strategies are possible behaviors.
:exception– Raises ActionController::InvalidAuthenticityToken exception, which is captured in the GraphQL response body.:reset_session– Resets the session. New token will be created and returned to the client.:null_session– Provides an empty session during request. The cookies/sessions added by Devise are also deleted.
Not like REST API, GraphQL always uses HTTP POST method by design. The HTTP methods is useless to control the protect_from_forgery strategies, so we should add a custom strategy.
GraphQL Rails app
The CSRF protection will be added to the previously created mini-blog-2 app. How to create the app is explained in Make it Secure 2, GraphQL by Rails and Devise. The code is at https://github.com/yokolet/mini-blog-2.
The app uses Devise gem for a user authentication.
Update for null session strategy
This is to fix a flash error caused by no UI, API only setting. This GraphQL app doesn’t use null_session strategy, but it’s good to have the update below for a future change.
Add config.middleware.use ActionDispatch::Flash in config/application.rb. The three lines for cookie and session were added when Devise authentication was set up. The cookie and session are used for CSRF protection as well, so leave those lines as are.
# config/application.rb
# ...
# ...
module MiniBlog2
  class Application < Rails::Application
    # ...
    # ...
    config.session_store :cookie_store, key: "_mini-blog-2_session_#{Rails.env}"
    config.middleware.use ActionDispatch::Cookies
    config.middleware.use config.session_store, config.session_options

    # when protect_from_forgery with: :null_session is used, add blow.
    config.middleware.use ActionDispatch::Flash
  end
end
Add method to create and set CSRF token
As mentioned above, the CSRF token will be added to cookie. Add set_csrf_token method in ApplicationController. Since the Rails app is configured API only, two modules are included to use cookie and form_authenticity_token method. The form_authenticity_token method generates a token and ties it to the session.
# app/controllers/application_controller.rb
class ApplicationController < ActionController::API
  include GraphqlDevise::SetUserByToken
  include ActionController::Cookies
  include ActionController::RequestForgeryProtection

  protected

  def set_csrf_token
    cookies['CSRF-TOKEN'] = form_authenticity_token
  end
end
Implement Custom protect_from_forgery Strategy
By the nature of GraphQL API, it’s very hard to choose protect_from_forgery strategies depending on queries and mutations. For that reason, a custom strategy class is added here. The strategy plan is:
- userLogin and userRegister mutations don’t need CSRF token verification, but want the token for later queries. Use reset_session.
- users and posts queries, createPost mutation do CSRF token verification. Use exception.
Something extra is that schema fetching query is issued very often while using the GraphQL client such as Insomnia or Postman. Absolutely, that doesn’t need CSRF token verification. We should consider such query exists to implement the custom strategy.
The below implementation parses GraphQL query and gets query/mutation names defined in the schema. The implementation is primitive and doesn’t support multiple or nested queries done in a single HTTP request. Assuming only one query comes in, it finds the name of a query or mutation.
# app/controllers/concerns/mini_blog_strategy.rb
class MiniBlogStrategy
  def initialize(controller)
    @controller = controller
  end

  def handle_unverified_request
    query_string = JSON.parse(@controller.request.body.string)["query"]
    operationName = GraphQL.parse(query_string).definitions[0].selections[0].name
    if %(users posts postCreate).include?(operationName)
      exception.handle_unverified_request
    else
      reset_session.handle_unverified_request
    end
  end

  private

  def reset_session
    ActionController::RequestForgeryProtection::ProtectionMethods::ResetSession.new(@controller)
  end

  def exception
    ActionController::RequestForgeryProtection::ProtectionMethods::Exception.new(@controller)
  end
end
Update graphql_controller
The last piece is a GraphqlController update. It’s simple. Just add set_csrf_token method and the custom strategy.
# app/controllers/graphql_controller.rb
class GraphqlController < ApplicationController
  # If accessing from outside this domain, nullify the session
  # This allows for outside API access while preventing CSRF attacks,
  # but you'll have to authenticate your user separately
  # protect_from_forgery with: :null_session
  protect_from_forgery with: MiniBlogStrategy
  after_action :set_csrf_token

  def execute
    # ...
  end

  # ...
  # ...
end
Try CSRF Protection
All are ready. Let’s see CSRF Protection is working. The GraphQL client used here is Postman since its HTTP request/response header handling is great.
The first step is the userLogin mutation. Open Postman, then:
- select POST for HTTP method
- input http://localhost:3000/graphql
- select Body
- select GraphQL
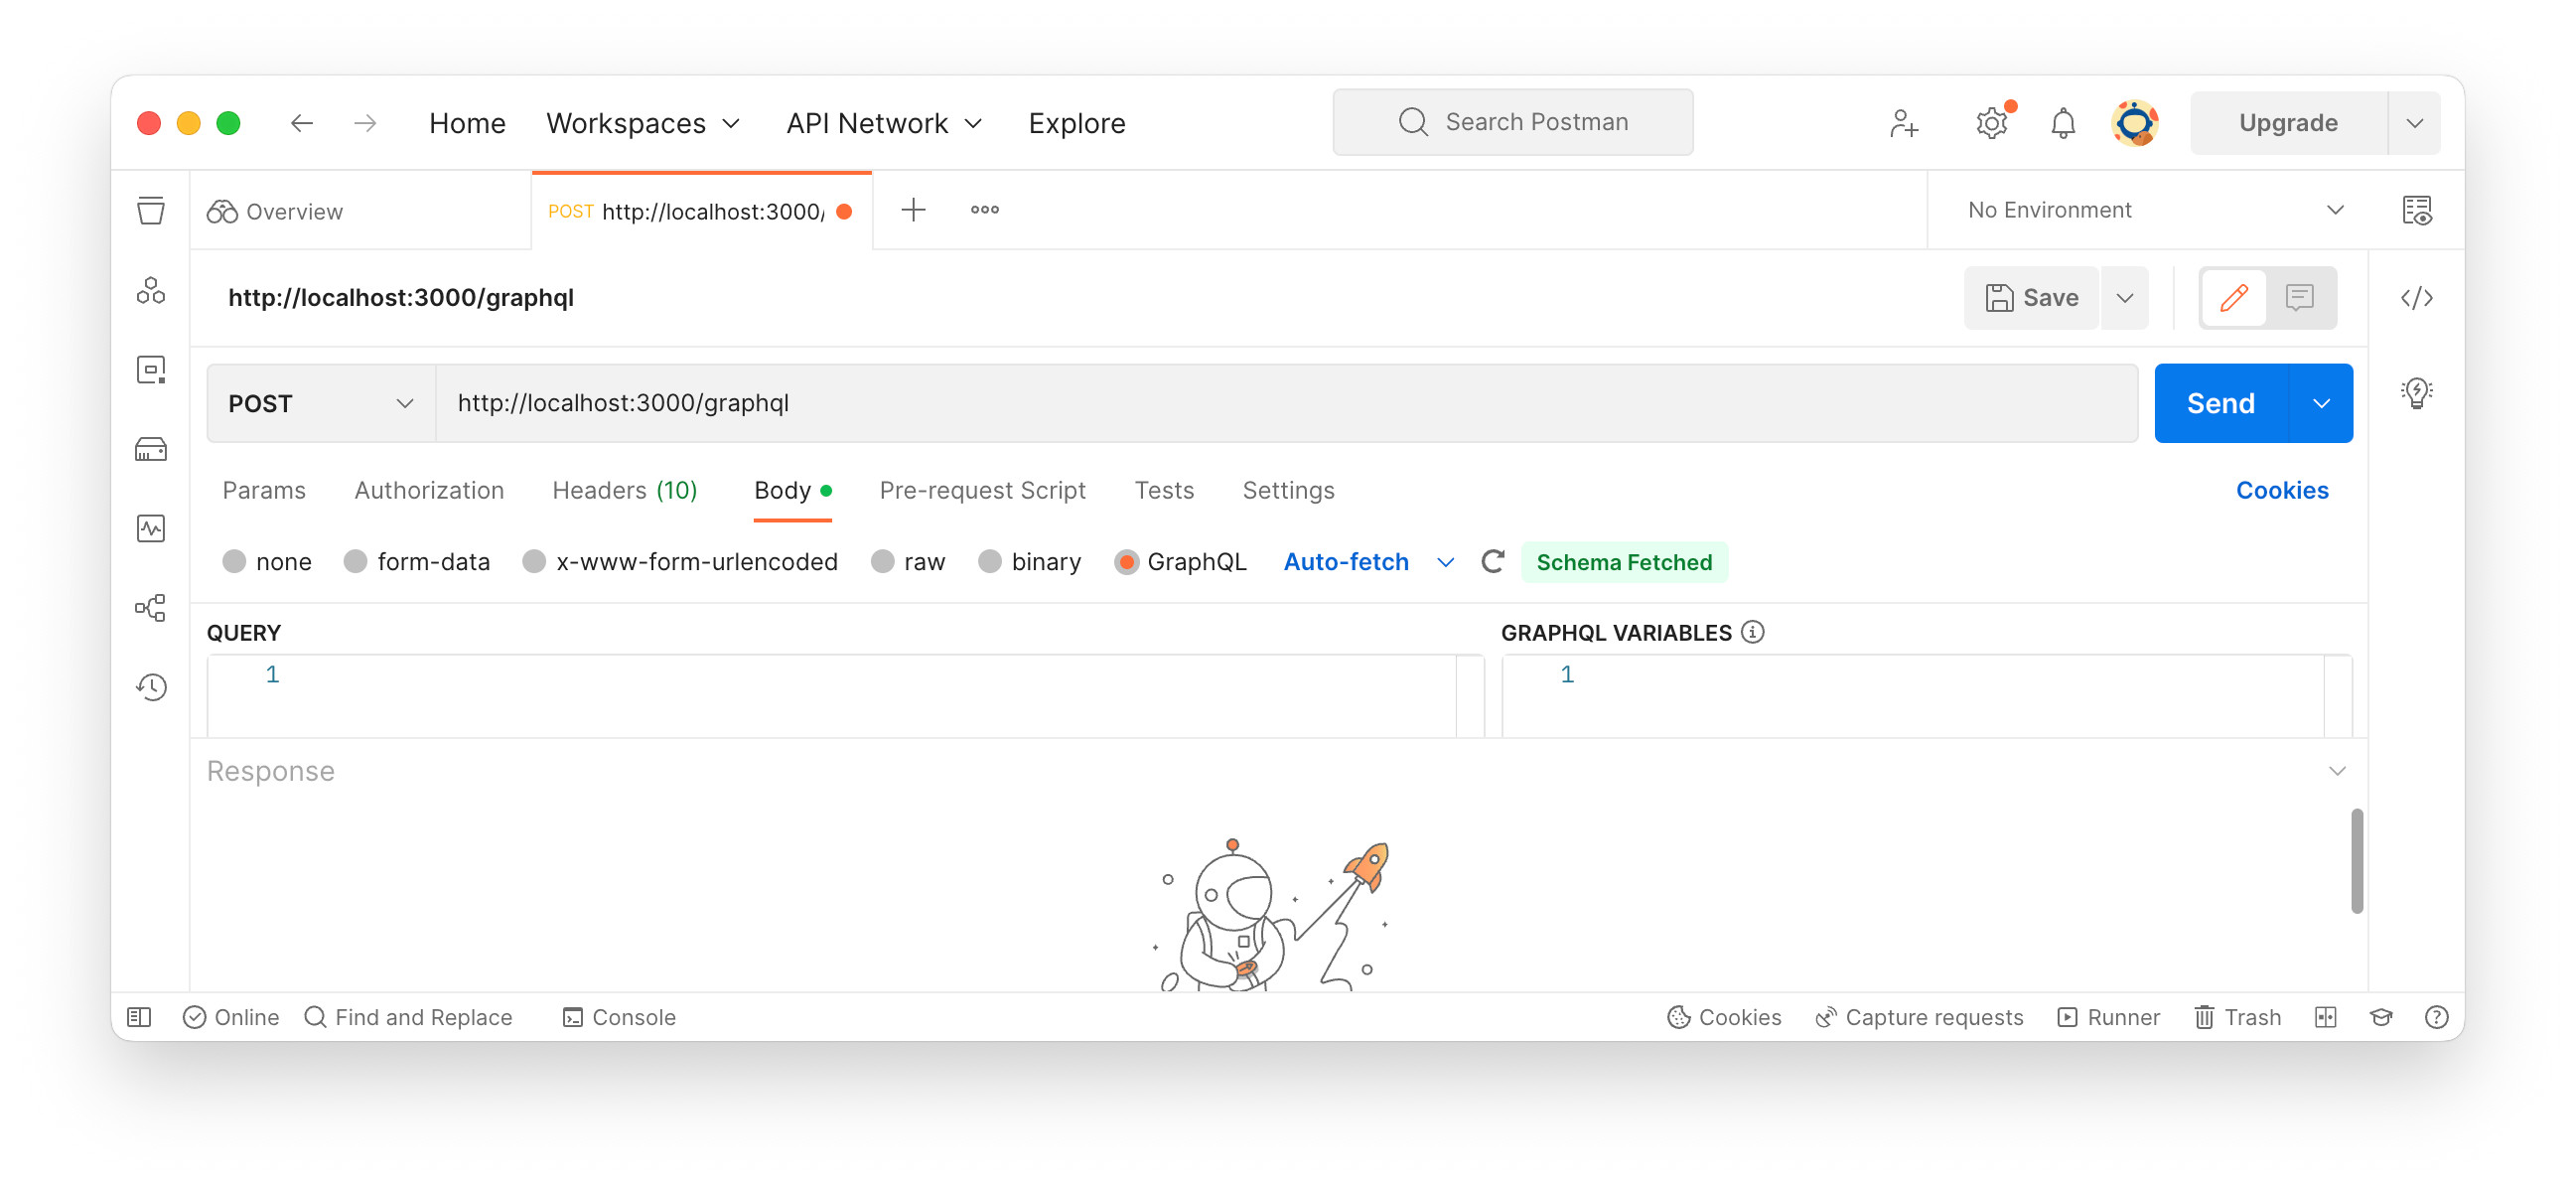
Right after GraphQL is selected, Postman makes a schema fetch query. As in the image below, “Schema Fetched” status appears.
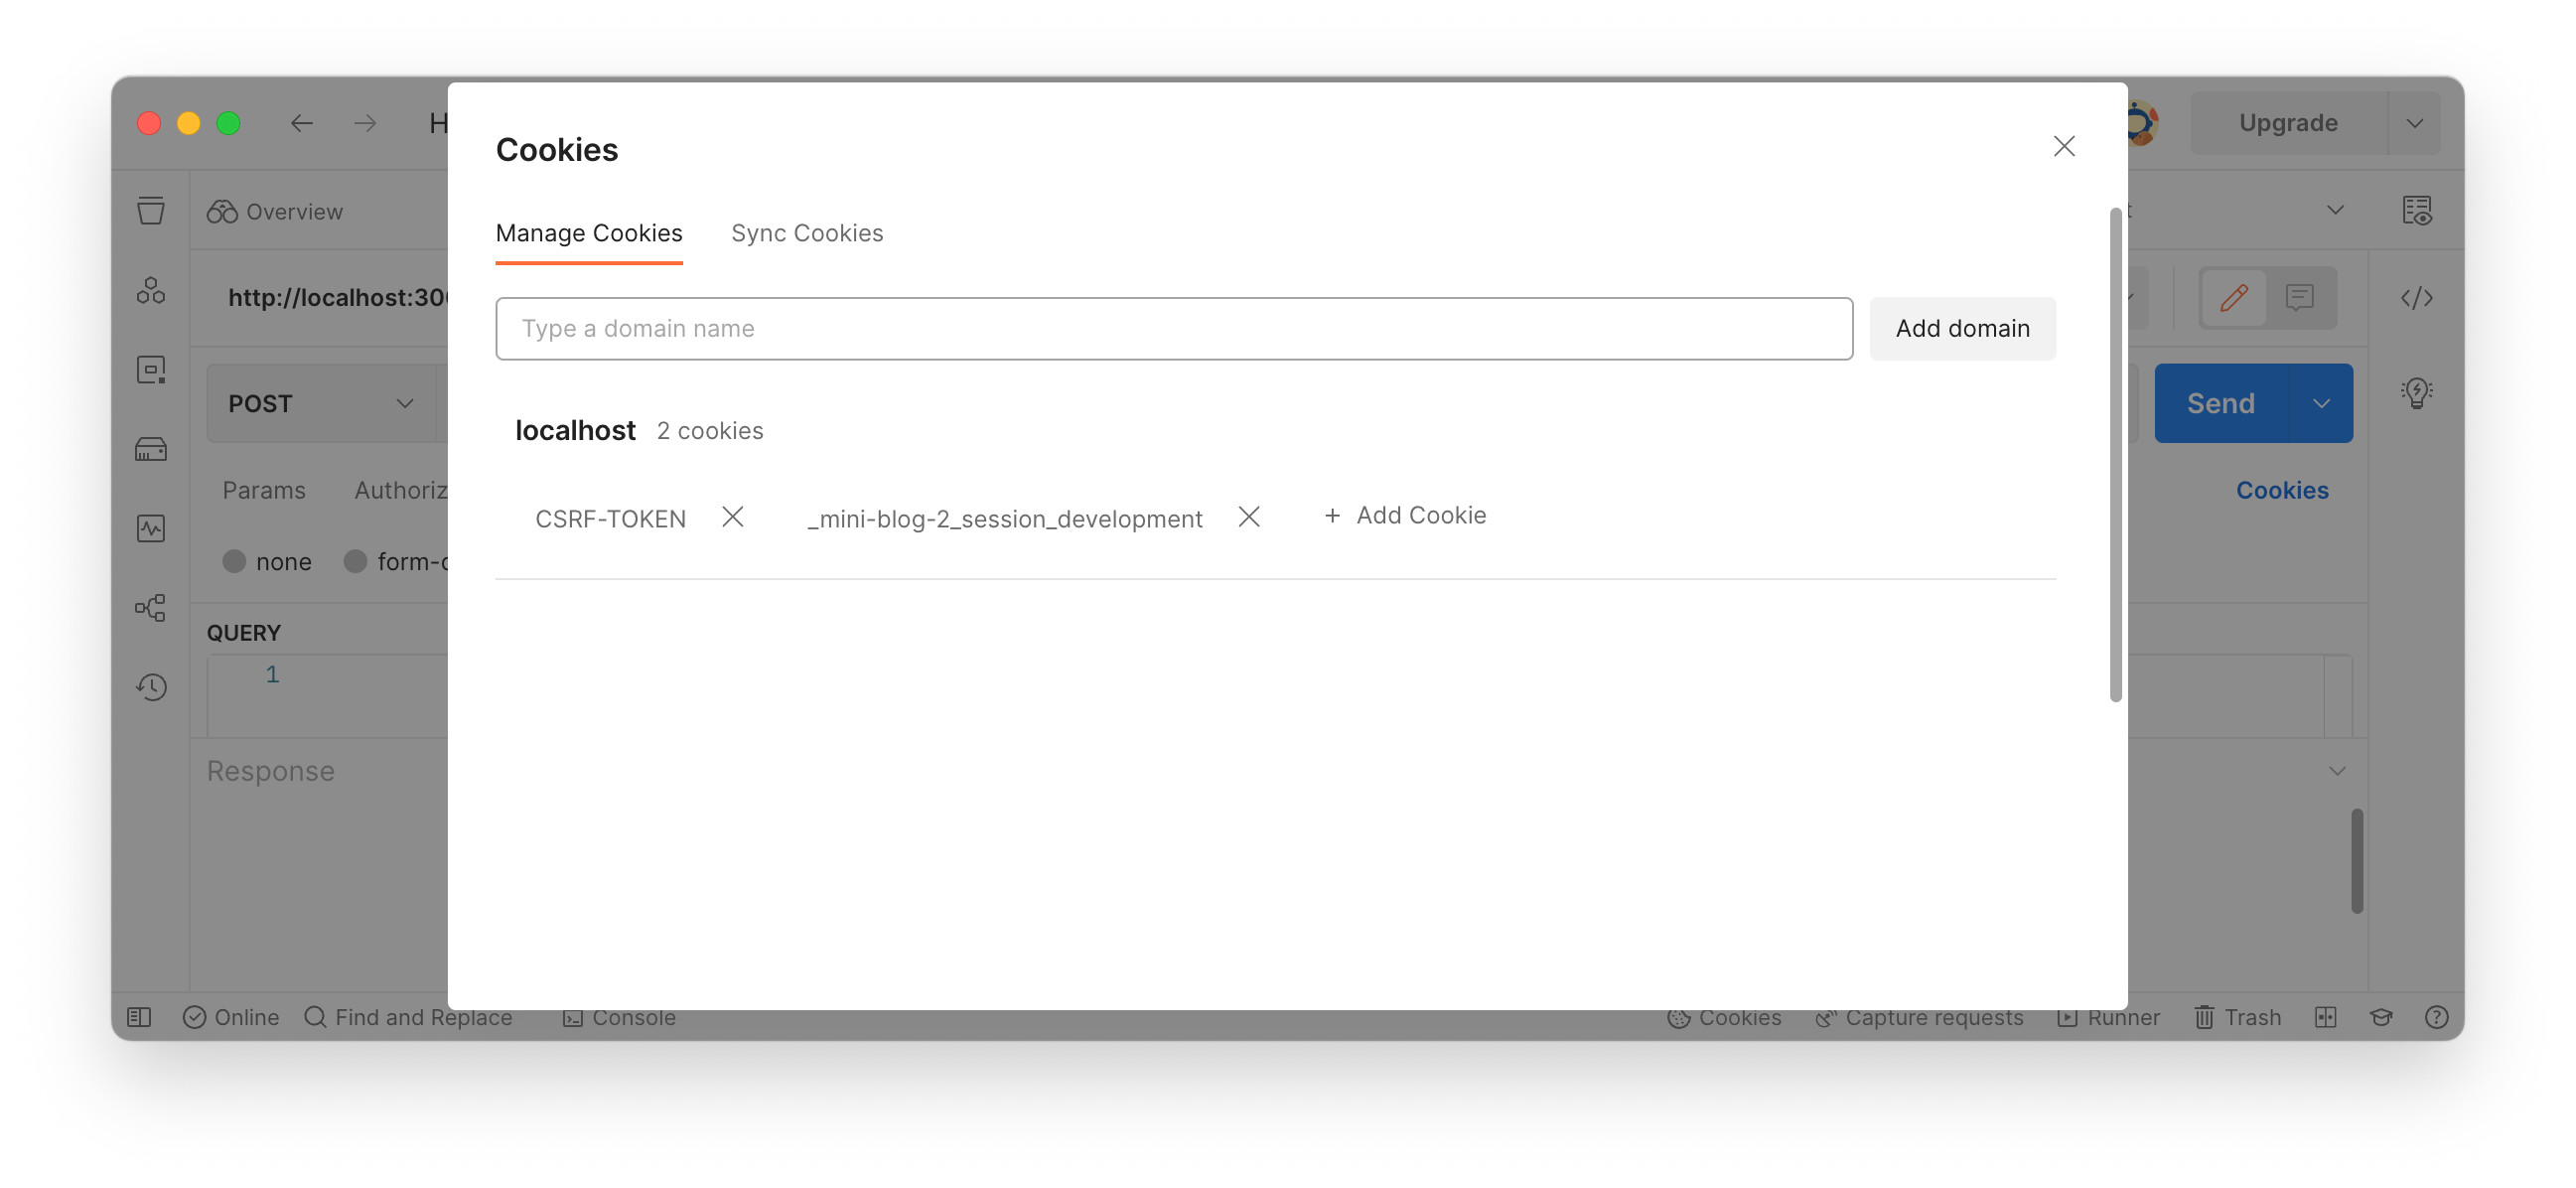
What happened behind the scene? The GraphQL request comes to GraphQLController. Sine the HTTP request header doesn’t include x-csrf-token header, session reset was performed following the unverified strategy. At the same time, the cookie and session are returned. If we look at the terminal where Rails is running, “Can’t verify CSRF token authenticity.” should be spotted among the bunch of outputs.
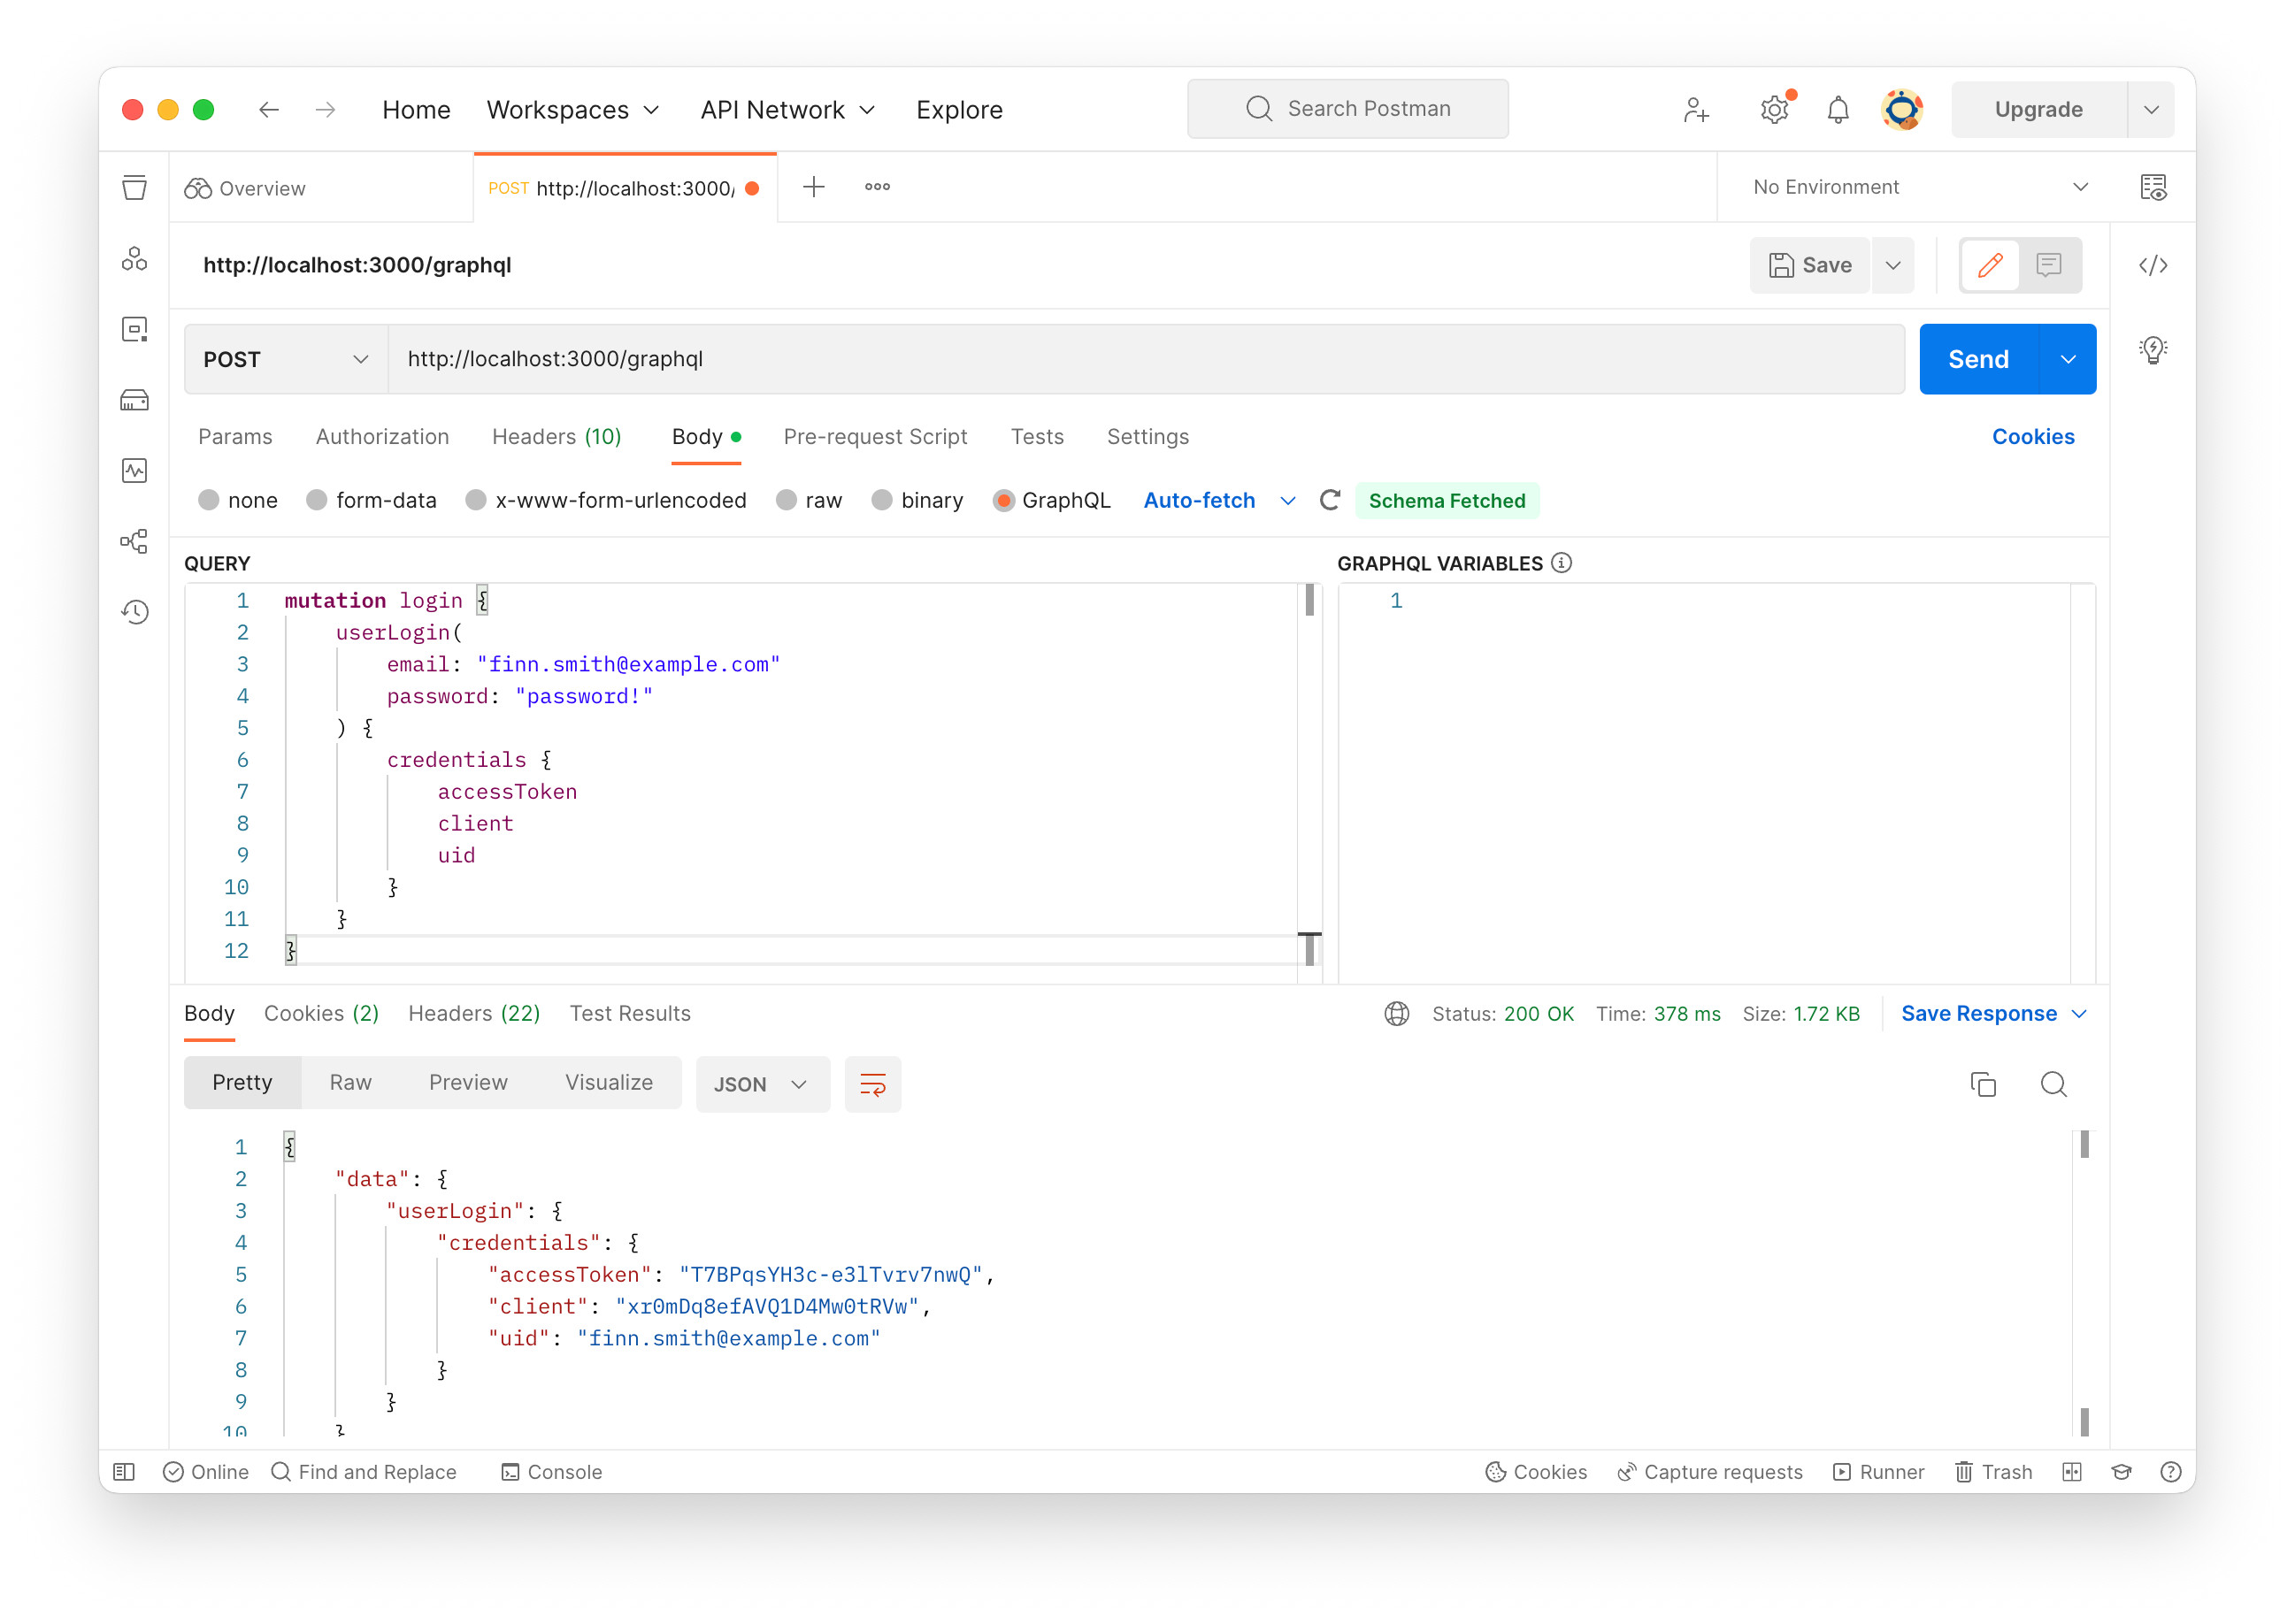
The userLogin mutation looks like below:
mutation login {
    userLogin(
        email: "finn.smith@example.com"
        password: "password!"
    ) {
        credentials {
            accessToken
            client
            uid
        }
    }
}
Write the mutation and click “Send” button. Again, we’ll see “Can’t verify CSRF token authenticity.” on the terminal, but get the CSRF-TOKEN cookie and session in the HTTP response header.
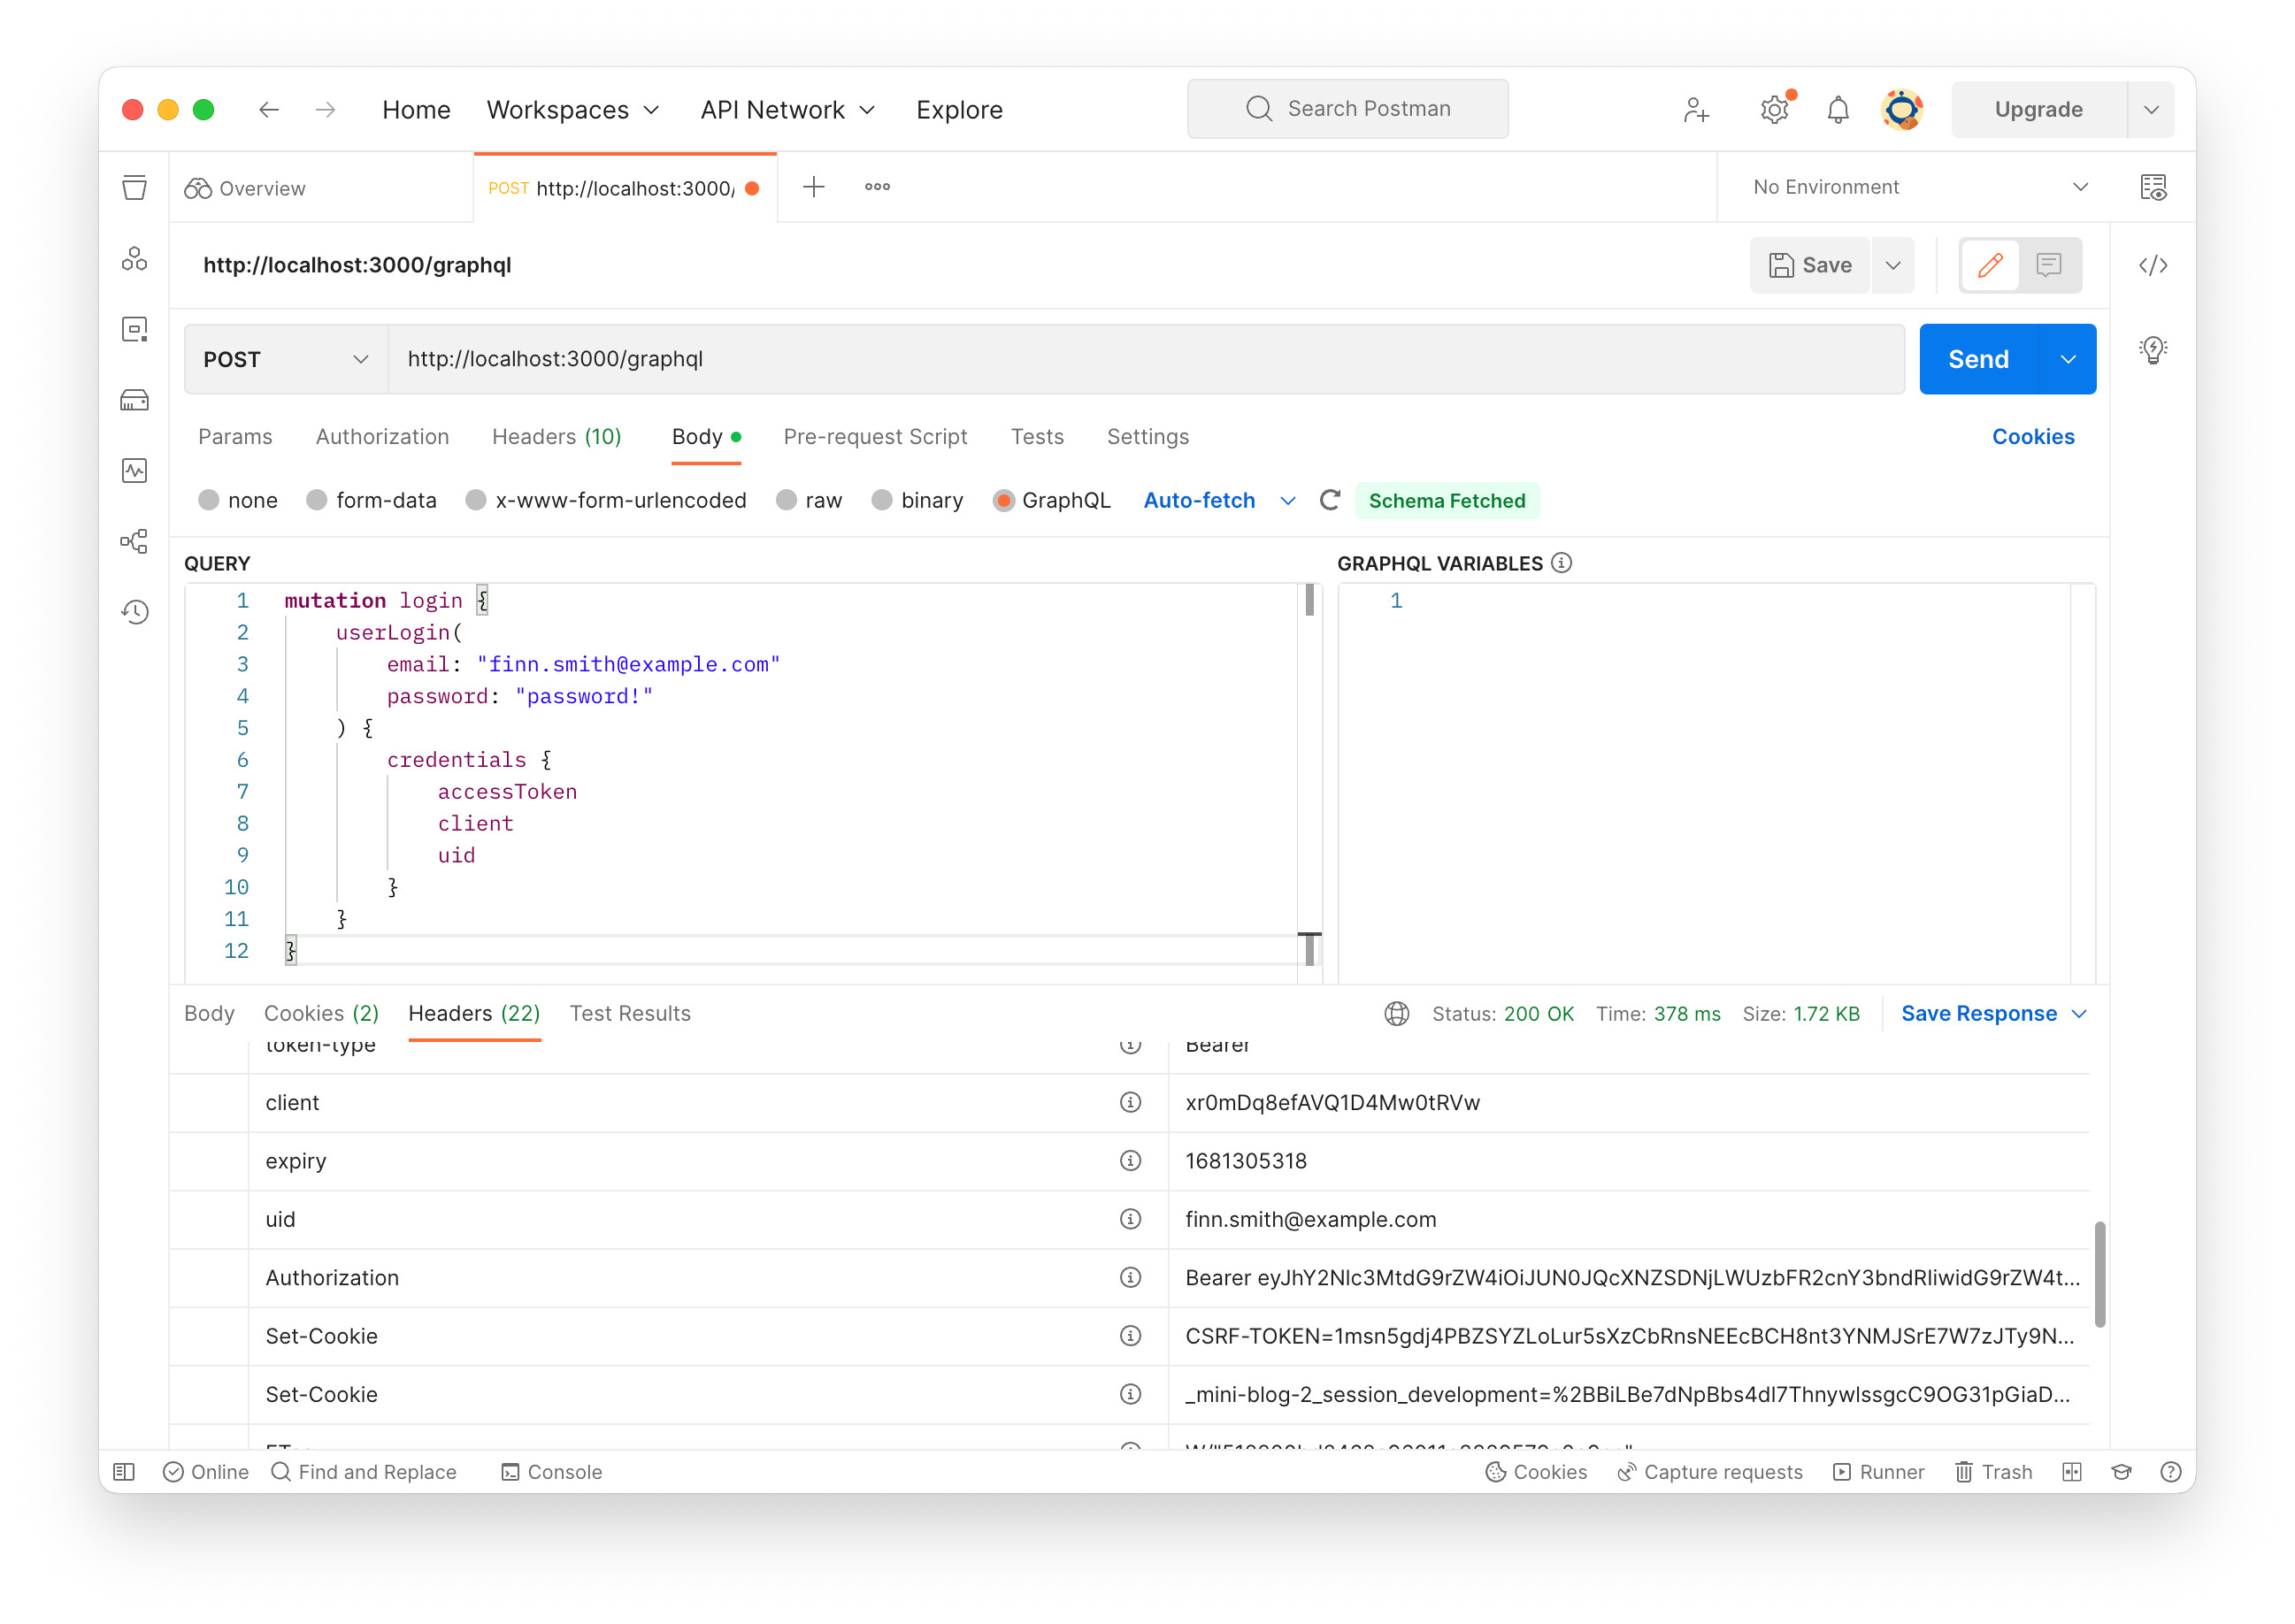
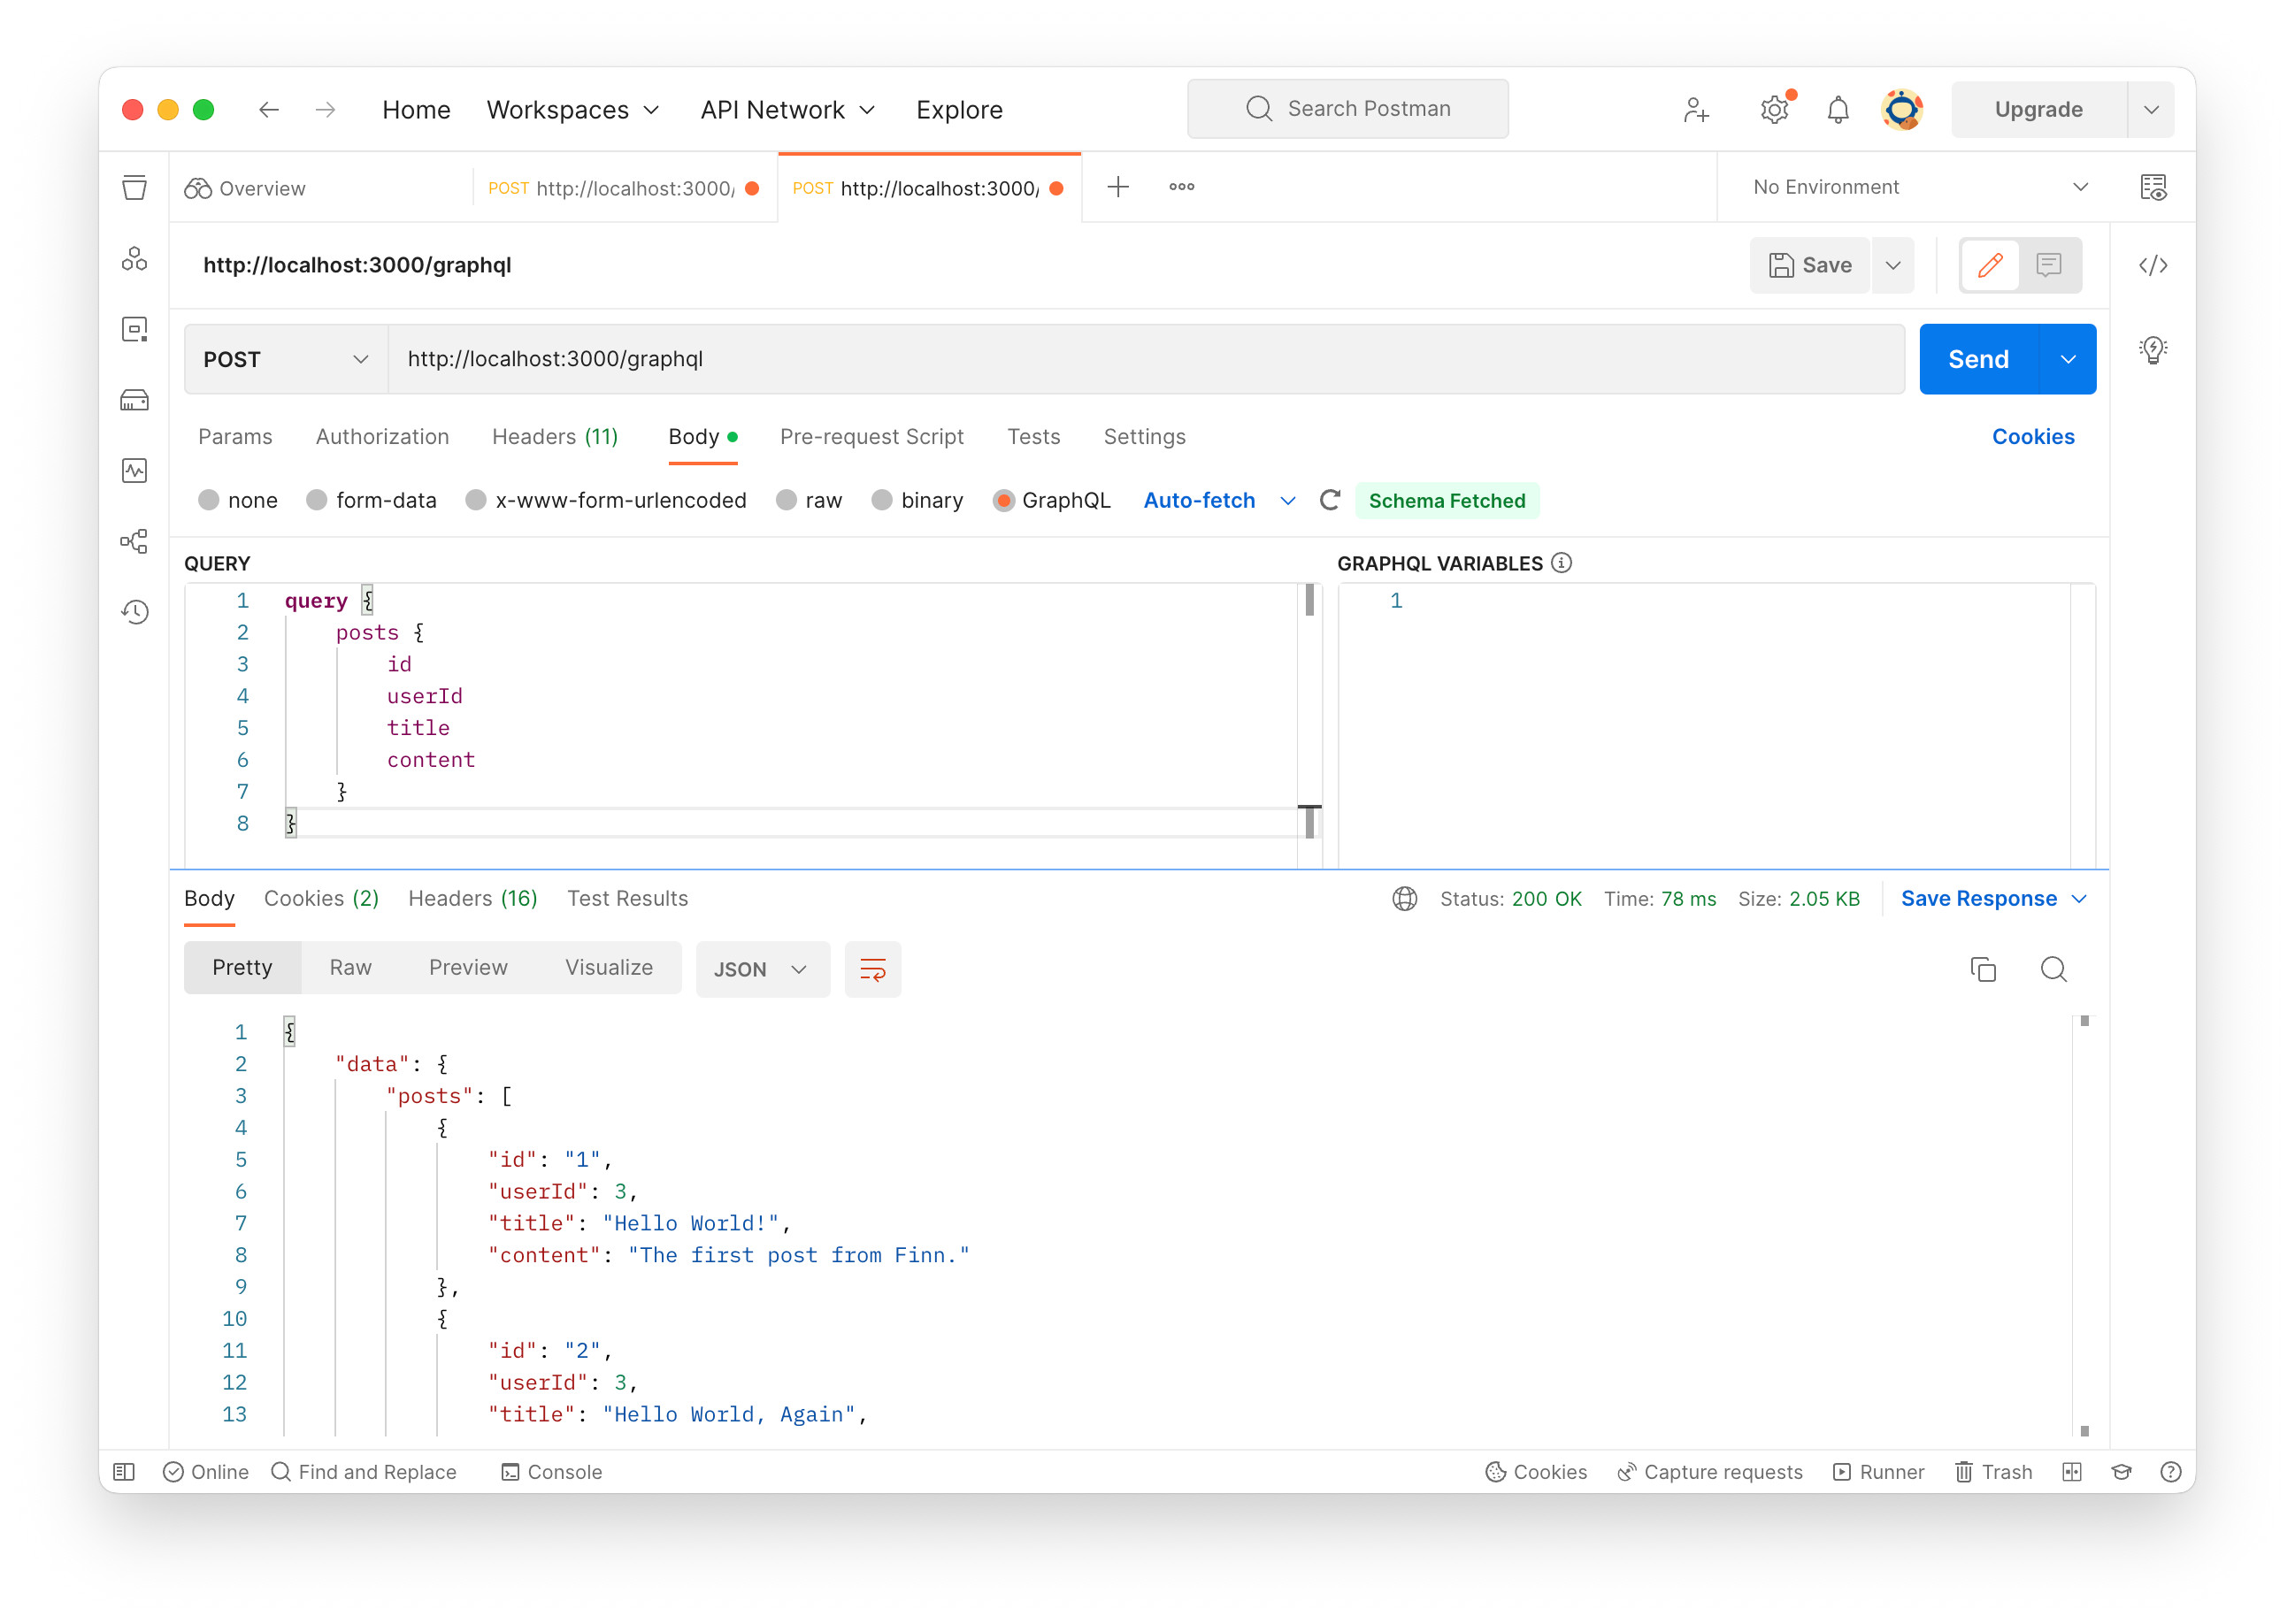
The next step is to make posts or users query. For example, posts query looks like below:
query {
    posts {
        id
        userId
        title
        content
    }
}
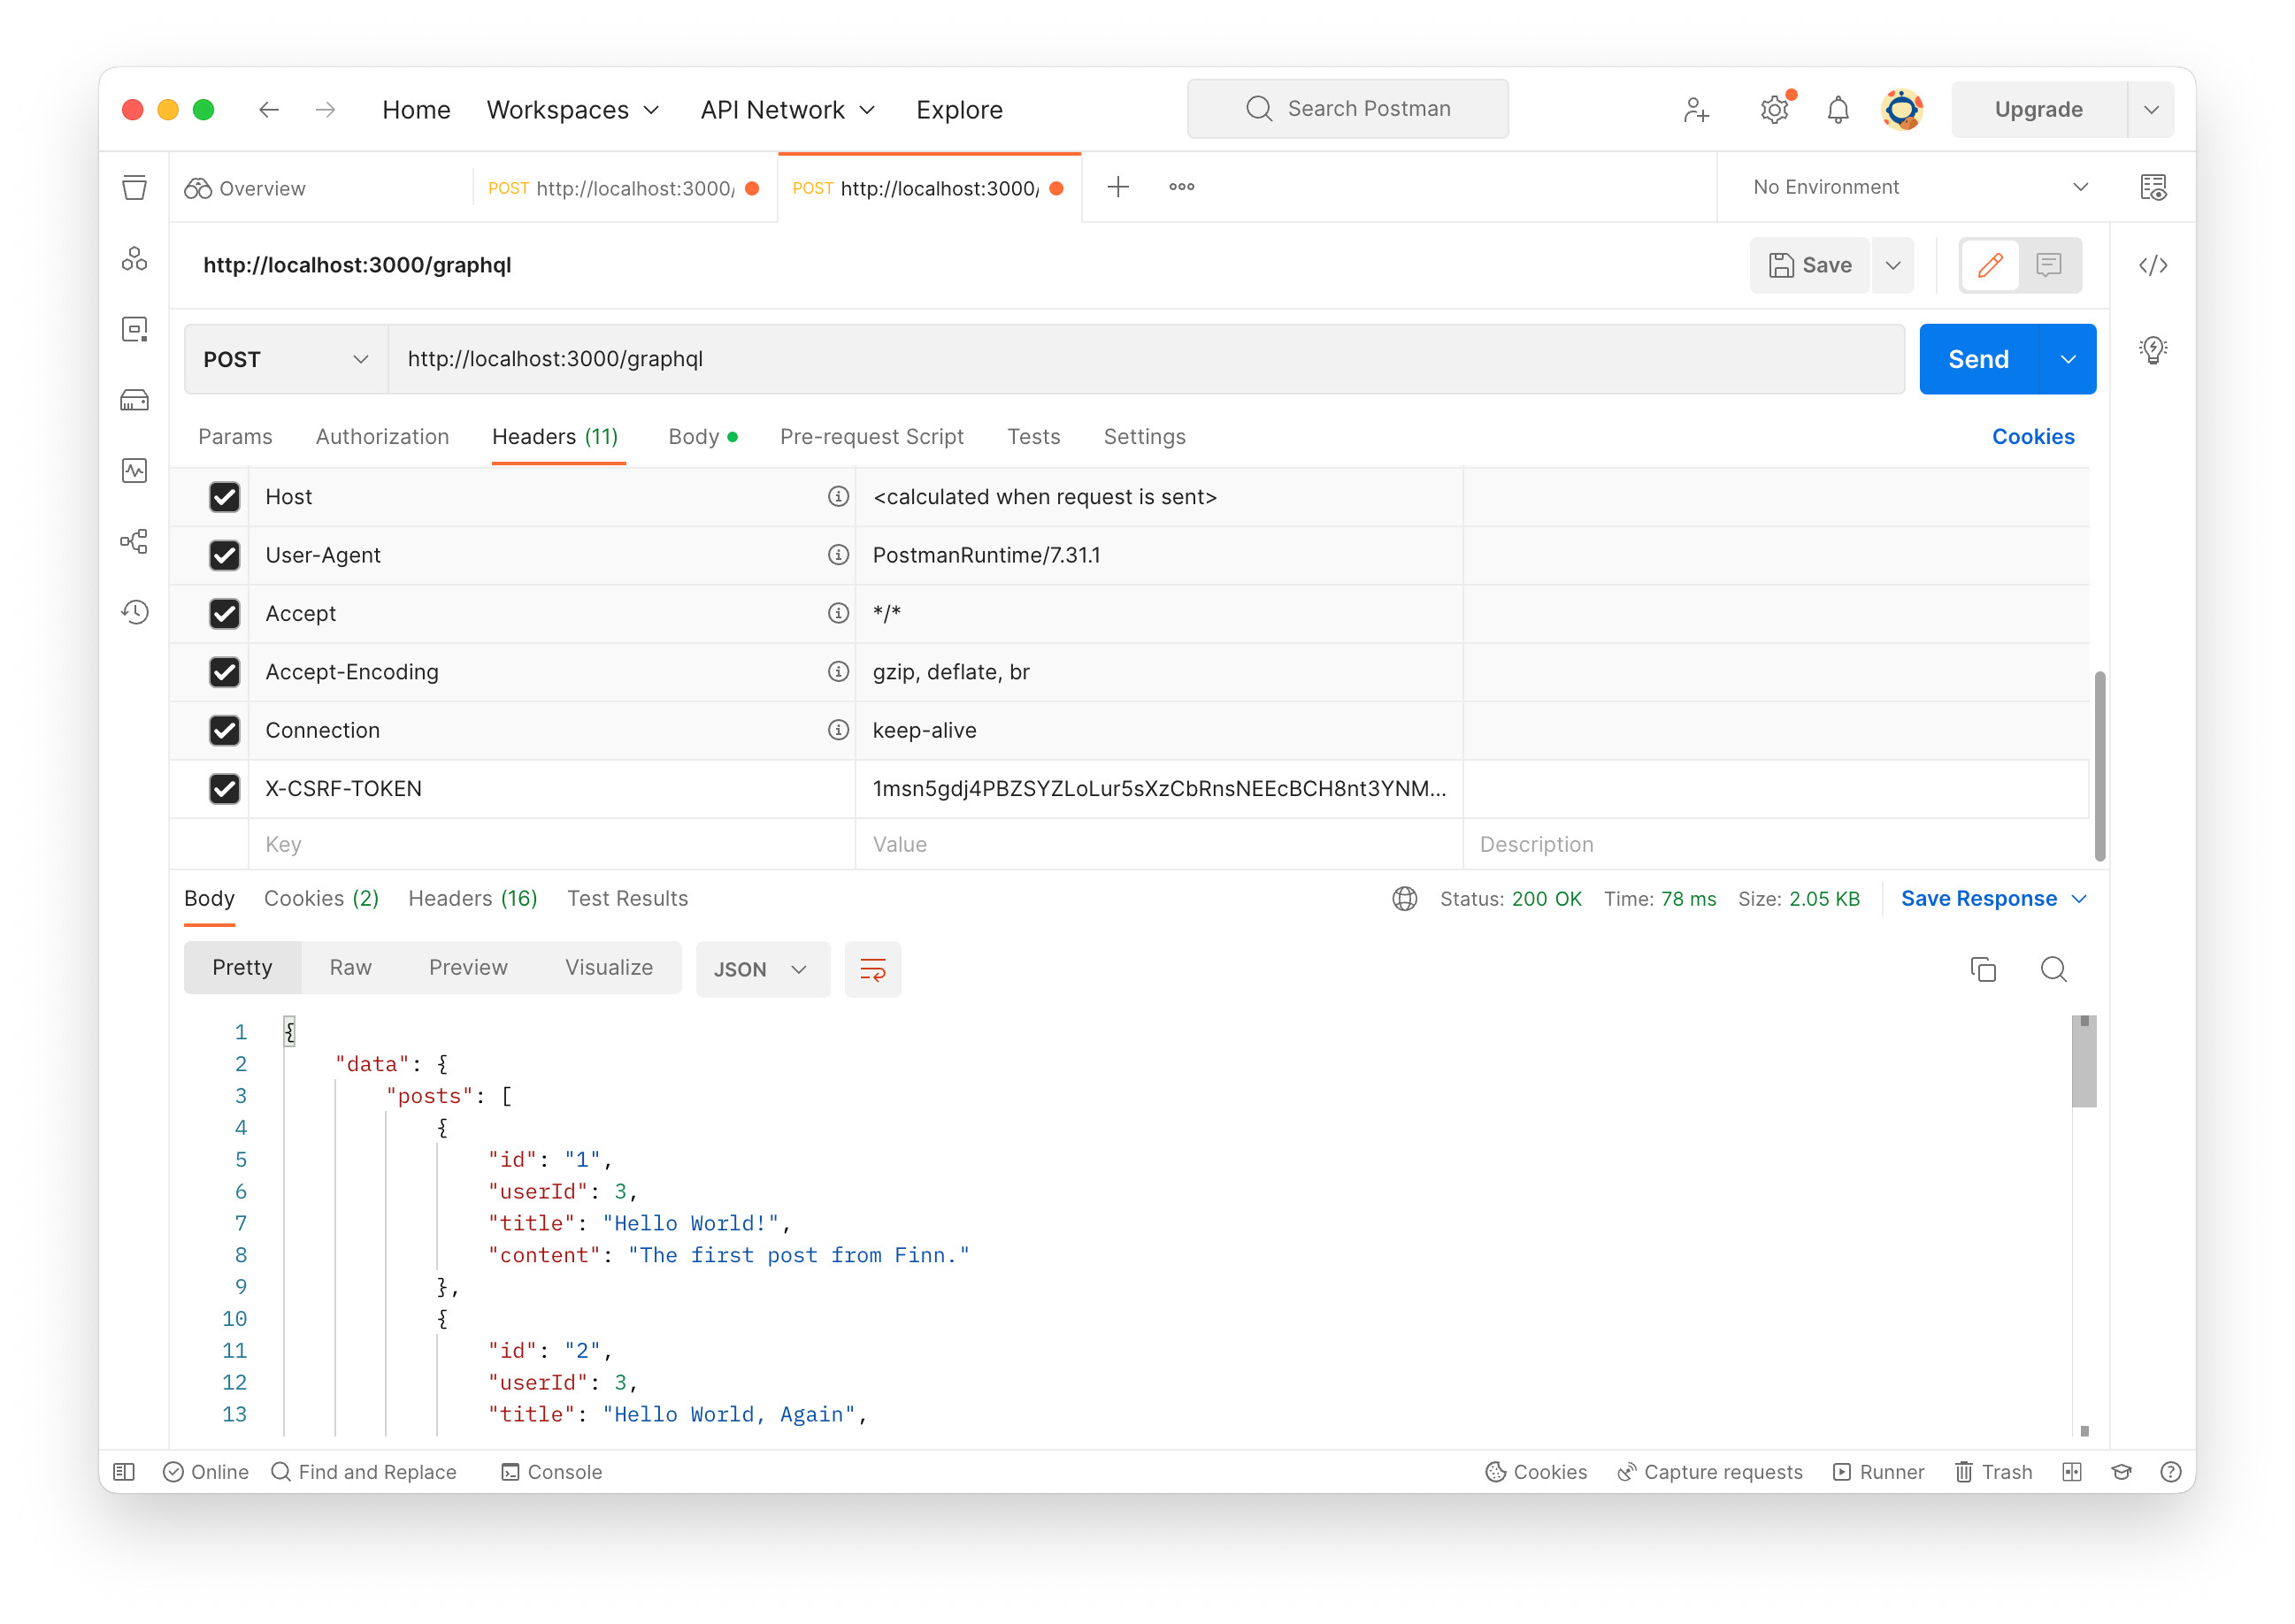
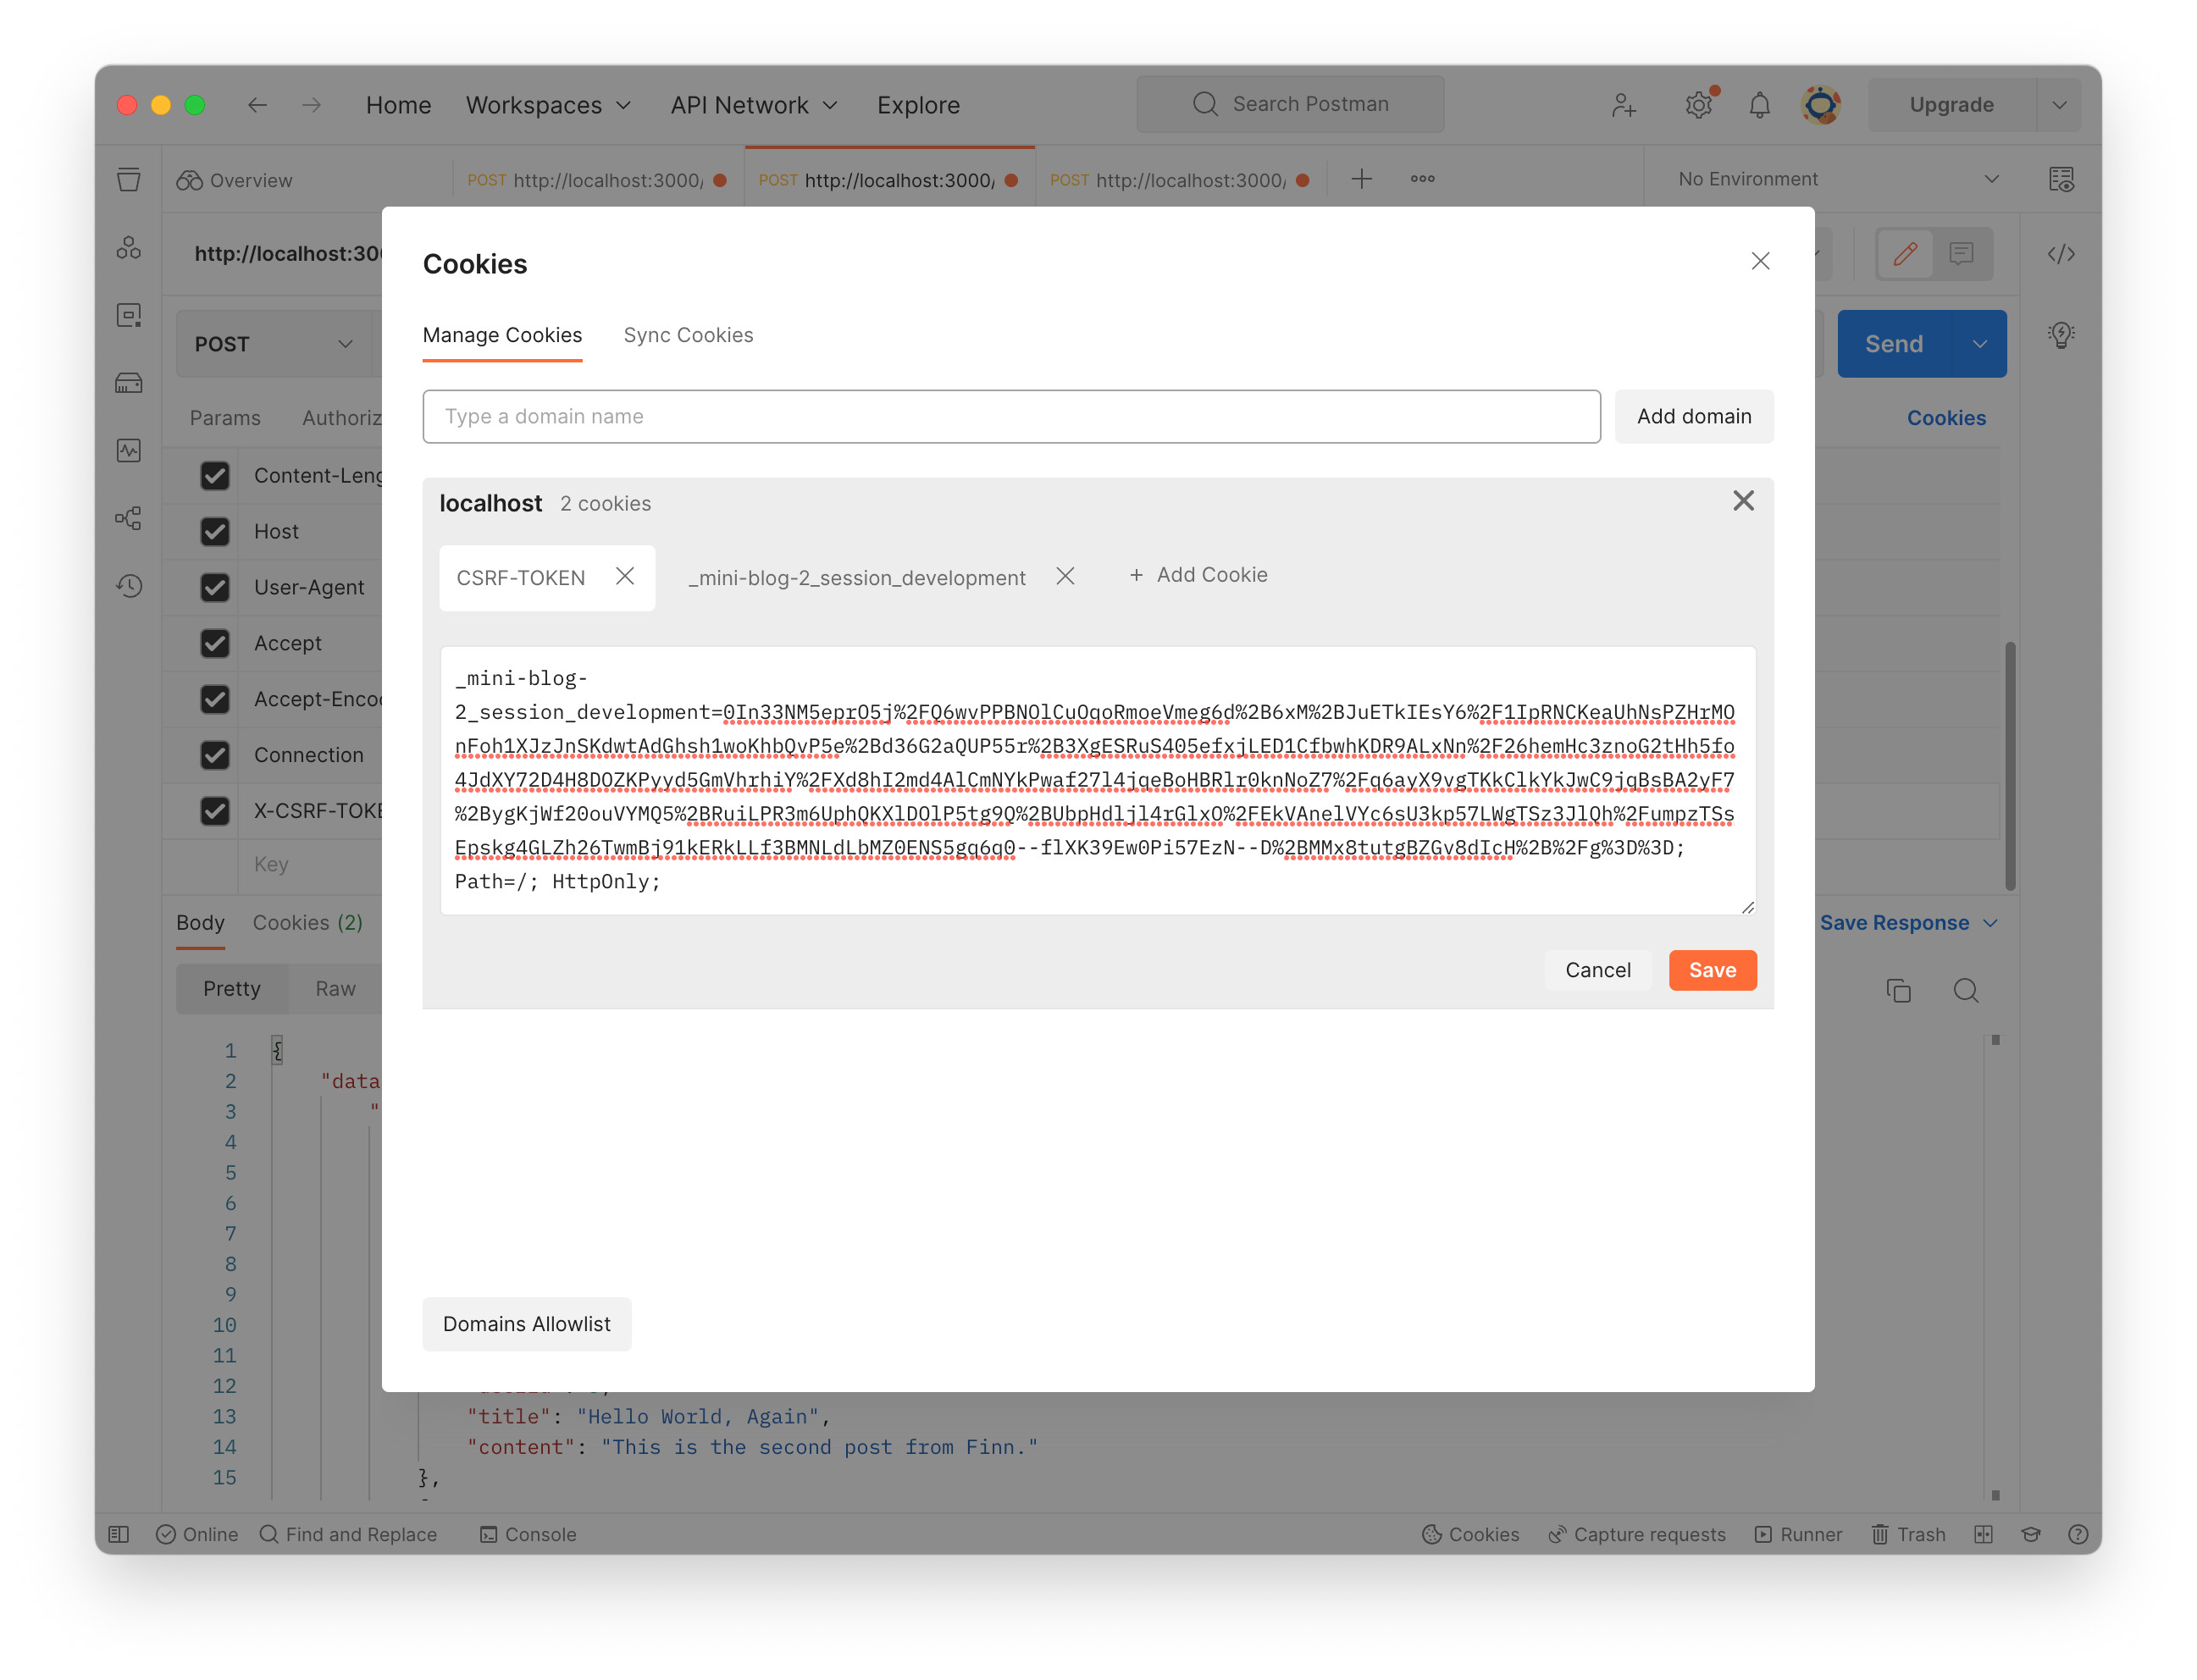
Add X-CSRF-TOKEN to the HTTP request header. The token can be seen in the login response’s header, so copy and paste it to the value column. Also, make sure the session is set in the cookie. Write the query and click “Send” button.
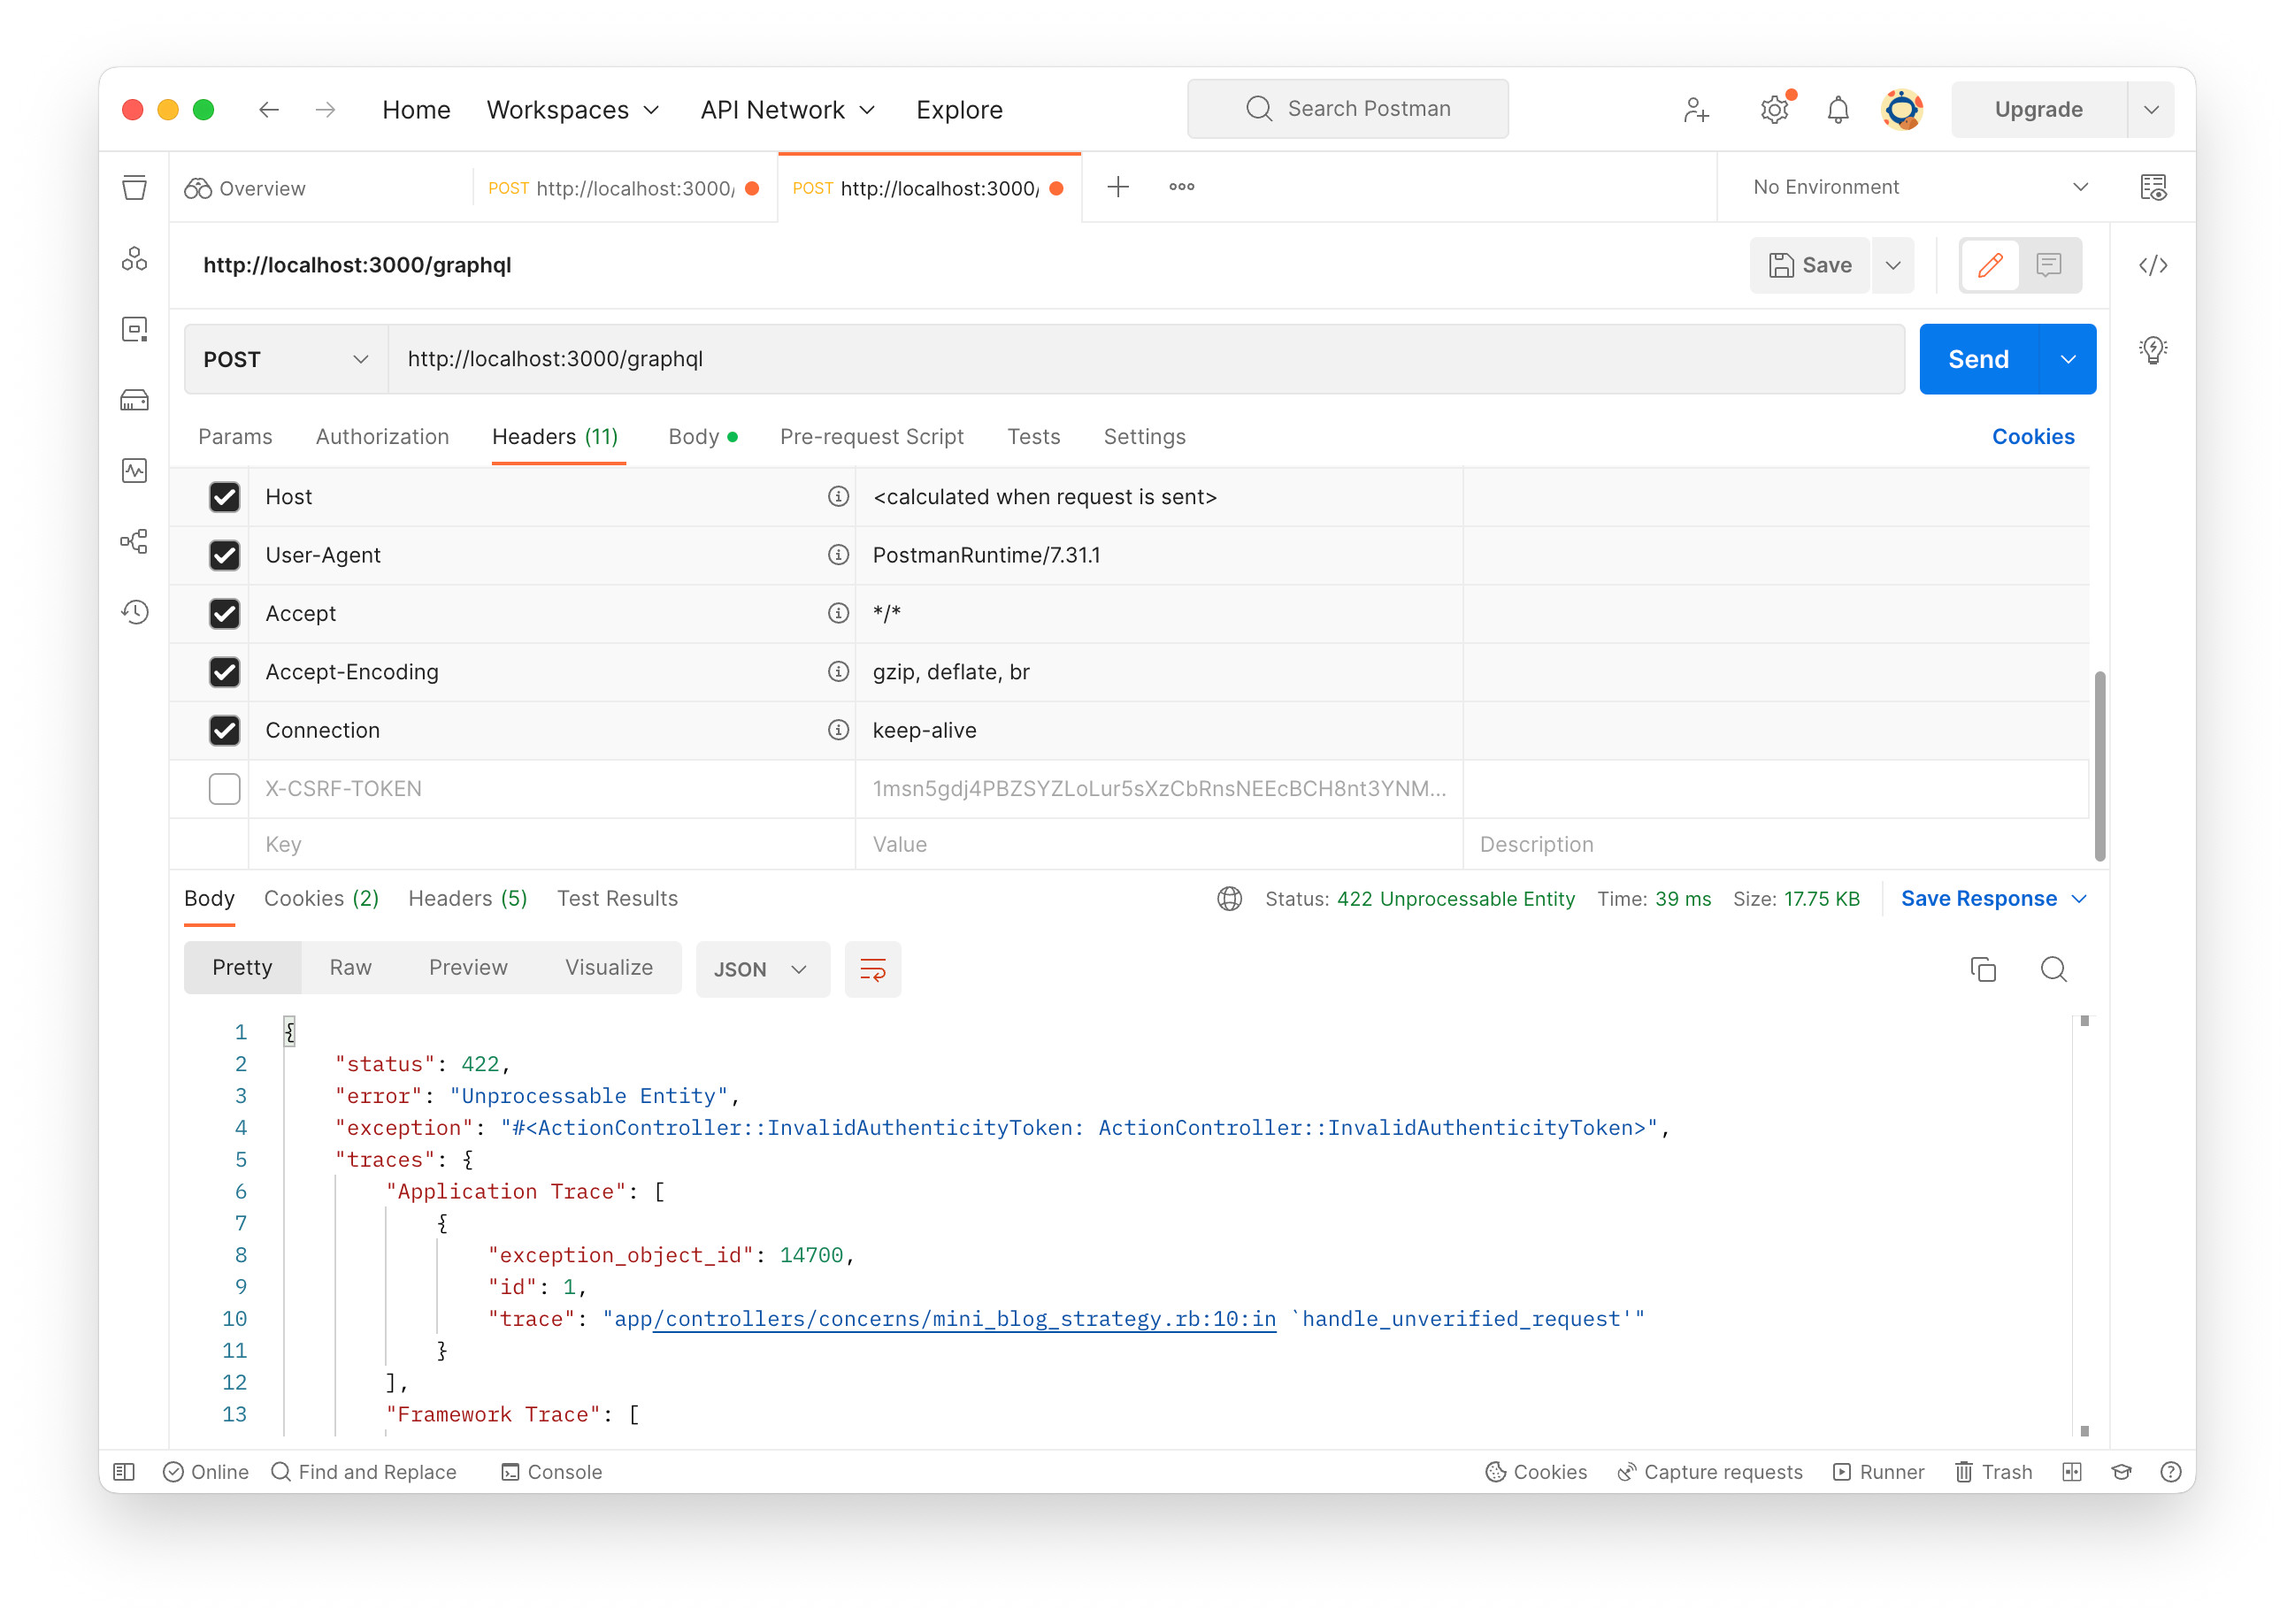
Let’s see CSRF verification failure. Click check box on the left of X-CSRF-TOKEN to deactivate. The header won’t be sent. Now we see ActionController::InvalidAuthenticityToken exception. On the terminal where Rails is running, “Can’t verify CSRF token authenticity.” appears again. That means the exception strategy is working.
Lastly, let’s try postCreate mutation. The mutation looks like below:
mutation create_post {
    postCreate(input: {
        title: "This is a test post title",
        content: "This is a test post content."
    }) {
        post {
            id
            userId
            title
            content
        }
    }
}
As explained in the previous post, access-token, client and uid should be set in the HTTP request header in addition to X-CSRF-TOKEN and session. Previously tried userLogin mutation gave us those three values already. Set those to the request header. Make sure the session is attached in the cookie if the GraphQL client is not Postman.
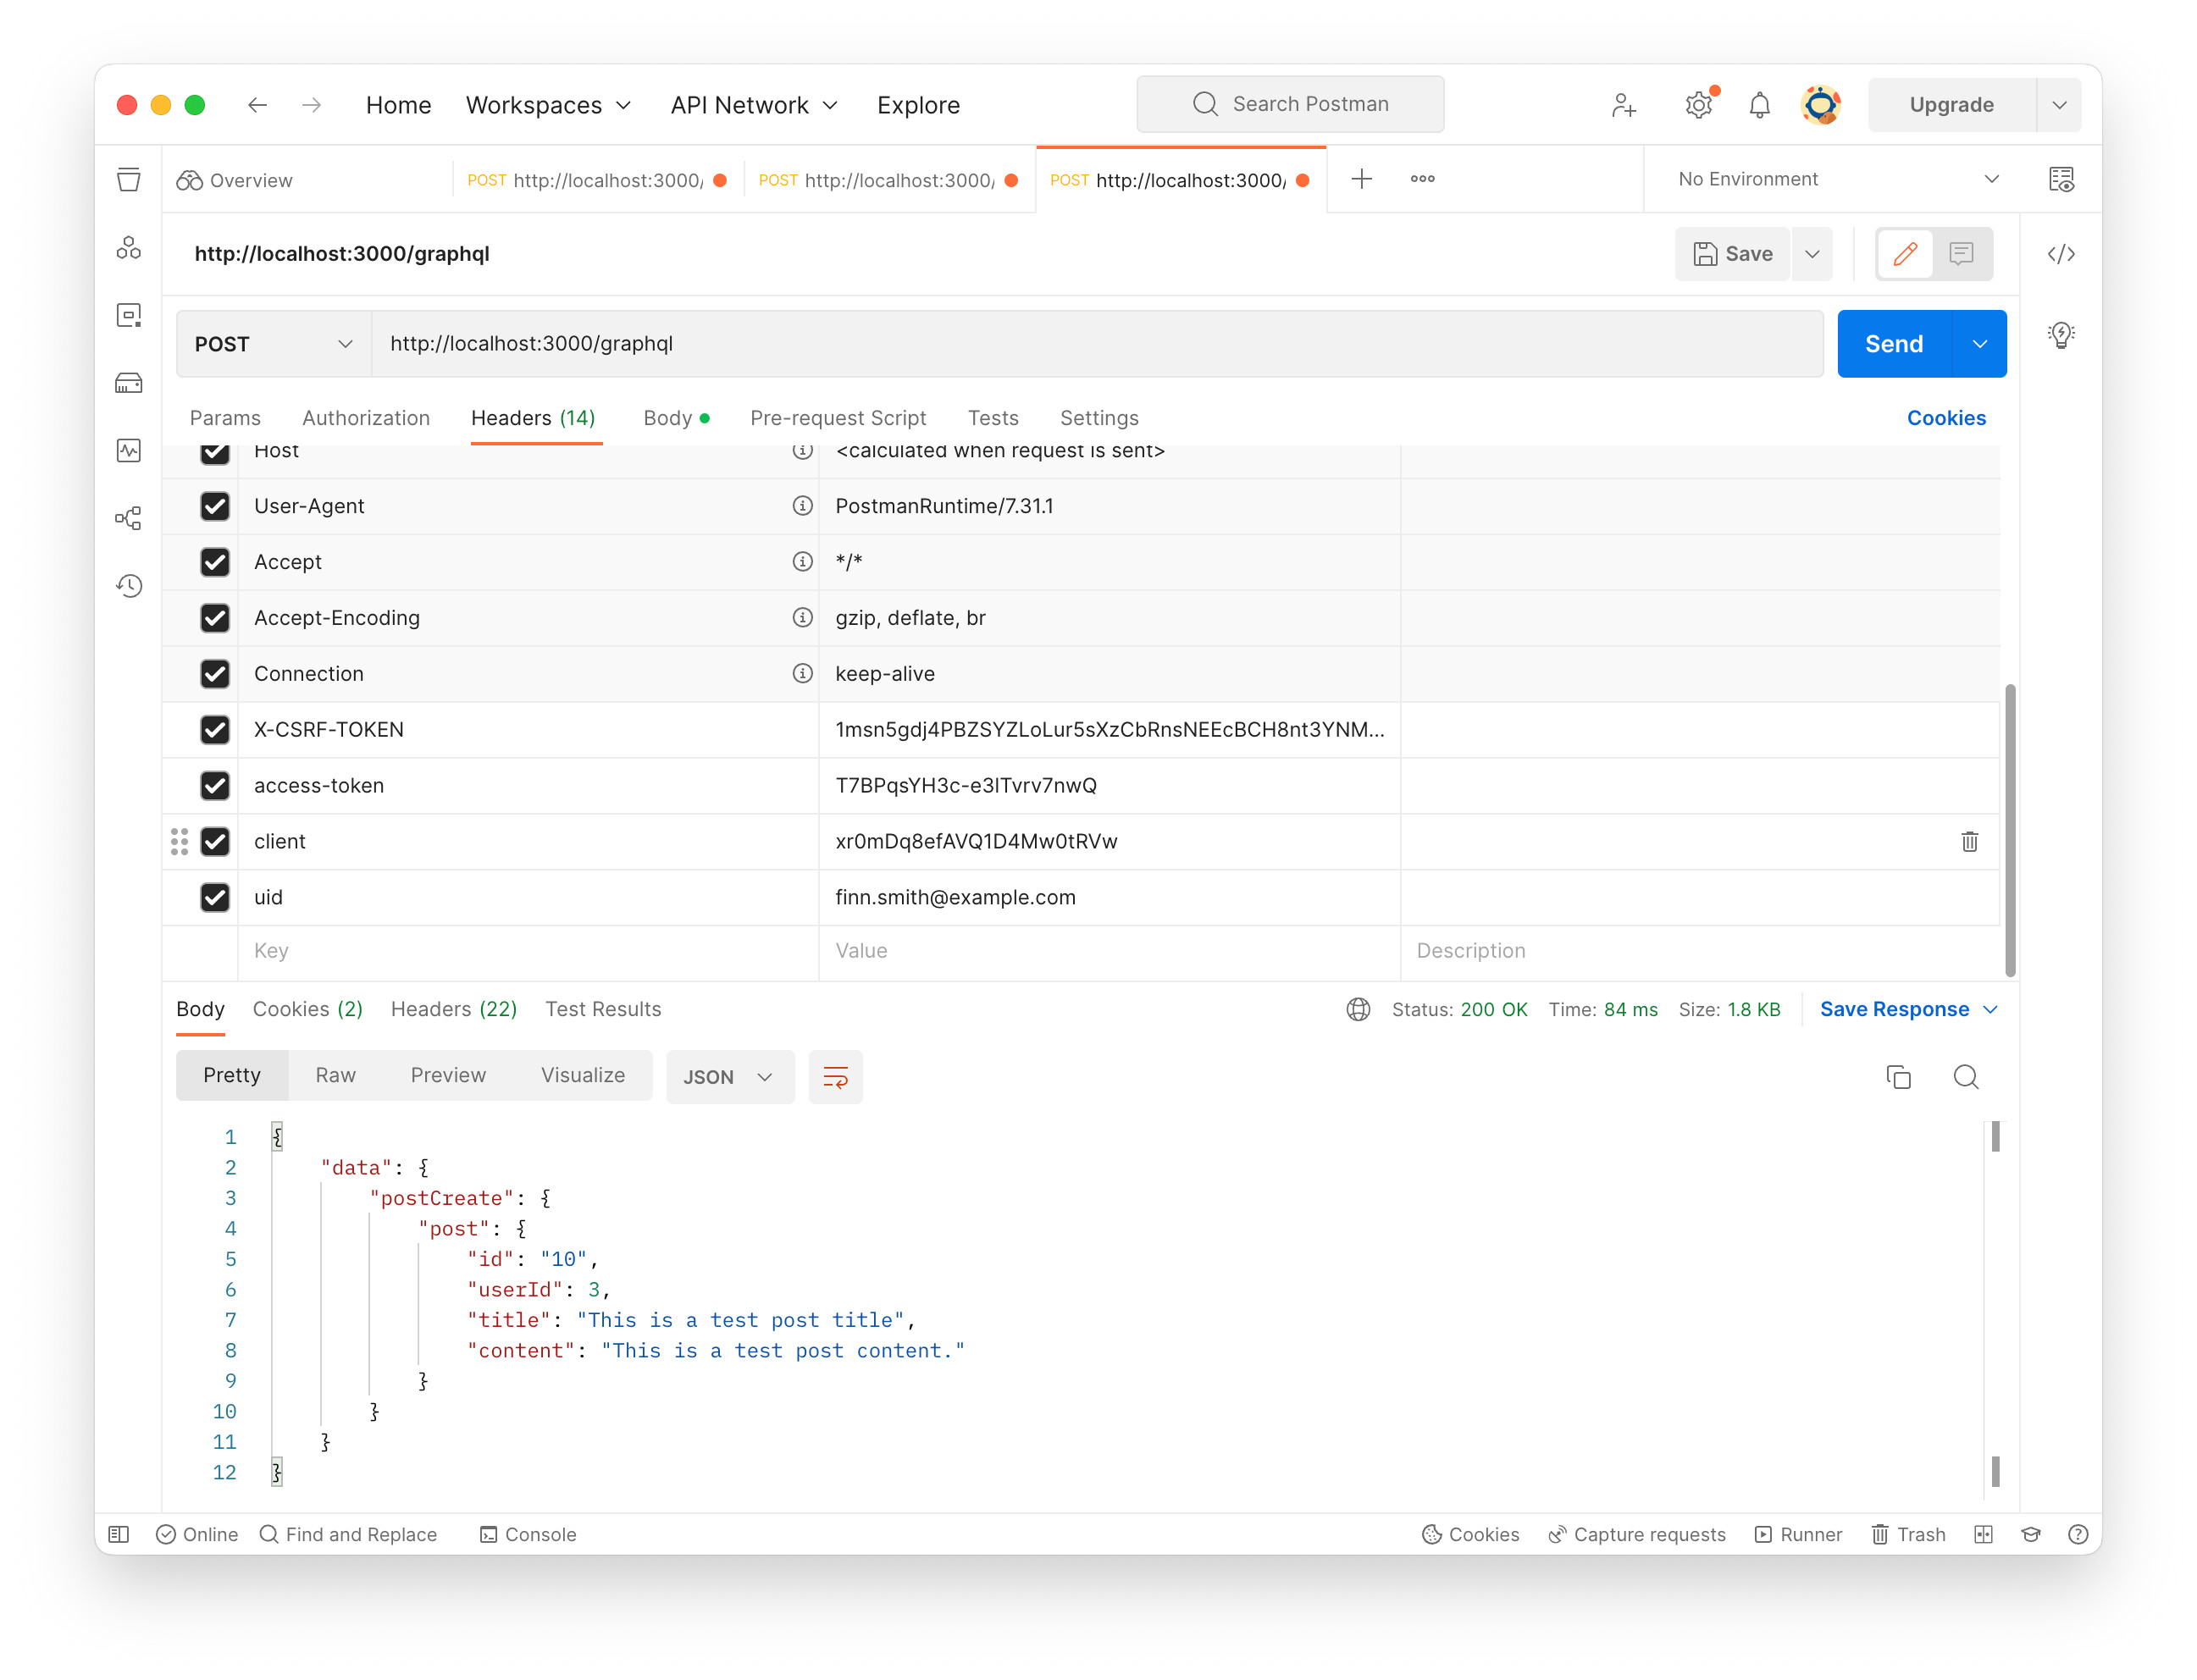
Write the mutation query and click “Send” button.
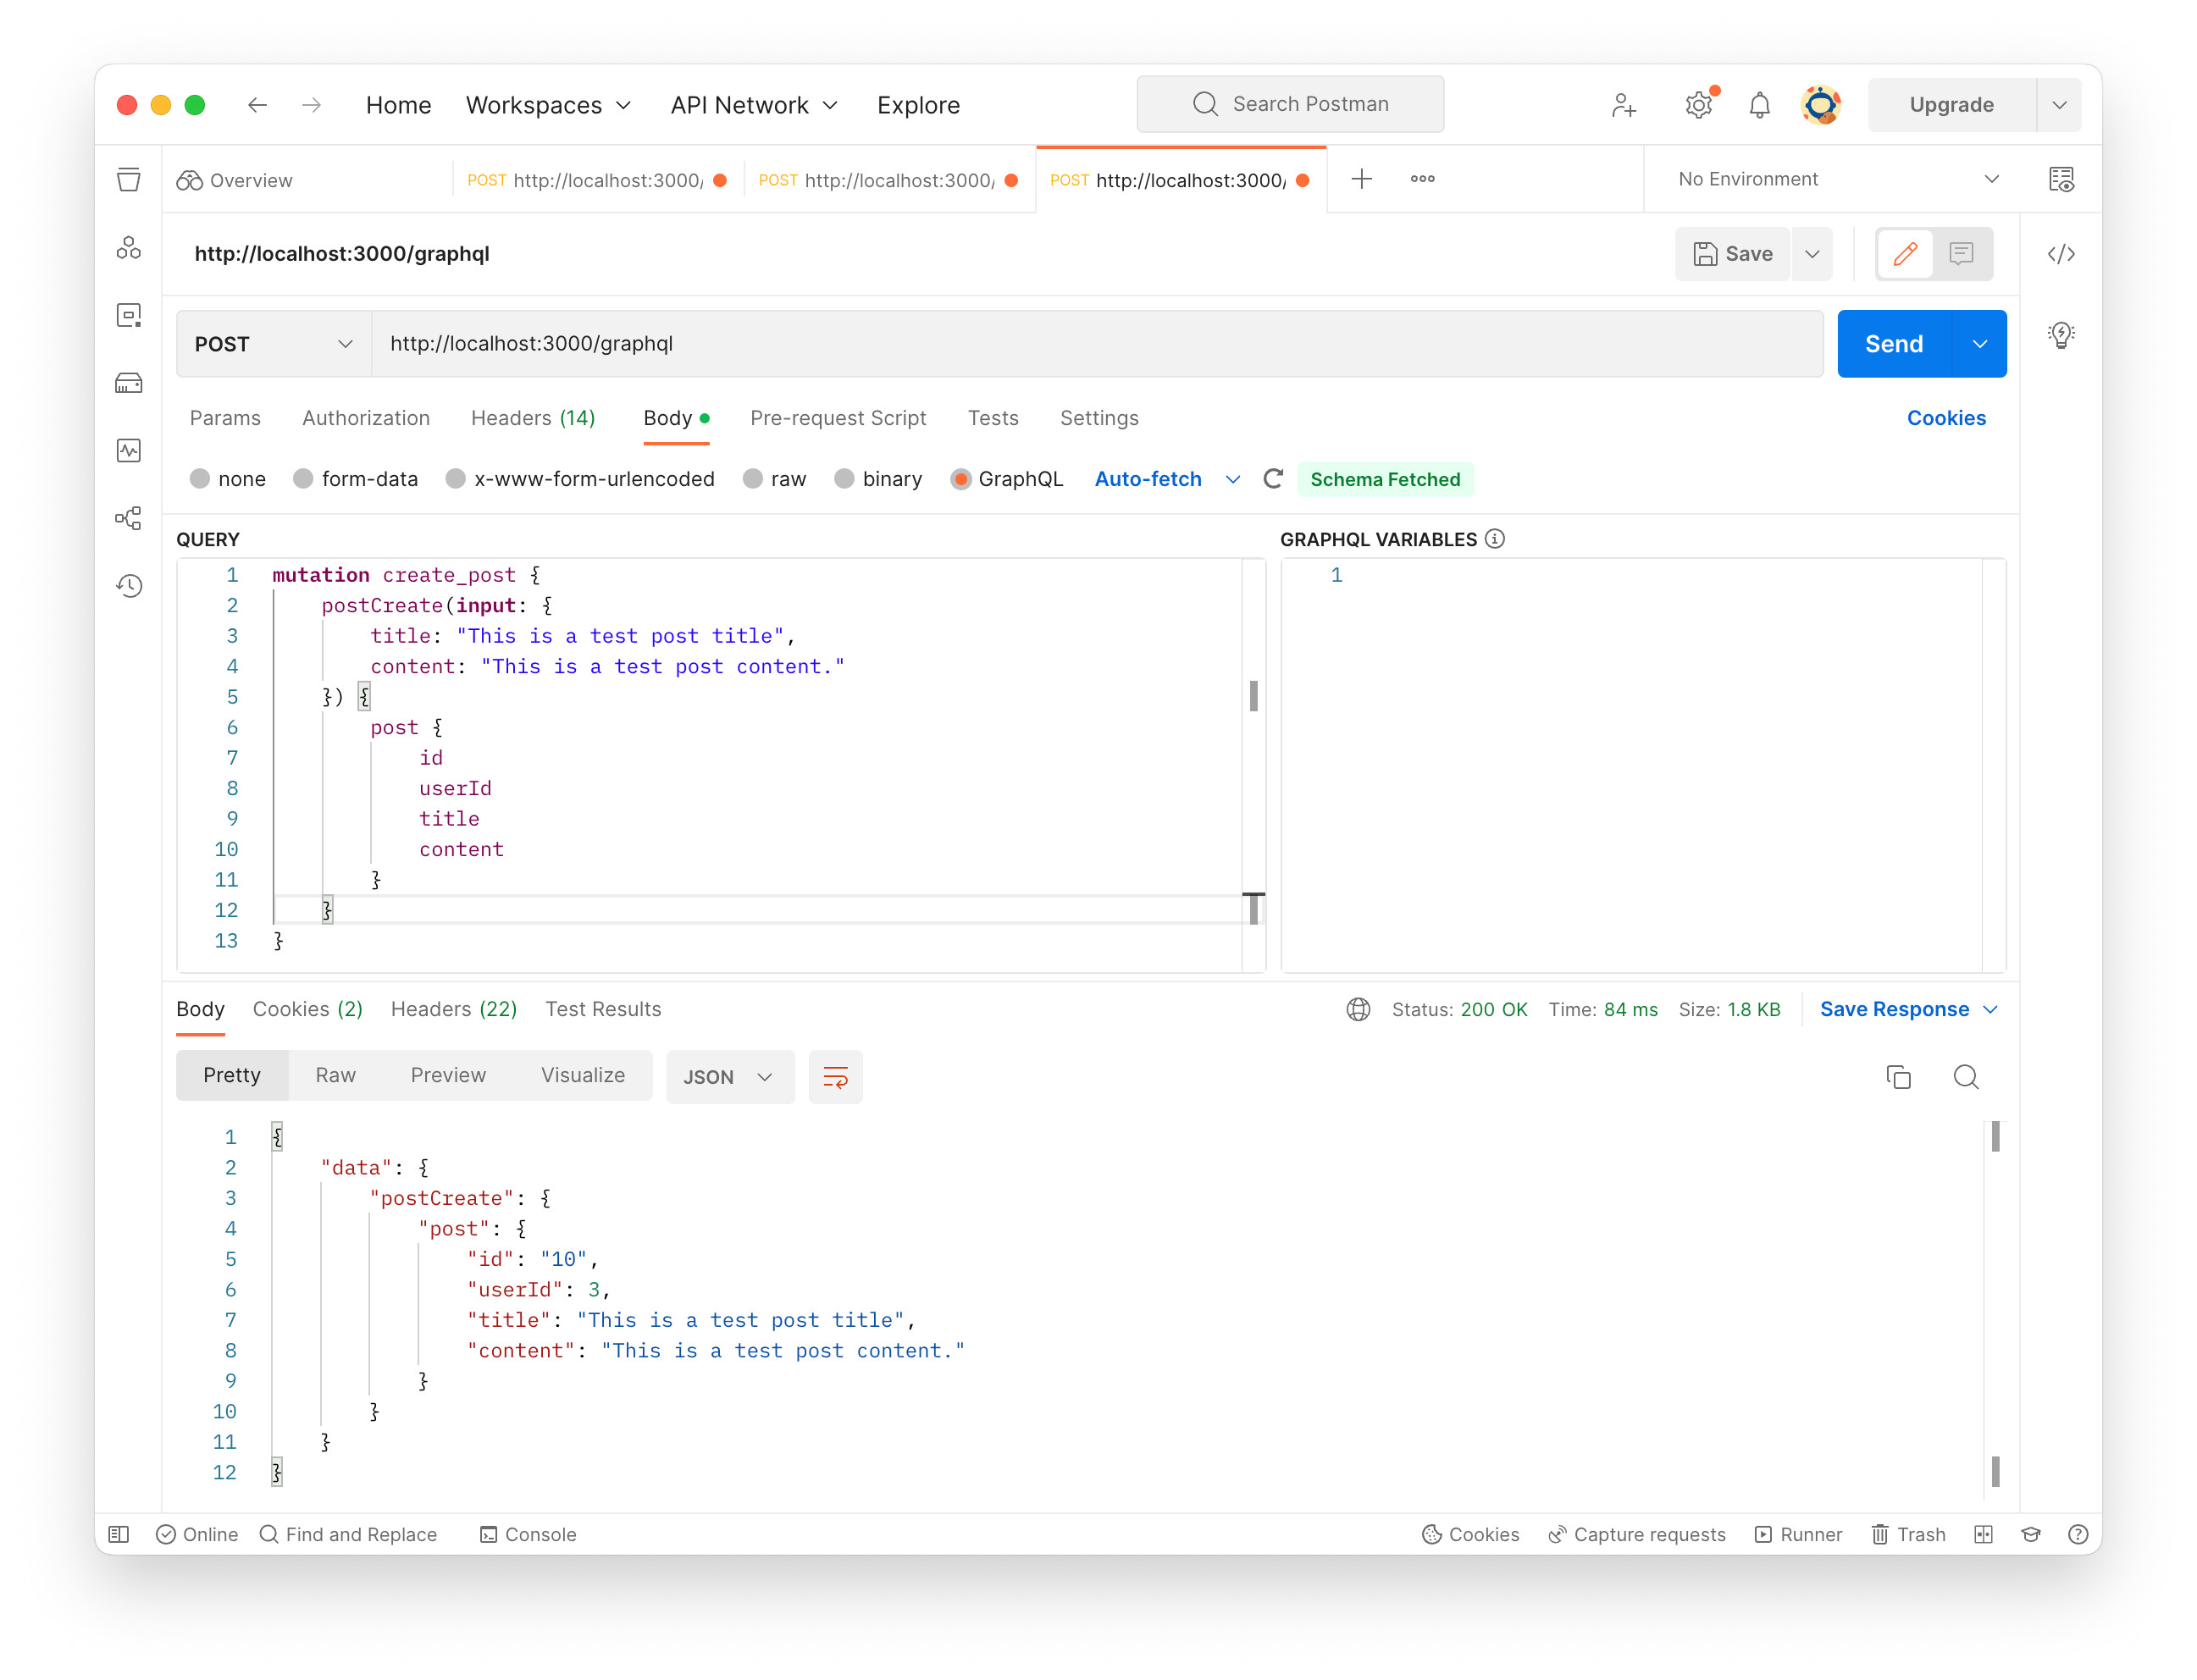
The new post was successfully created.
Code
The example Rails app code is on the GitHub repo. Please see https://github.com/yokolet/mini-blog-3.