Published: Mar 23, 2023
This is the second post about securing Rails GraphQL API app. Most of conceptual explanations are in the previous post, Make it Secure, GraphQL by Rails. This memo is focusing on how to add the authentication using Devise gem (https://github.com/heartcombo/devise).
The GraphQL API itself is the same as the previous one. The GraphQL app in the previous post uses Global ID and implements the user authentication from scratch. The Devise gem covers many of those. However the odds are: the Devise gem is for a traditional web application, so the GraphQL API only app can’t use as is. Luckily, people have already tried the token based authentication by Devise and established a couple of ways to do that. A combination with JWT (Jason Web Token, https://github.com/jwt/ruby-jwt) is one, while with Devise Token Auth (https://github.com/lynndylanhurley/devise_token_auth) is another one. This memo uses GraphQLDevise gem (https://github.com/graphql-devise/graphql_devise), which is implemented on top of Devise Token Auth.
Versions:
- Ruby: 3.2.1
- Rails: 7.0.4.3
Create Rails App
The Rails app creation is same as previous two posts. However, the app here introduces Devise gem, so this memo starts from creating the app for clarity.
Create an option list file, for example, ./.railsrc, with the following content.
--api
--skip-action-mailer
--skip-action-mailbox
--skip-action-cable
--skip-action-text
--skip-active-job
--skip-active-storage
-T
This app skips email based user registration provided by Devise gem.
For this reason, the option list has --skip-action-mailer.
The option list above creates much smaller API only Rails app.
Run the command to create the app.
$ rails new mini-blog-2 --rc=./.railsrc
Setup graphql_devise gem
The app is going to use graphql_devise gem for the authentication. The first step is to add and initialize the gem.
$ cd mini-blog-2
$ bundle add graphql_devise
Above command installs graphql_devise gem as well as graphql, devise, devise_auth_token gems as dependencies.
The next step depends on the design decision, whether to create a new GraphQL path for the authentication or to use an existing path.
If the new path is chosen, GraphQL paths will have /graphql and /graphql_auth.
If the existing path is chosen, GraphQL path will be only /graphql as normal GraphQL app has.
To use existing path, graphql_devise initializer needs an existing GraphQL schema as a mount point.
The choice here is to mount on the exising schema.
For this reason, the second step is to initialize GraphQL gem.
$ rails g graphql:install
Above command generates the schema MiniBlog2Schema in the app/graphql/mini_blog2_schema.rb.
This is the mount point.
The graphql_devise initialization includes Devise model creation, so it needs model name for the authentication.
The model name is typically User.
$ rails g graphql_devise:install User --mount MiniBlog2Schema
Above command shows messages from Devise gem in addition to creating a bunch of files.
As for GraphQL side, include GraphqlDevise::SetUserByToken is added to app/controllers/application_controller.rb,
and a schema plugin is added to app/graphql/mini_blog2_schema.rb.
# app/controllers/application_controller.rb
class ApplicationController < ActionController::API
  include GraphqlDevise::SetUserByToken
end
# app/graphql/mini_blog2_schema.rb
class MiniBlog2Schema < GraphQL::Schema
  use GraphqlDevise::SchemaPlugin.new(
    query:            Types::QueryType,
    mutation:         Types::MutationType,
    resource_loaders: [
      GraphqlDevise::ResourceLoader.new(User)
    ]
  )
  mutation(Types::MutationType)
  query(Types::QueryType)

  # more code here

end
The migration file for the user model has been created as well, so run the migration.
$ rails db:migrate
Additional graphql_devise configuration
We are almost there. Since the app mounts the authentication path to the existing GraphQL path, some more configurations are required.
Add include GraphqlDevise::FieldAuthentication in the file, app/graphql/types/base_field.rb.
Add gql_devise_context(User) in the file, app/controller/graphql_controller.rb, to receive
user info from GraphQL queries/mutations.
# app/graphql/types/base_field.rb.
module Types
  class BaseField < GraphQL::Schema::Field
    include GraphqlDevise::FieldAuthentication

    argument_class Types::BaseArgument
  end
end
# app/controller/graphql_controller.rb
def execute
  variables = prepare_variables(params[:variables])
  query = params[:query]
  operation_name = params[:operationName]
  context = gql_devise_context(User)
  result = MiniBlog2Schema.execute(query, variables: variables, context: context, operation_name: operation_name)
  render json: result
rescue StandardError => e
  raise e unless Rails.env.development?
  handle_error_in_development(e)
end
Make Mutation Queries to Register and Login
For now, we can register a user and login. Let’s try. As a GraphQL client, Insomnia (https://insomnia.rest/) is used since Insomnia has a nice UI for HTTP request/response headers.
To register the user, make mutation query below.
mutation register {
	userRegister(
		email: "finn.smith@example.com"
		password: "password!"
		passwordConfirmation: "password!"
	) {
		authenticatable {
			email
		}
		credentials{
			accessToken
			client
			uid
		}
	}
}
Above query sets only required fields. Other fields can be seen in Insomnia’s Schema pane. The response fields are the same. The accessToken, client and uid will be used for later queries, so those are requested.
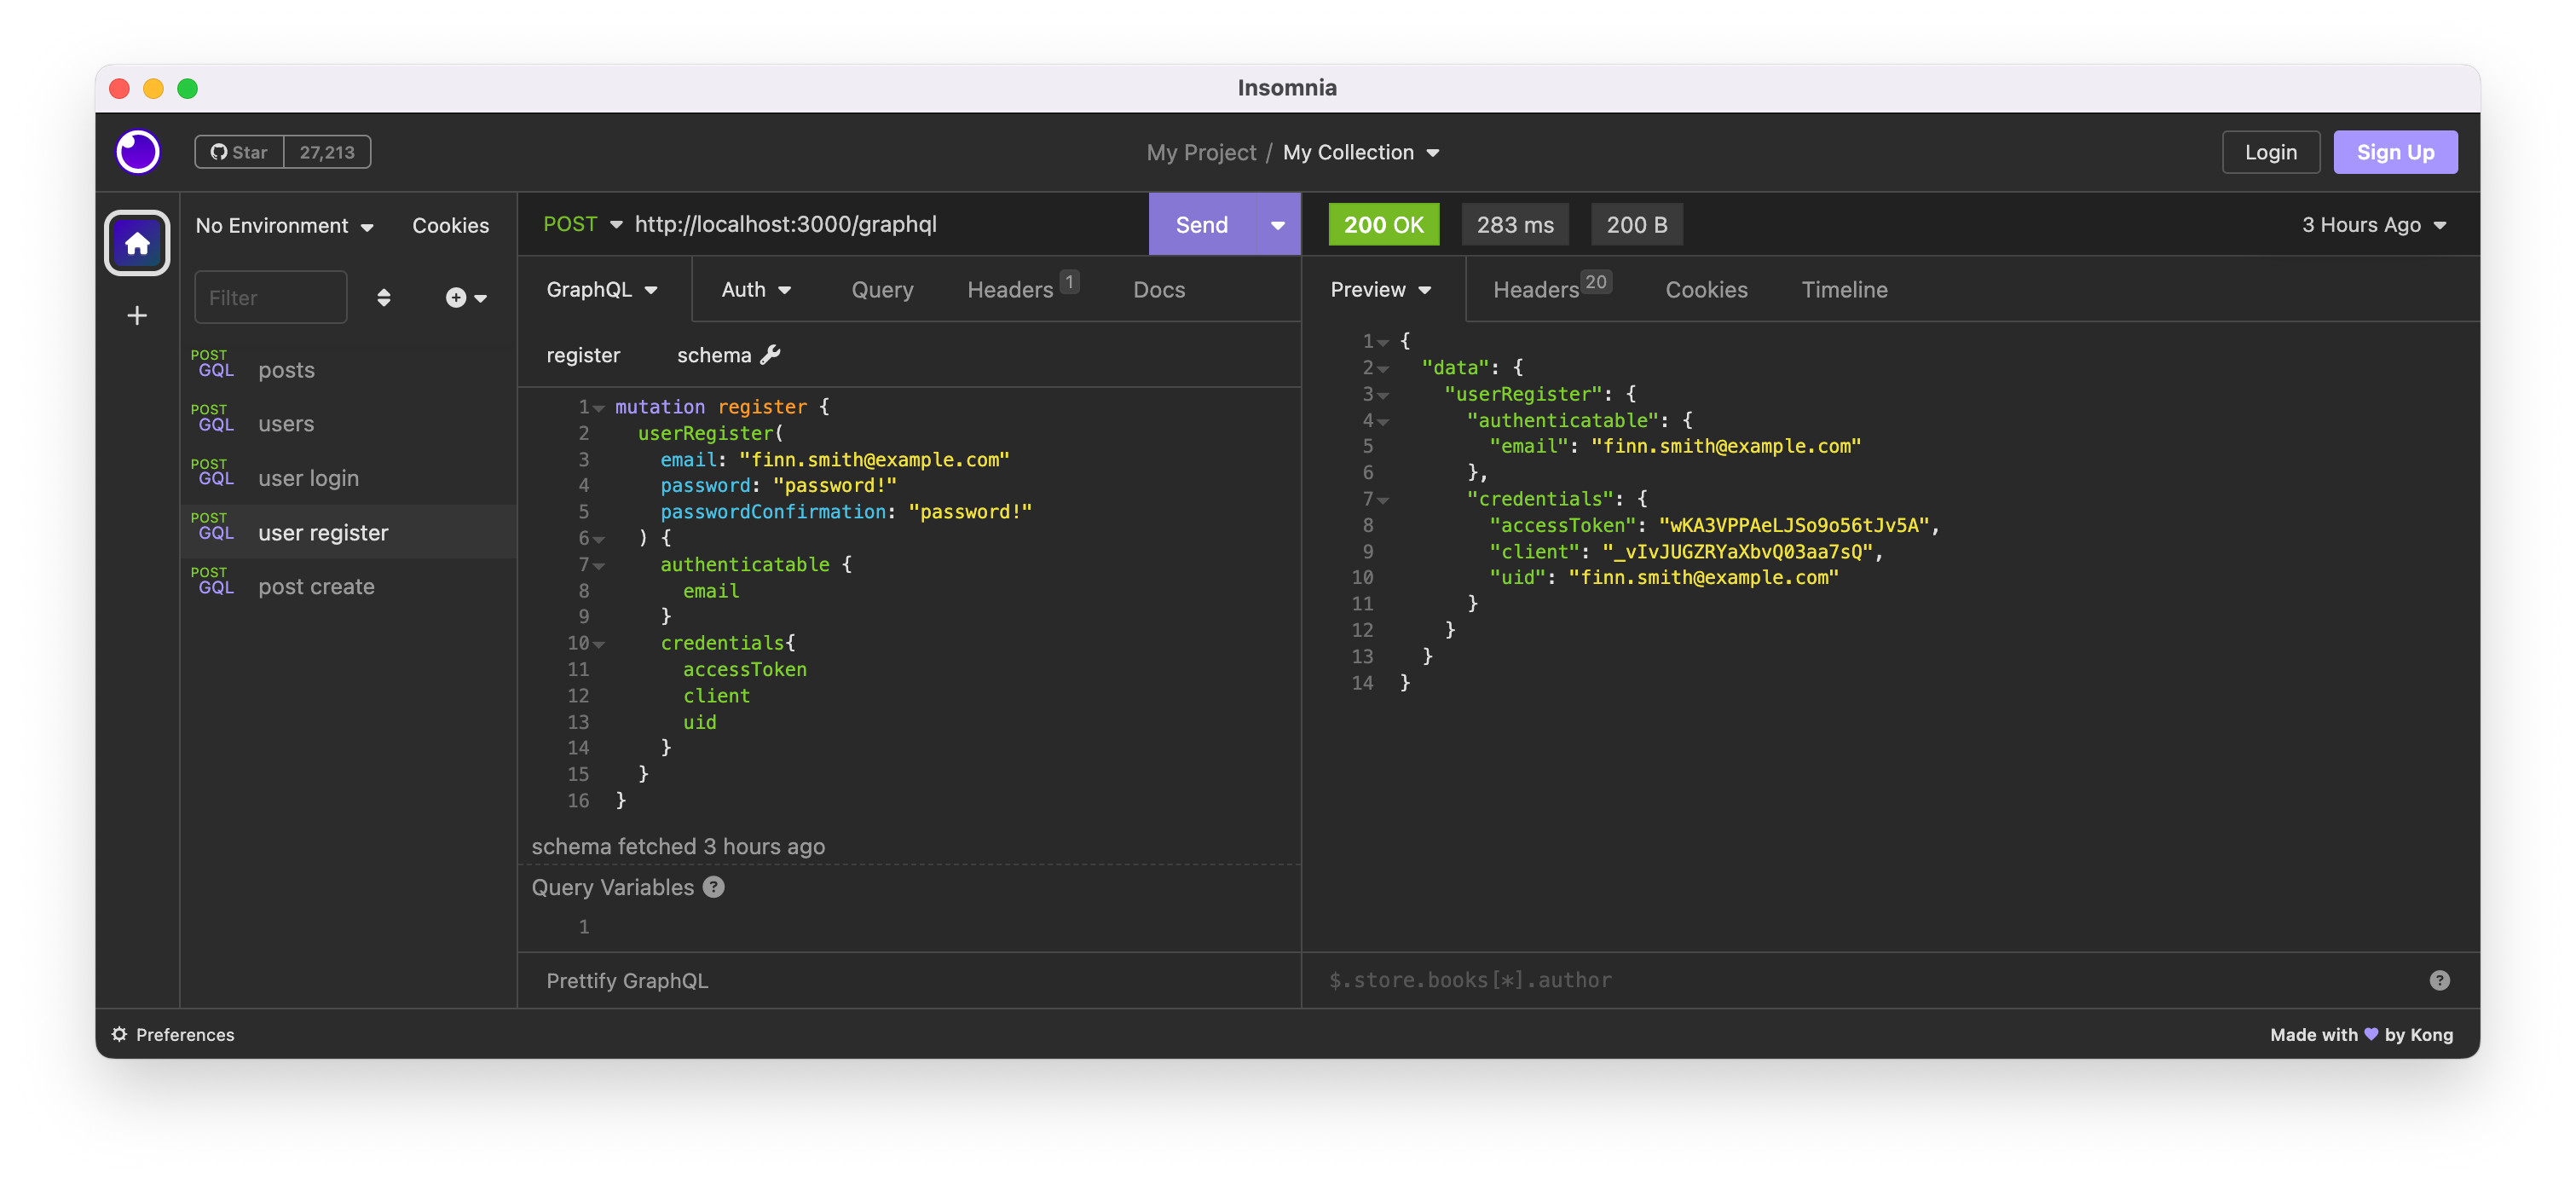
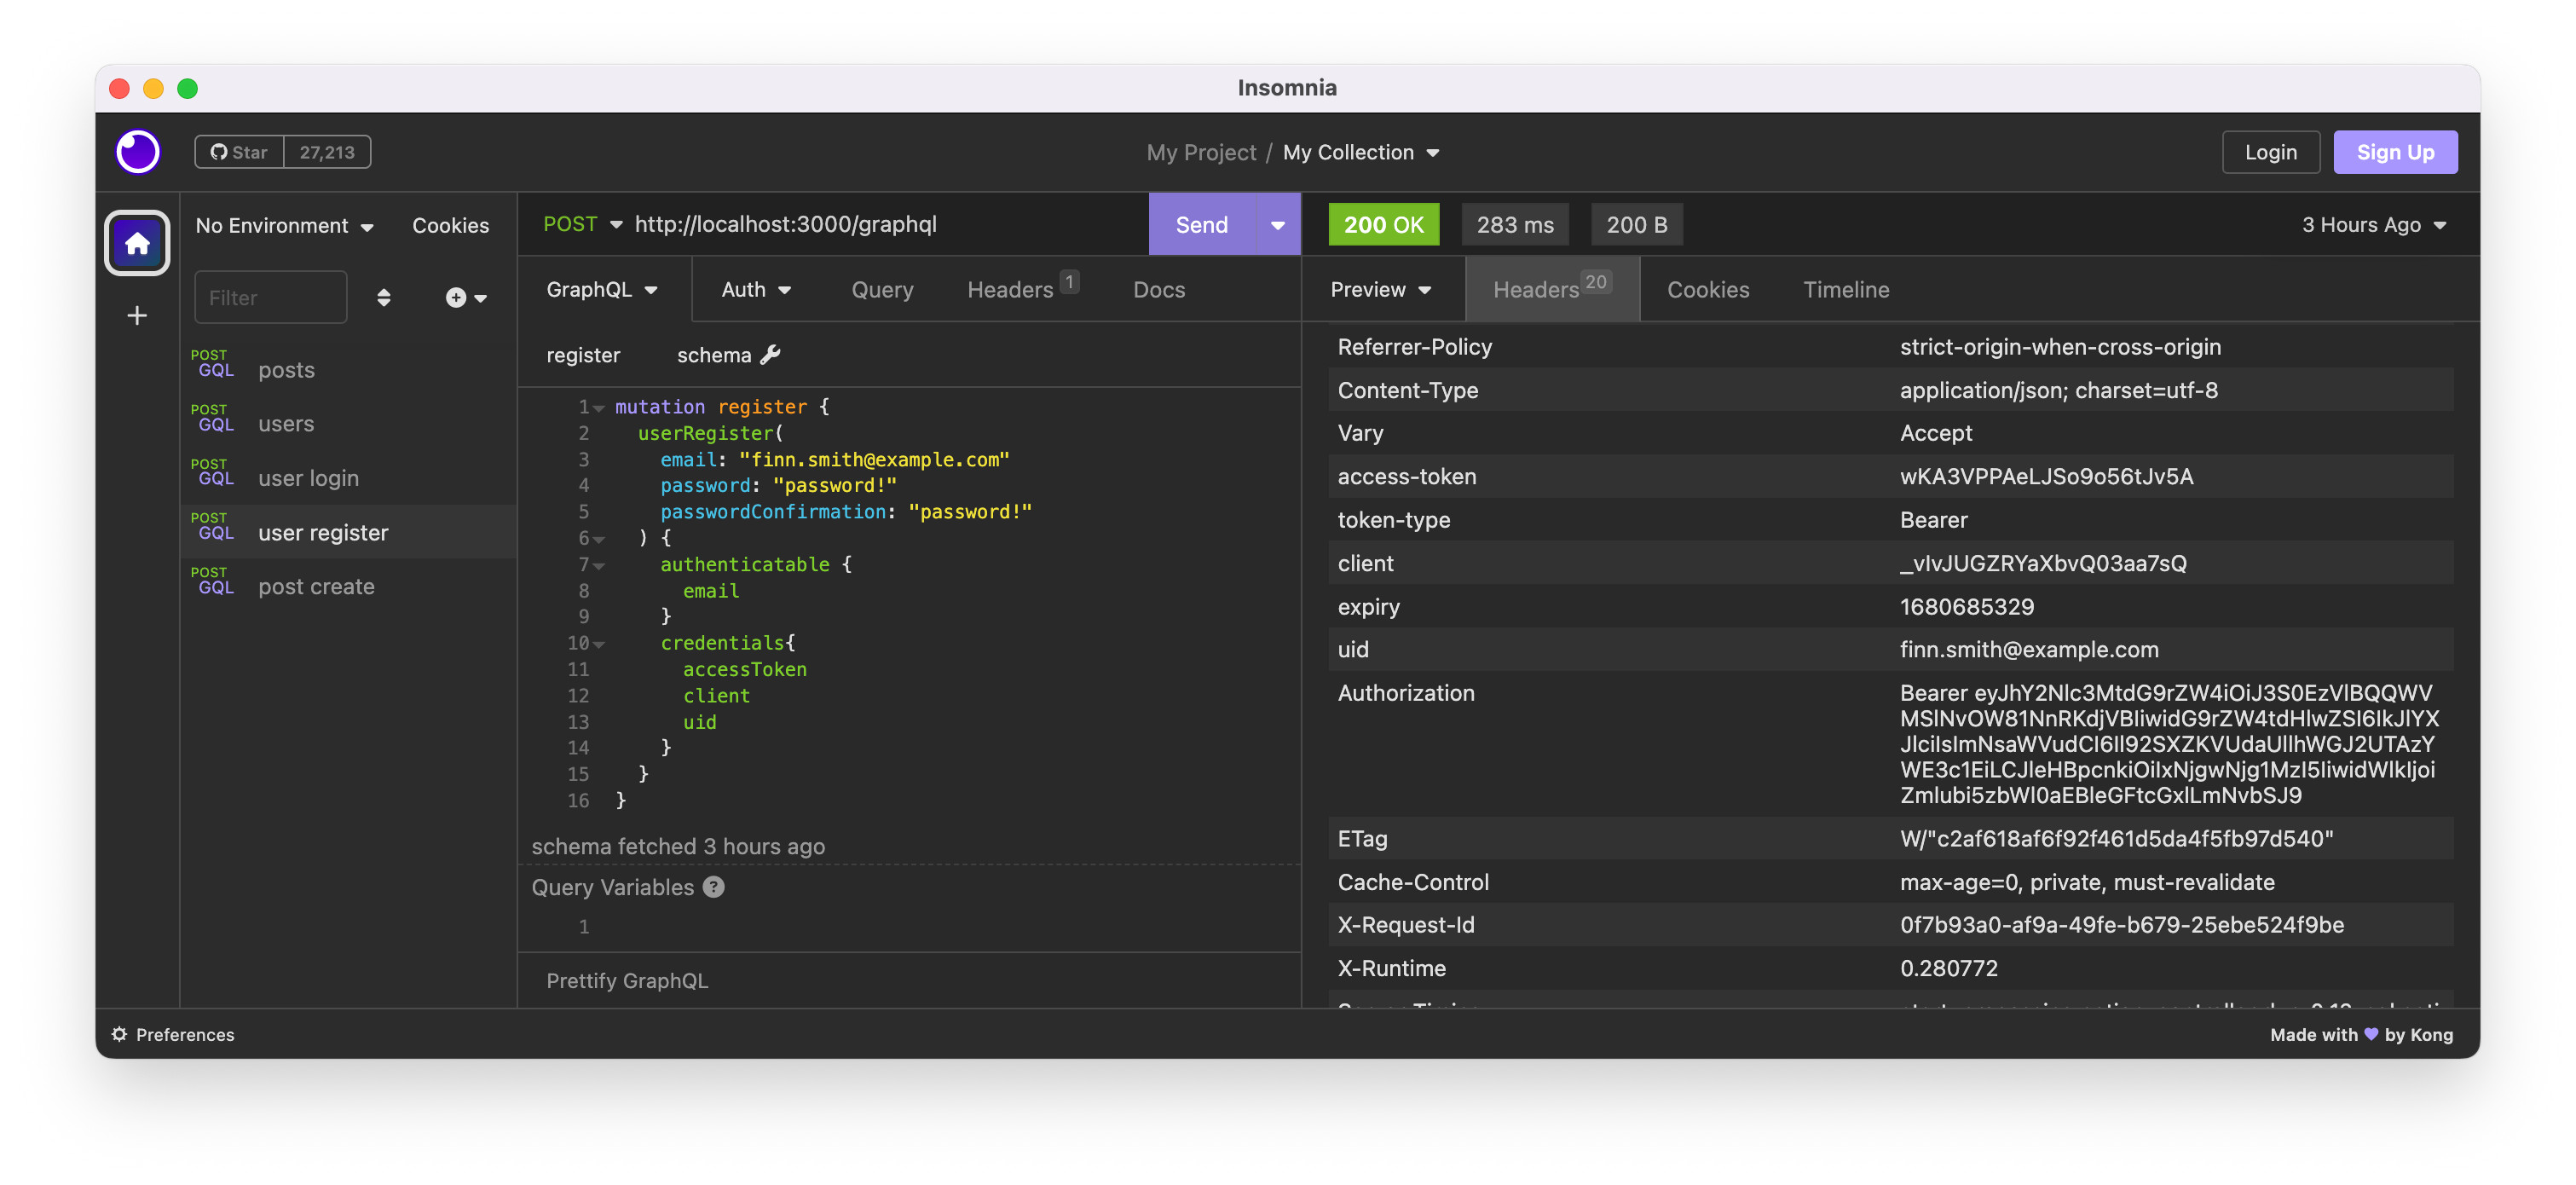
Let’s check HTTP response headers. As in below, authentication related headers can been seen.
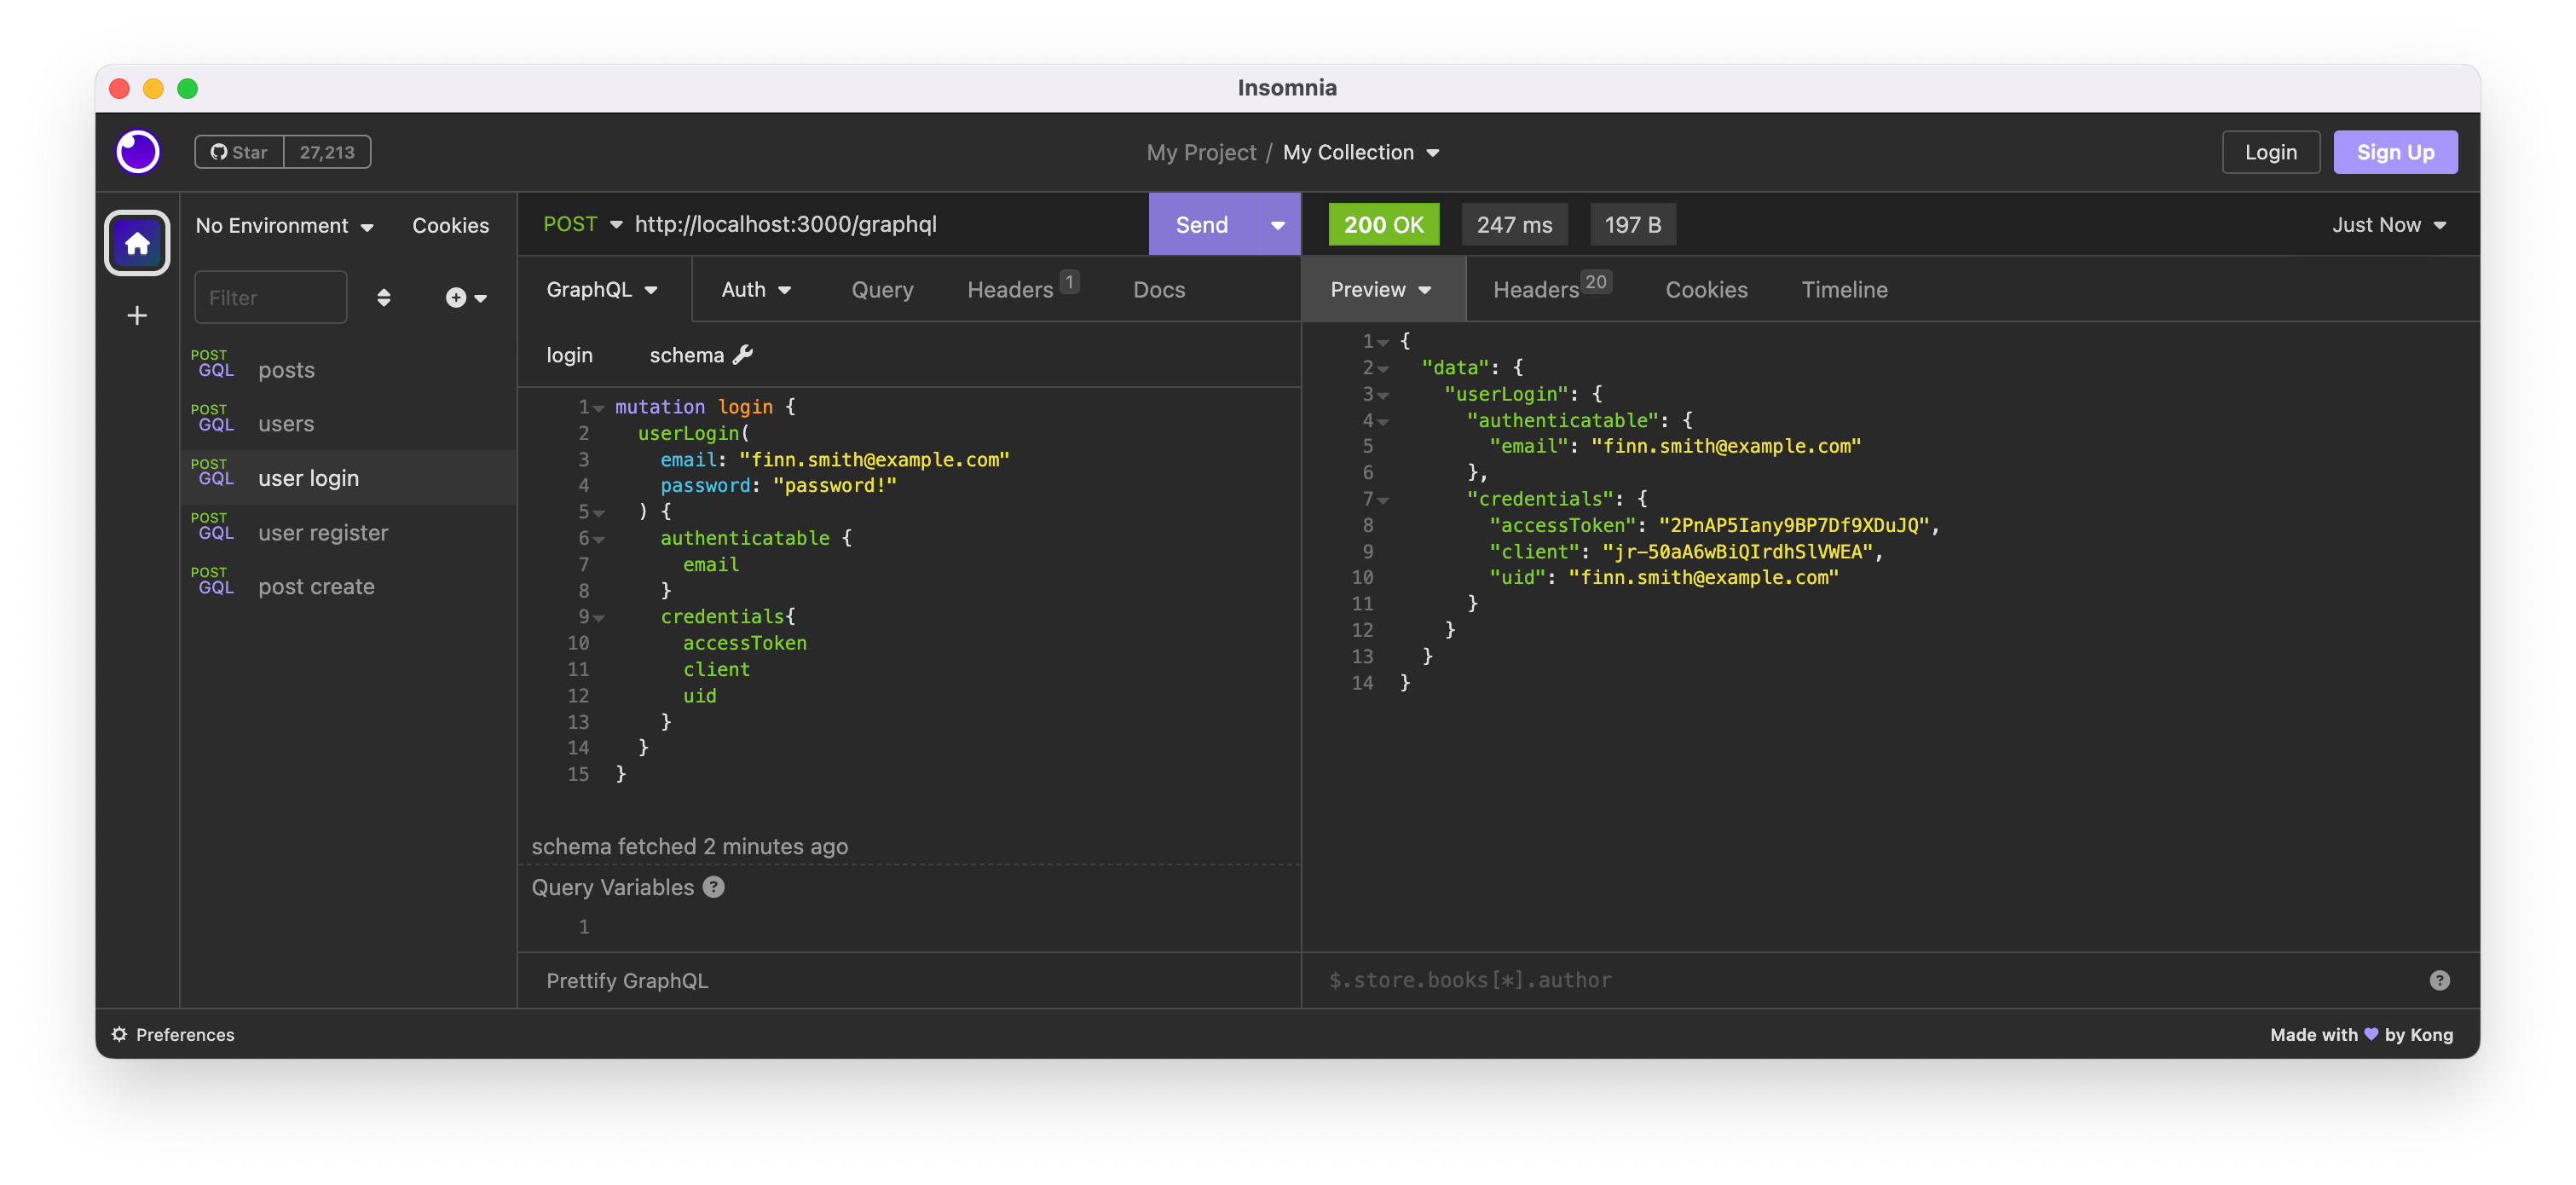
To login as a registered user, make mutation query below.
mutation login {
	userLogin(
		email: "finn.smith@example.com"
		password: "password!"
	) {
		authenticatable {
			email
		}
		credentials{
			accessToken
			client
			uid
		}
	}
}
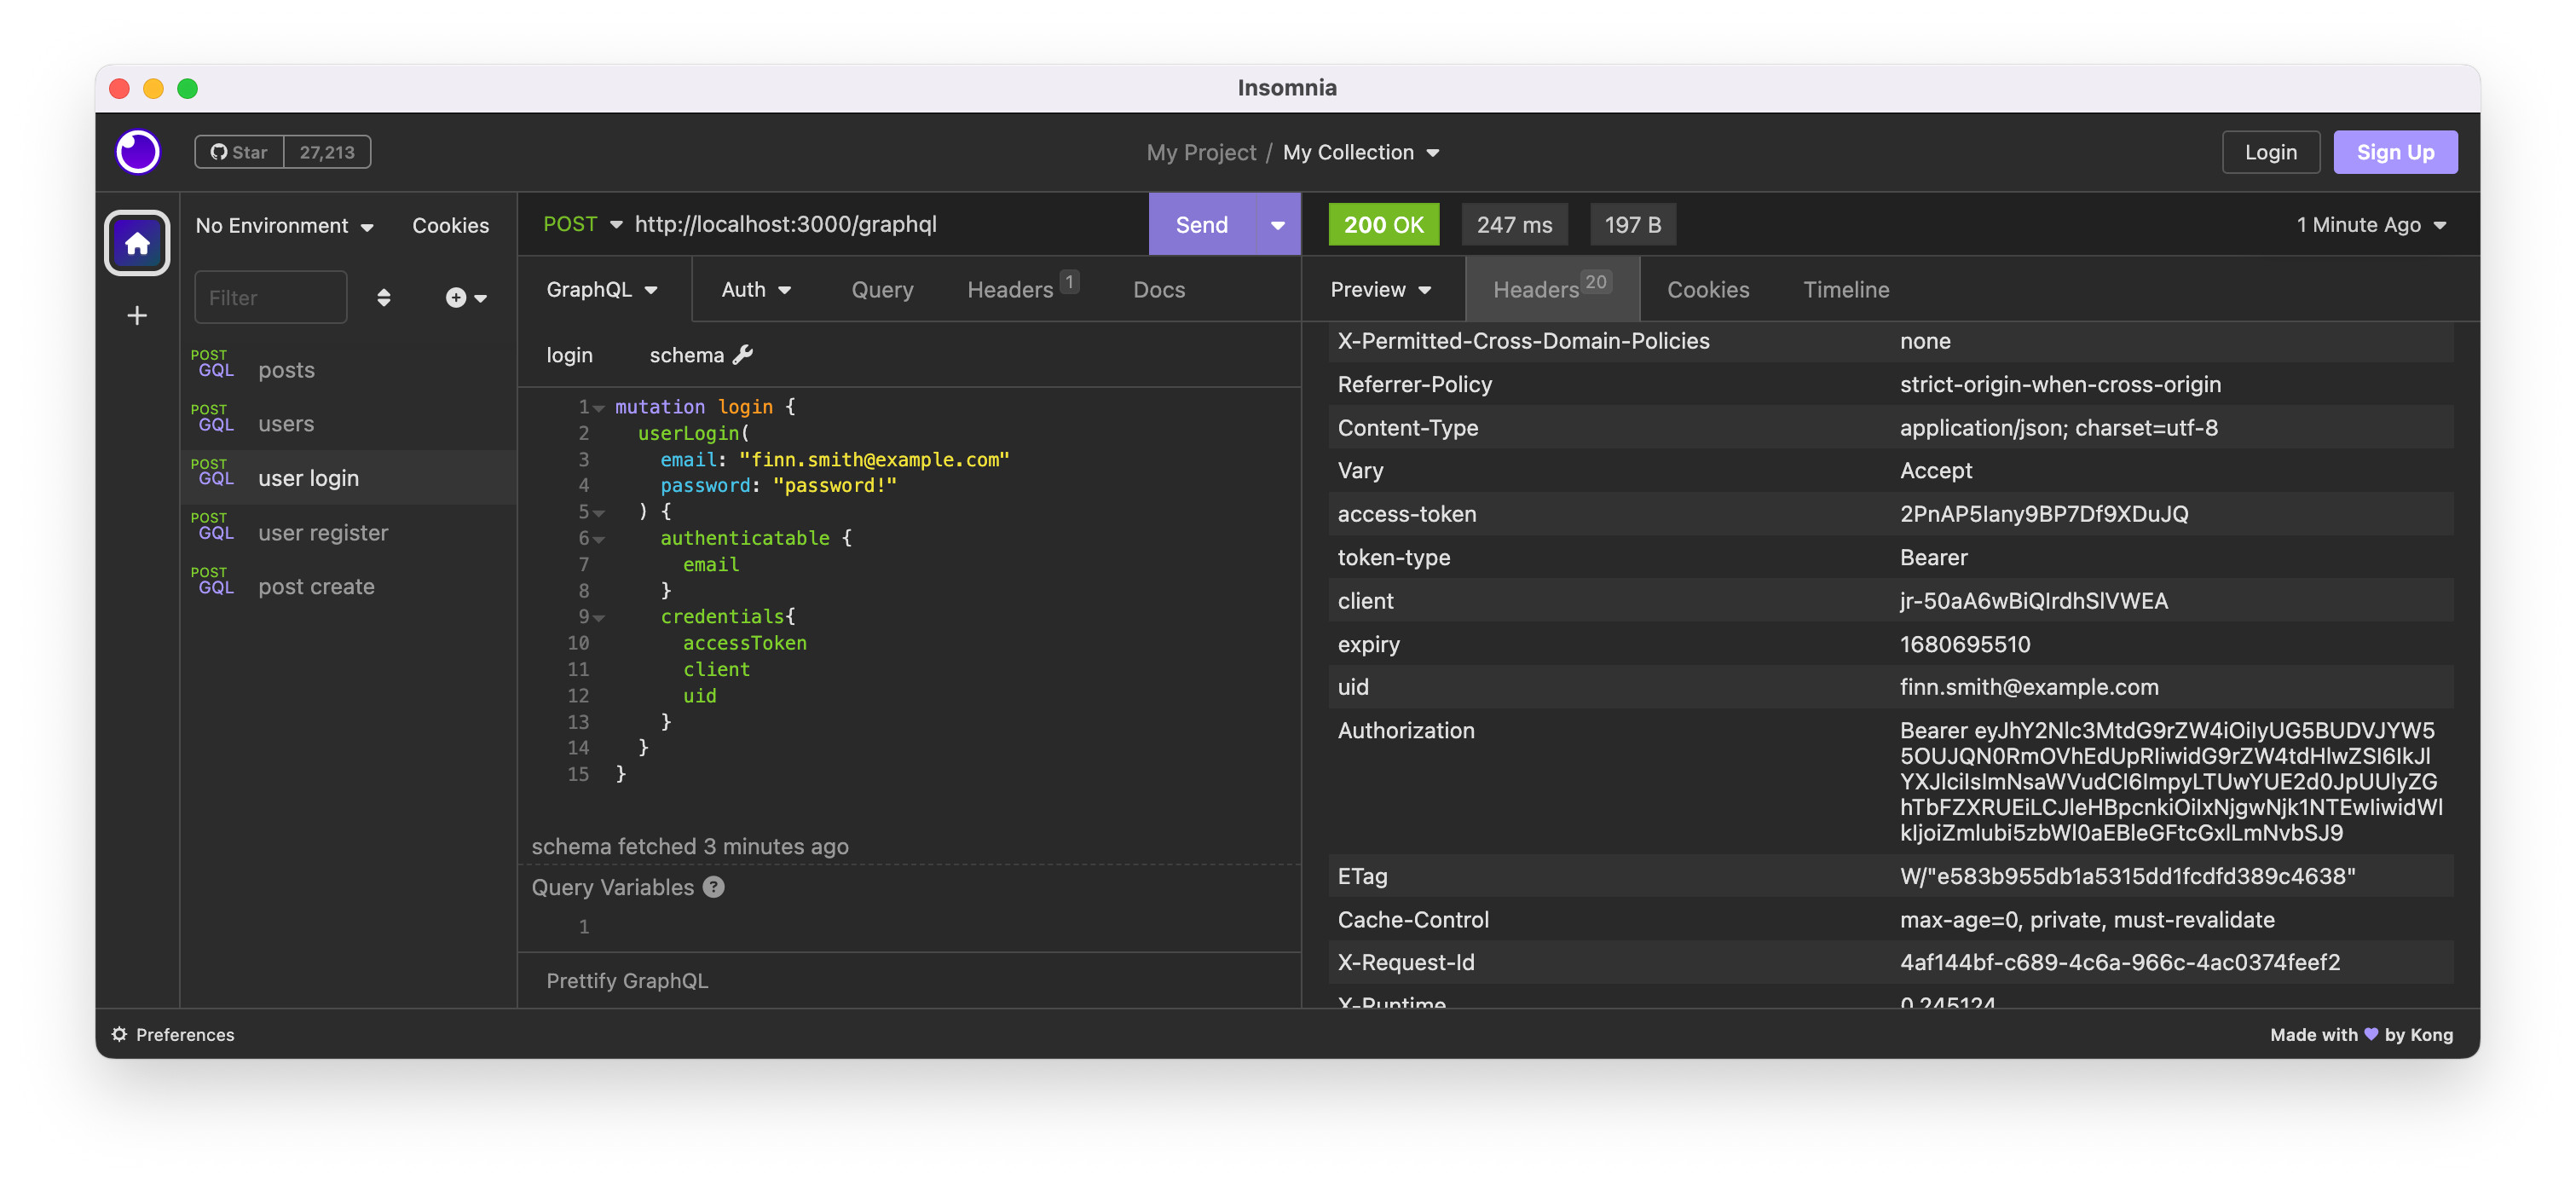
Successful login returns the same result as the registration.
User and Post Models
If we imagine to create a blog site, minimum models would be users and posts. Those two models should have a relation: a user has many posts.
The user model is already created when graphql_devise was initialized. The post model should be created, but nothing special.
$ rails g model Post user:references title:string{50} content:text
We want to add some non-null constraints to user and post models. Create migrations:
$ rails g migration ChangeEmailNullOnUsers
$ rails g migration ChangeTitleContentNullOnPosts
Edit migration files:
#  db/migrate/[DATE TIME]_change_email_null_on_users.rb
class ChangeEmailNullOnUsers < ActiveRecord::Migration[7.0]
  def change
    change_column_null :users, :email, false
  end
end

#  db/migrate/[DATE TIME]_change_title_content_null_on_posts.rb
class ChangeTitleContentNullOnPosts < ActiveRecord::Migration[7.0]
  def change
    change_column_null :posts, :title, false
    change_column_null :posts, :content, false
  end
end
Run migration:
$ rails db:migrate
Update models:
# app/models/user.rb
class User < ActiveRecord::Base
  # Include default devise modules. Others available are:
  # :confirmable, :lockable, :timeoutable, :trackable and :omniauthable
  devise :database_authenticatable, :registerable,
         :recoverable, :rememberable, :validatable
  include GraphqlDevise::Authenticatable

  has_many :posts, dependent: :destroy

  validates :email, presence: true, uniqueness: true
end

# app/models/post.rb
class Post < ApplicationRecord
  belongs_to :user

  validates :title, presence: true
  validates :content, presence: true
end
GraphQL Queries
To make queries, we need GraphQL types. Generate user and post types.
$ rails g graphql:object user
$ rails g graphql:object post
Now, we got two types:
- app/graphql/types/user_type.rb
- app/graphql/types/post_type.rb
We need query definitions for both user and post. Create resolvers as in below:
# app/graphql/resolvers/user_resolver.rb
module Resolvers
  class UserResolver < GraphQL::Schema::Resolver
    type [Types::UserType], null: false

    argument :id, Int, required: false

    def resolve(**kwargs)
      if kwargs[:id]
        [User.find(kwargs[:id])]
      else
        User.all
      end
    end
  end
end

# app/graphql/resolvers/post_resolver.rb
module Resolvers
  class PostResolver < GraphQL::Schema::Resolver
    type [Types::PostType], null: false

    argument :user_id, Int, required: false

    def resolve(**kwargs)
      if kwargs[:user_id]
        Post.where(user: kwargs[:user_id]).all
      else
        Post.all
      end
    end
  end
end
Update query_types to include user and post resolvers with authenticate option false. An assumption here is that we don’t need to authenticate for queries.
# app/graphql/types/query_type.rb
module Types
  class QueryType < Types::BaseObject
    # Add `node(id: ID!) and `nodes(ids: [ID!]!)`
    include GraphQL::Types::Relay::HasNodeField
    include GraphQL::Types::Relay::HasNodesField

    # Add root-level fields here.
    # They will be entry points for queries on your schema.
    field :users, resolver: Resolvers::UserResolver, authenticate: false
    field :posts, resolver: Resolvers::PostResolver, authenticate: false
  end
end
An example query to get all users will be blow:
query users {
	users {
		id
		email
	}
}
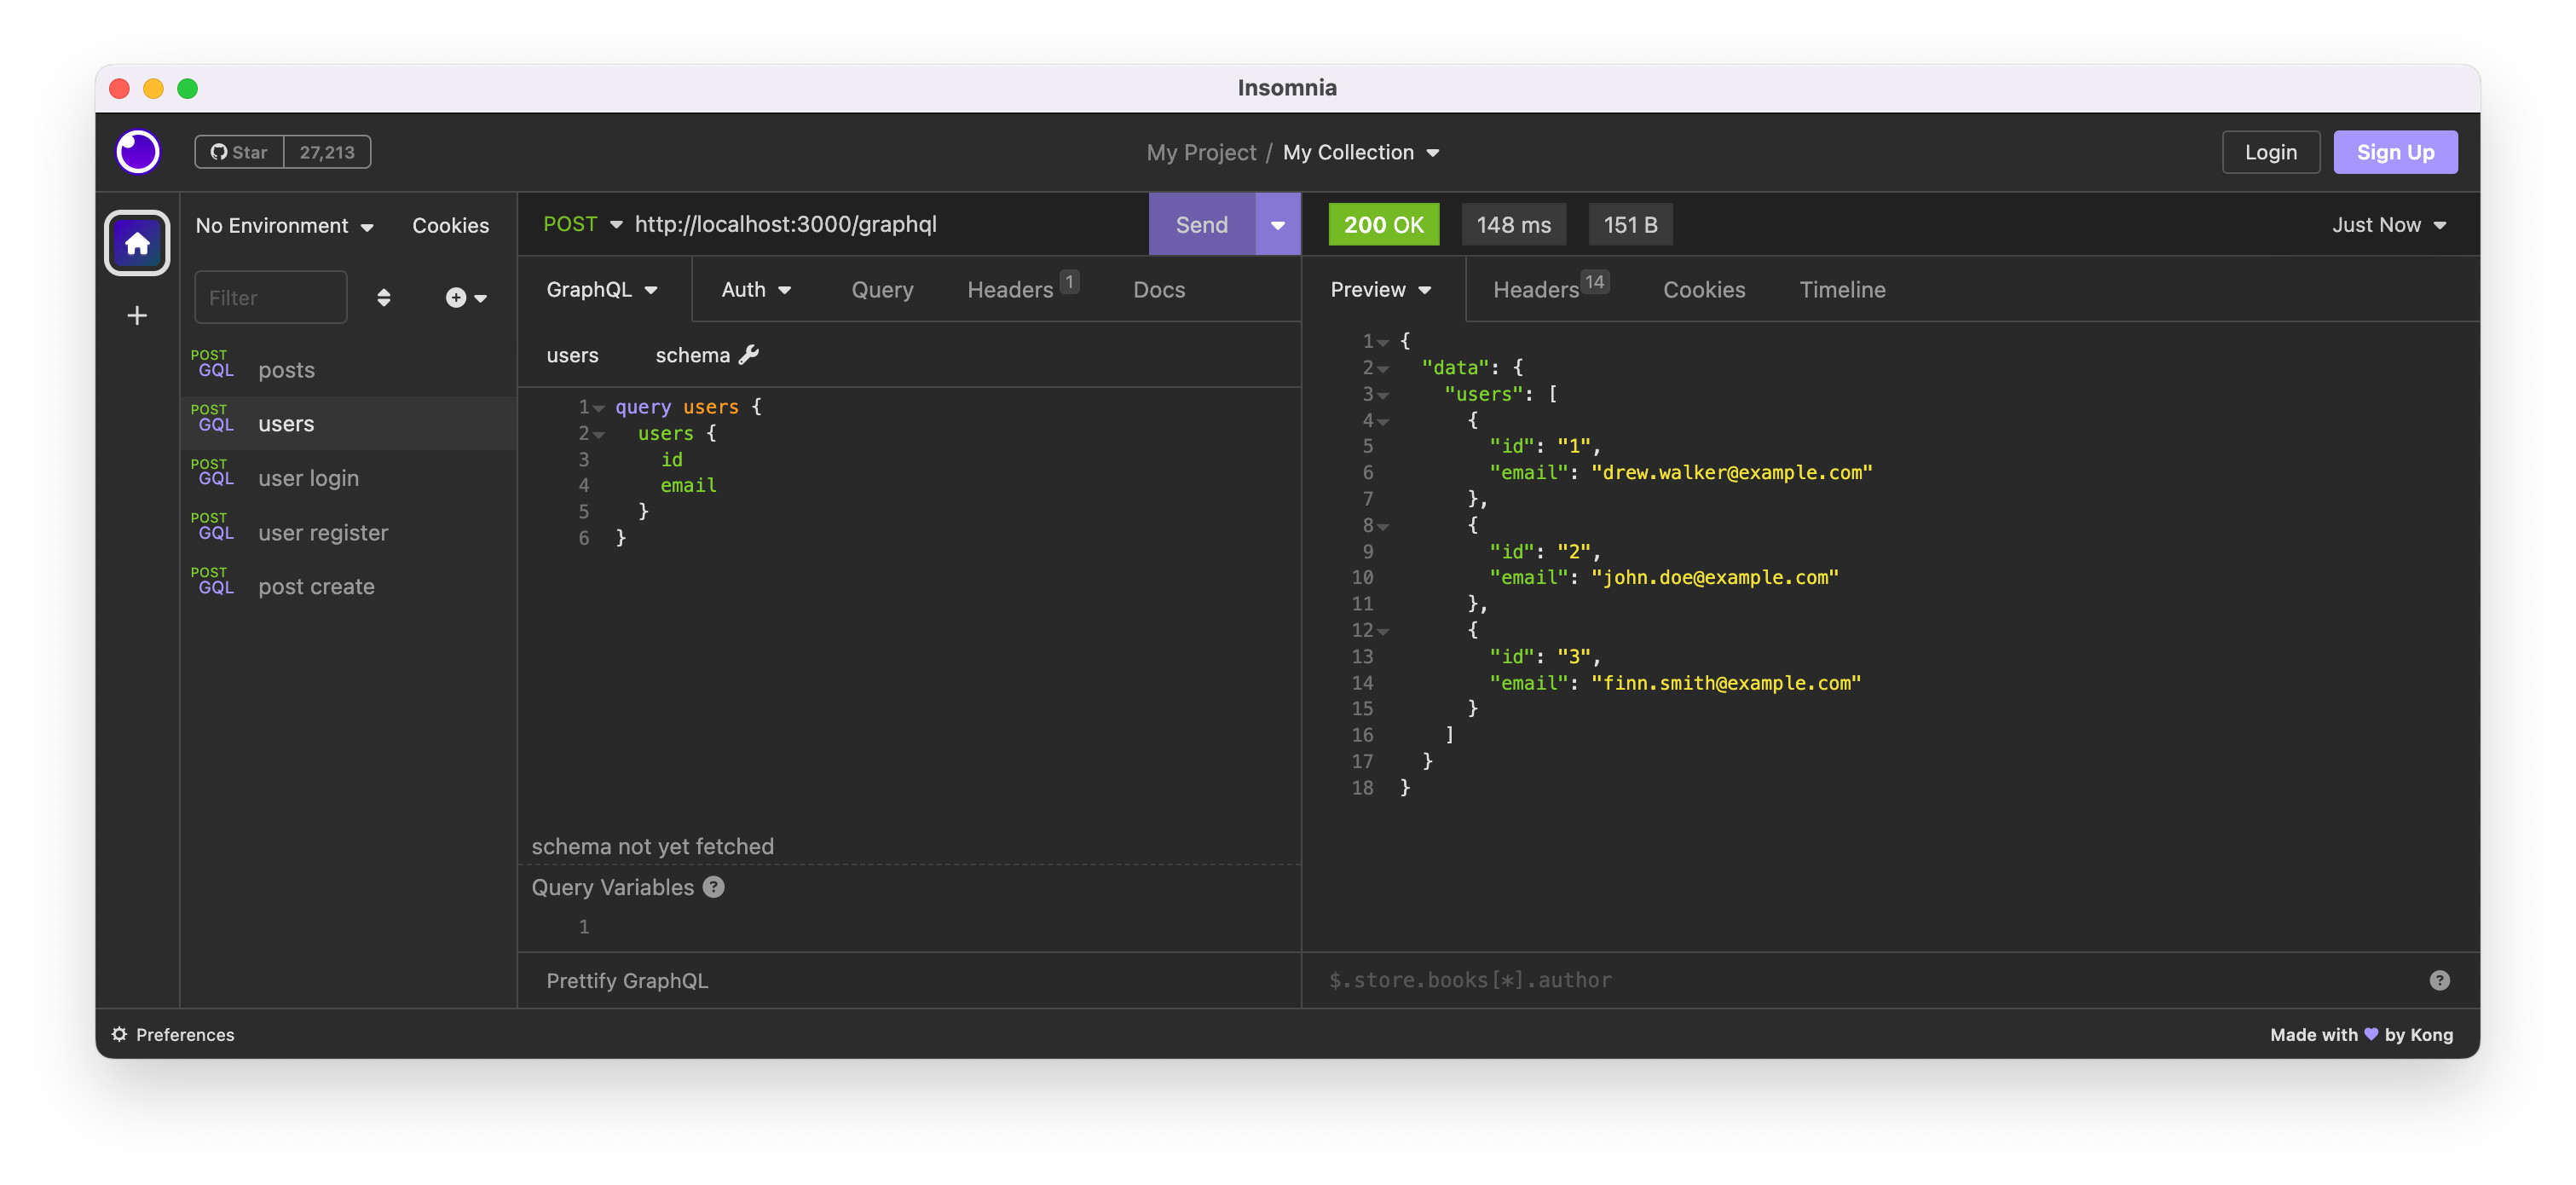
To make the query above, no authentication is required at all.
We can make post query as well, however, it returns an empty array at this moment.
GraphQL Mutations
The next is a create post mutation so that we can see some results from the post query.
$ rails g graphql:mutation_create post
Above generates app/graphql/mutations/post_create.rb file. After some editing, the post_create.rb looks like below:
# app/graphql/mutations/post_create.rb
module Mutations
  class PostCreate < BaseMutation
    description "Creates a new post"

    field :post, Types::PostType, null: false

    argument :title, String, required: true
    argument :content, String, required: true

    def resolve(**kwargs)
      kwargs[:user_id] = context[:current_resource].id
      post = ::Post.new(**kwargs)
      raise GraphQL::ExecutionError.new "Error creating post", extensions: post.errors.to_hash unless post.save

      { post: post }
    end
  end
end
Since mutation queries require authentication, the logged in user information is available in the context. The user id to create a post is retrieved from the authentication result.
Lastly, we need a little hack on Rails 7.0.4.3 and Devise 4.9.0. In general, API only web application don’t use cookie or session. However, Devise has been developed based on a traditional web application, so it still relies on the cookie. The issue is on-going and discussed at https://github.com/heartcombo/devise/issues/5443.
The workaround is adding below three lines to config/application.rb. The session store’s key is, in general, “[APP NAME]_session#{Rails.env}”.
# config/application.rb
# ...
# ...
module MiniBlog2
  class Application < Rails::Application
    # ...
    # ...
    config.session_store :cookie_store, key: "_mini-blog-2_session_#{Rails.env}"
    config.middleware.use ActionDispatch::Cookies
    config.middleware.use config.session_store, config.session_options
  end
end
Everything is ready. It’s time to create some posts. As the application designed like this, we need to log in first. Try login mutation query.
mutation login {
	userLogin(
		email: "finn.smith@example.com"
		password: "password!"
	) {
		authenticatable {
			email
		}
		credentials{
			accessToken
			client
			uid
		}
	}
}
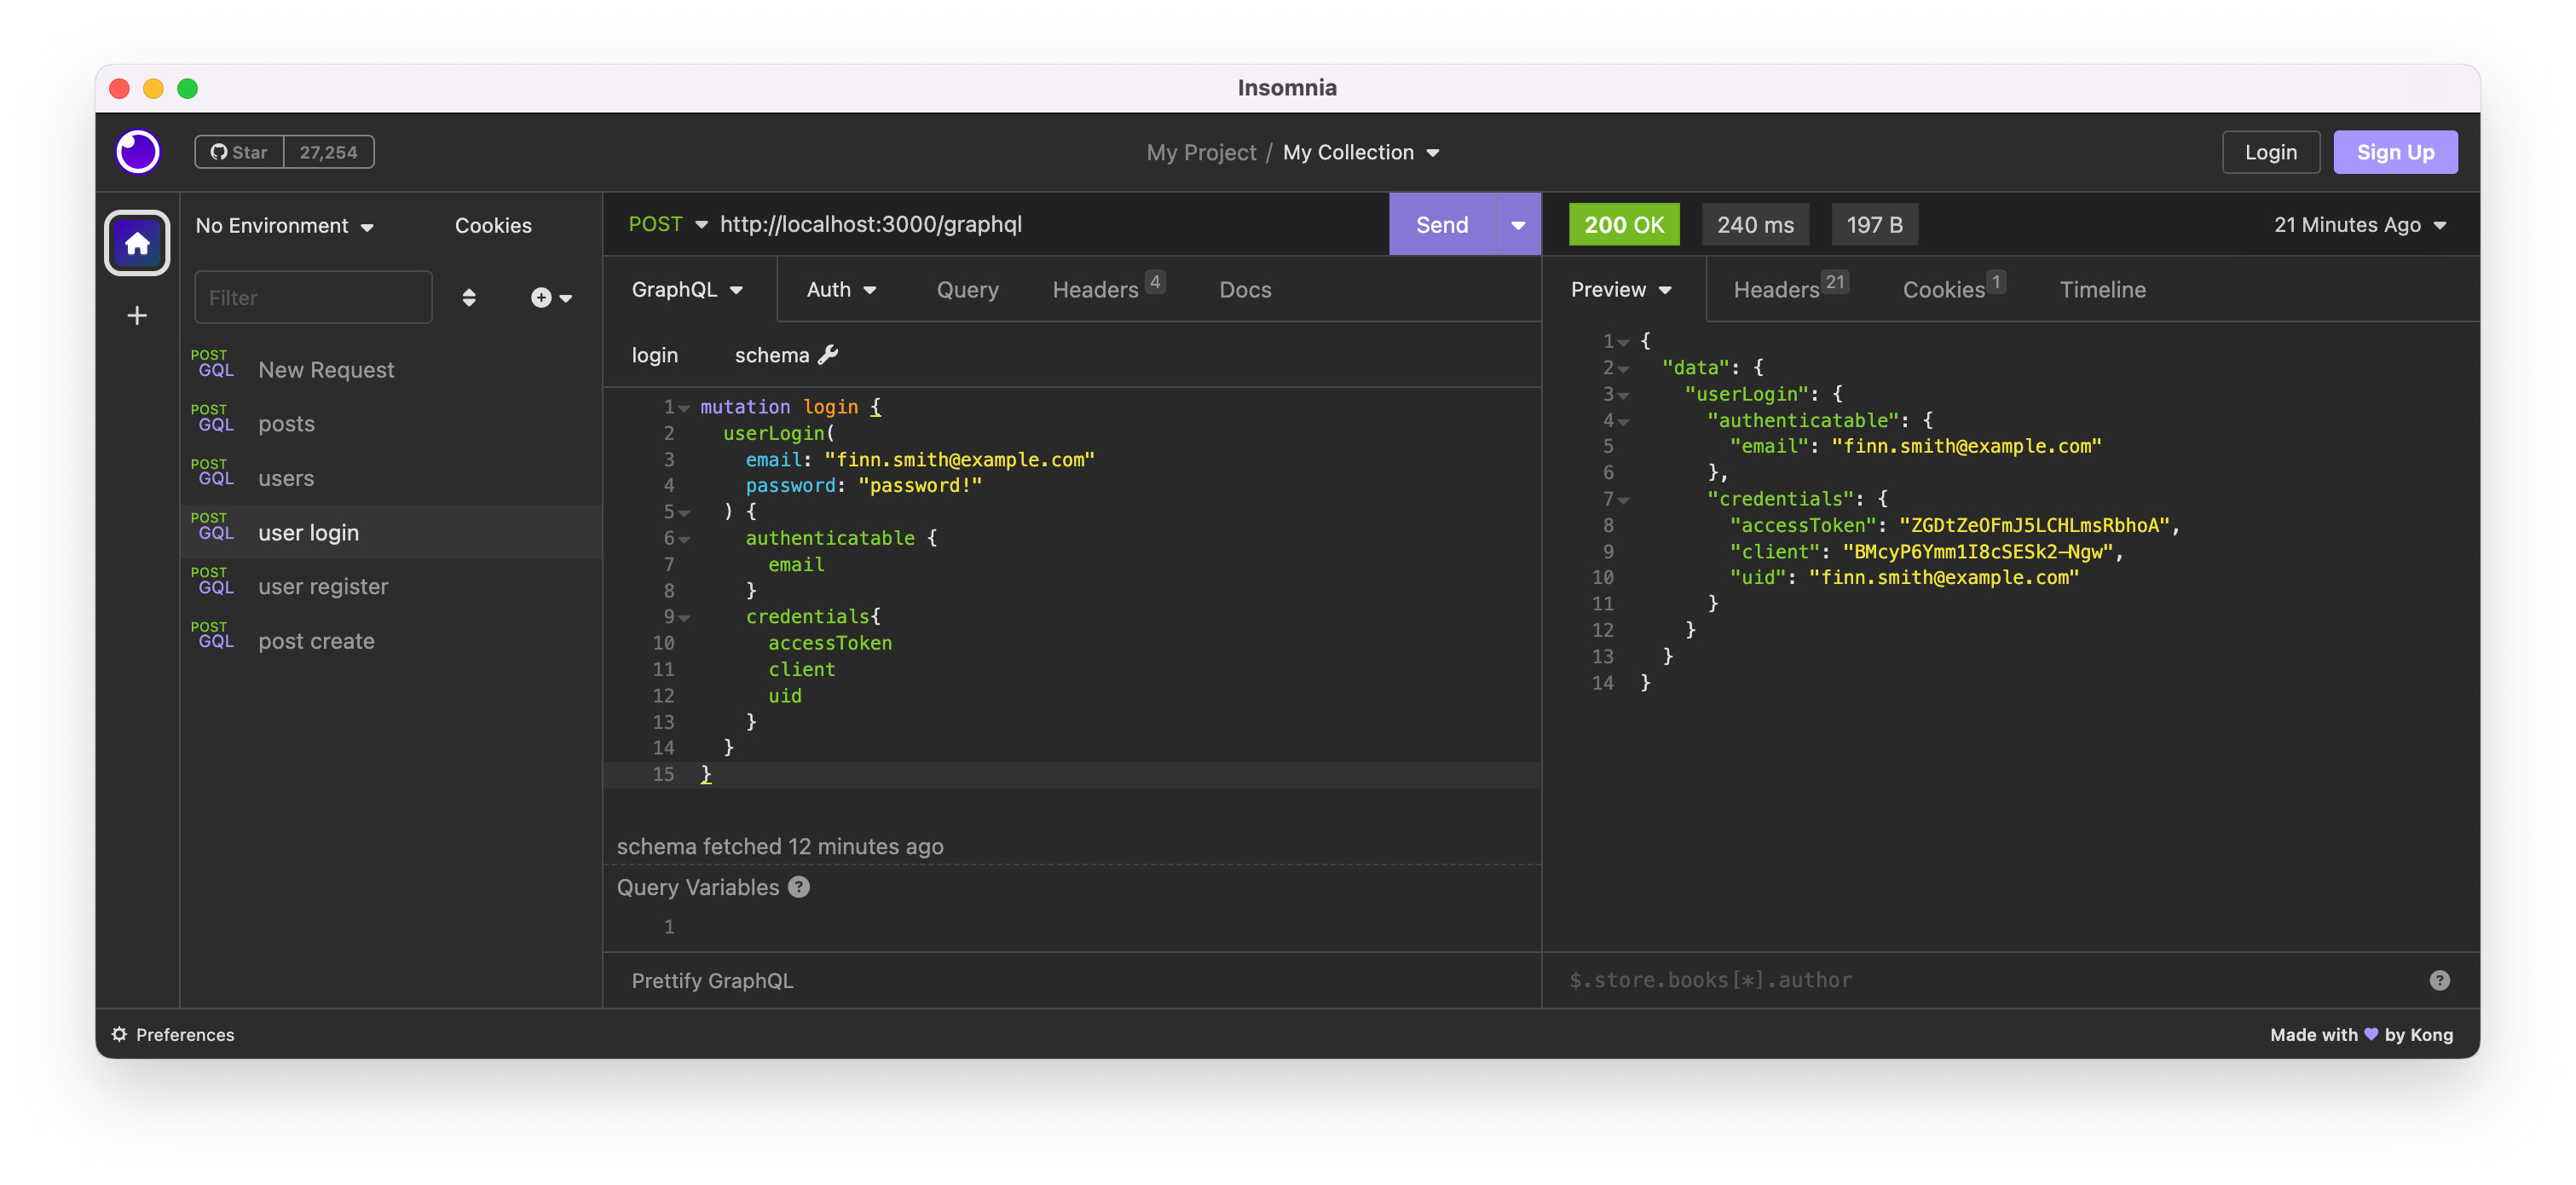
The successful login returns accessToken, client, and uid. These three are used to authenticate. The create post mutation query looks like below:
mutation post {
	postCreate(input: {
		title: "Hello World, Again",
		content: "This is the second post from Finn."
	}) {
		post {id userId title content}
	}
}
Set three user authentication values to the HTTP request header. Be careful, GraphQL result is accessToken, but HTTP request header is access-token. Now, we could create a post.
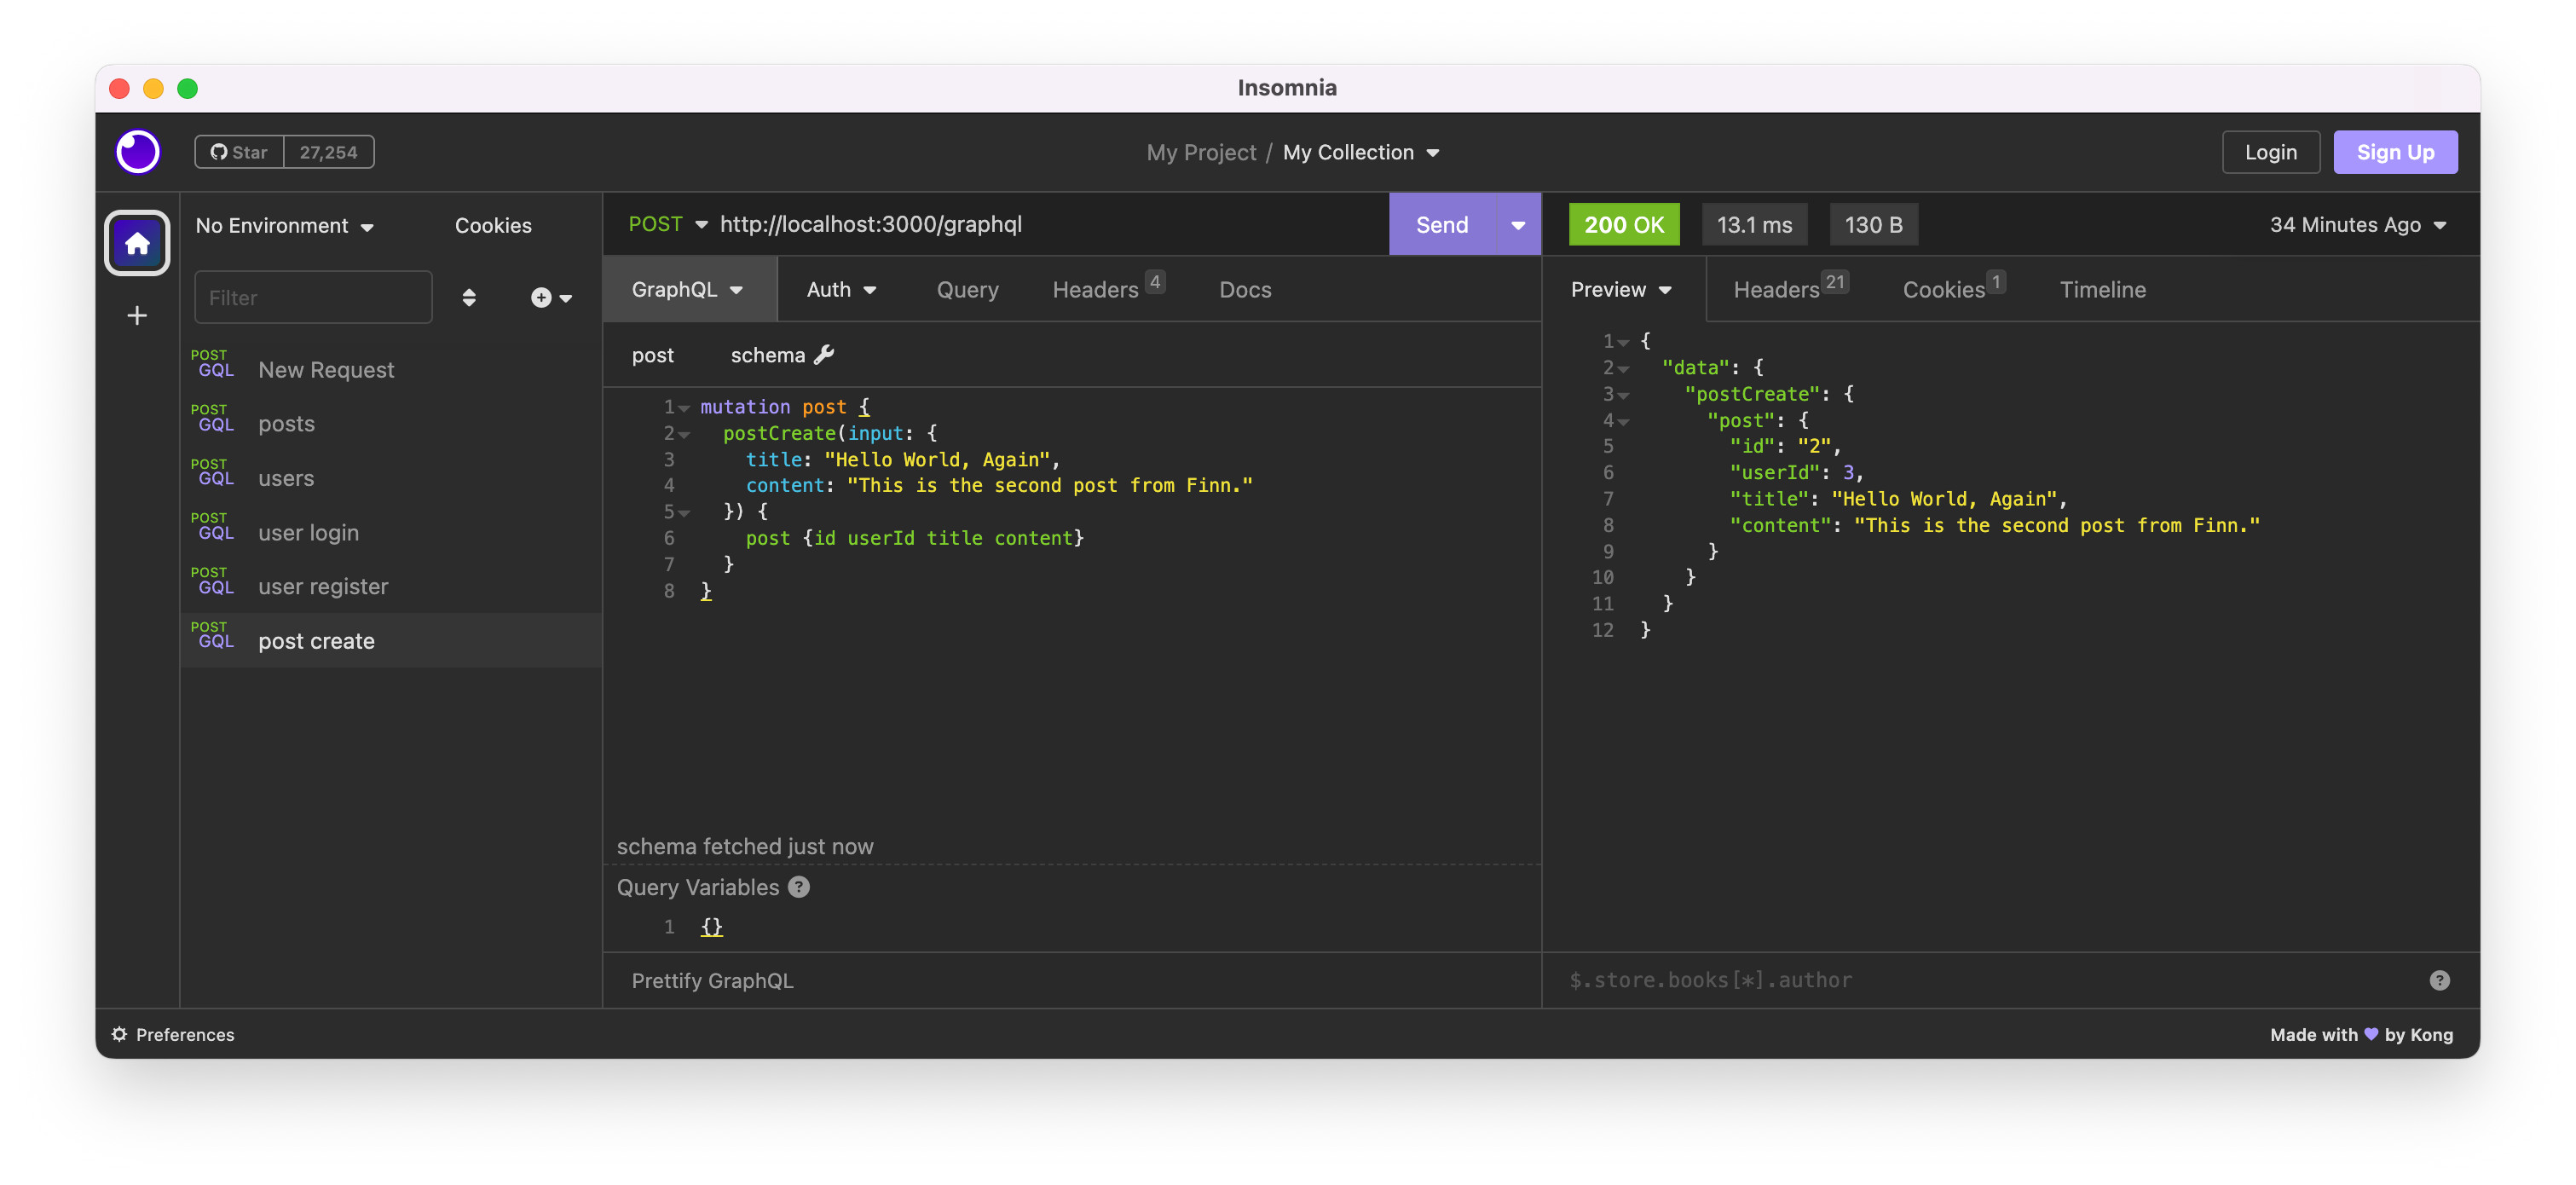
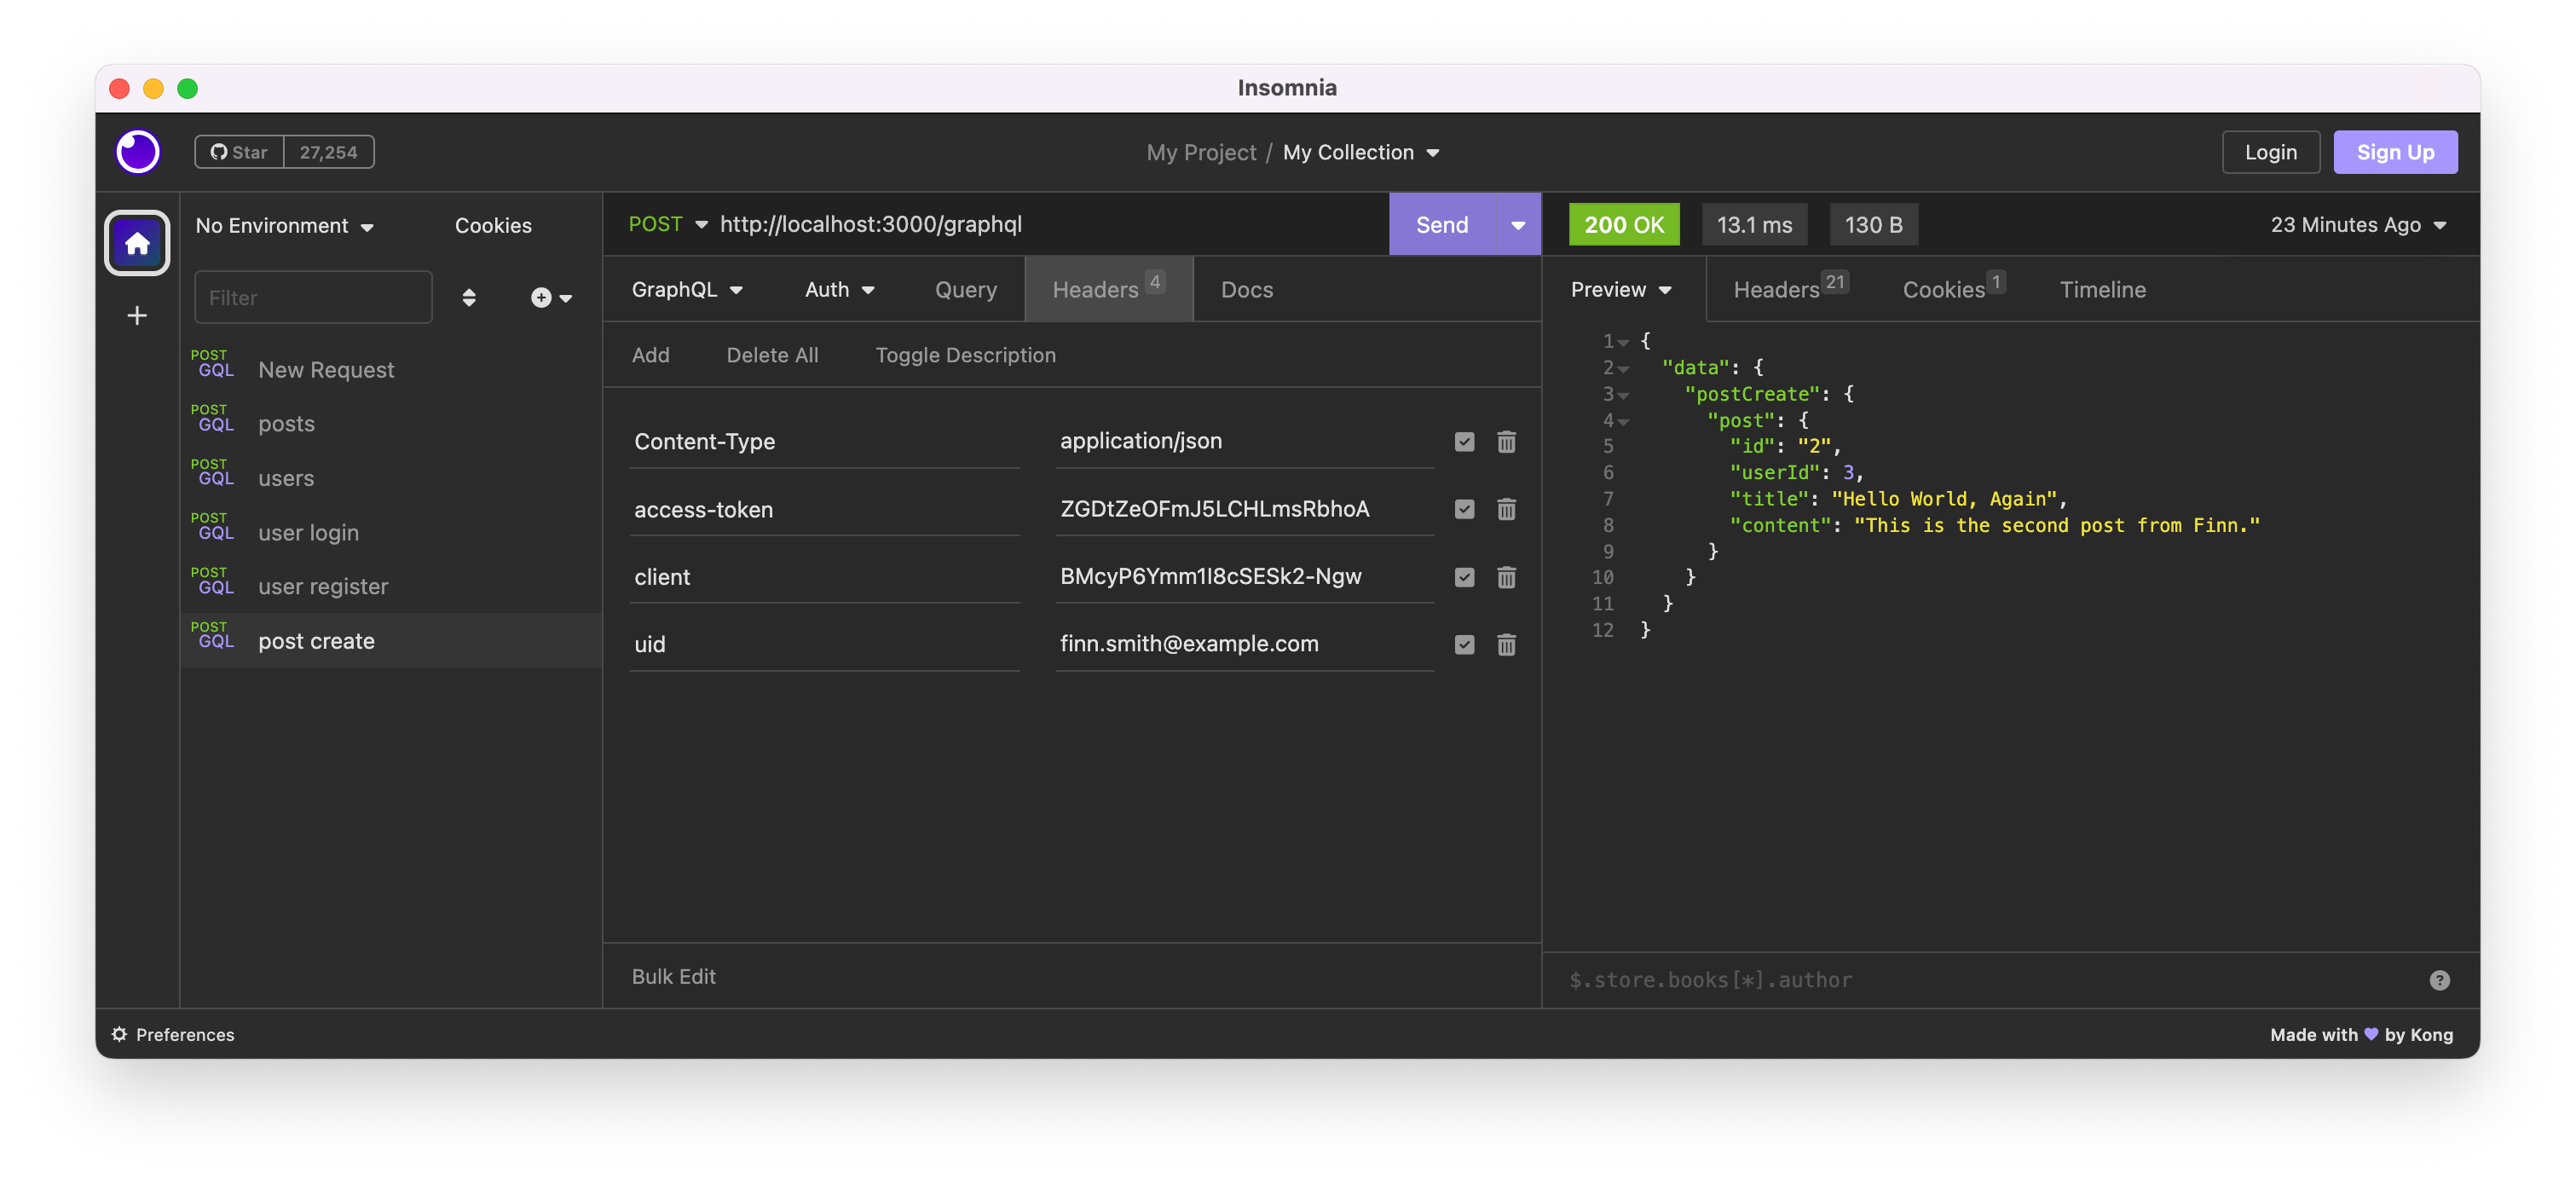
Add some more posts using different user’s authentication values.
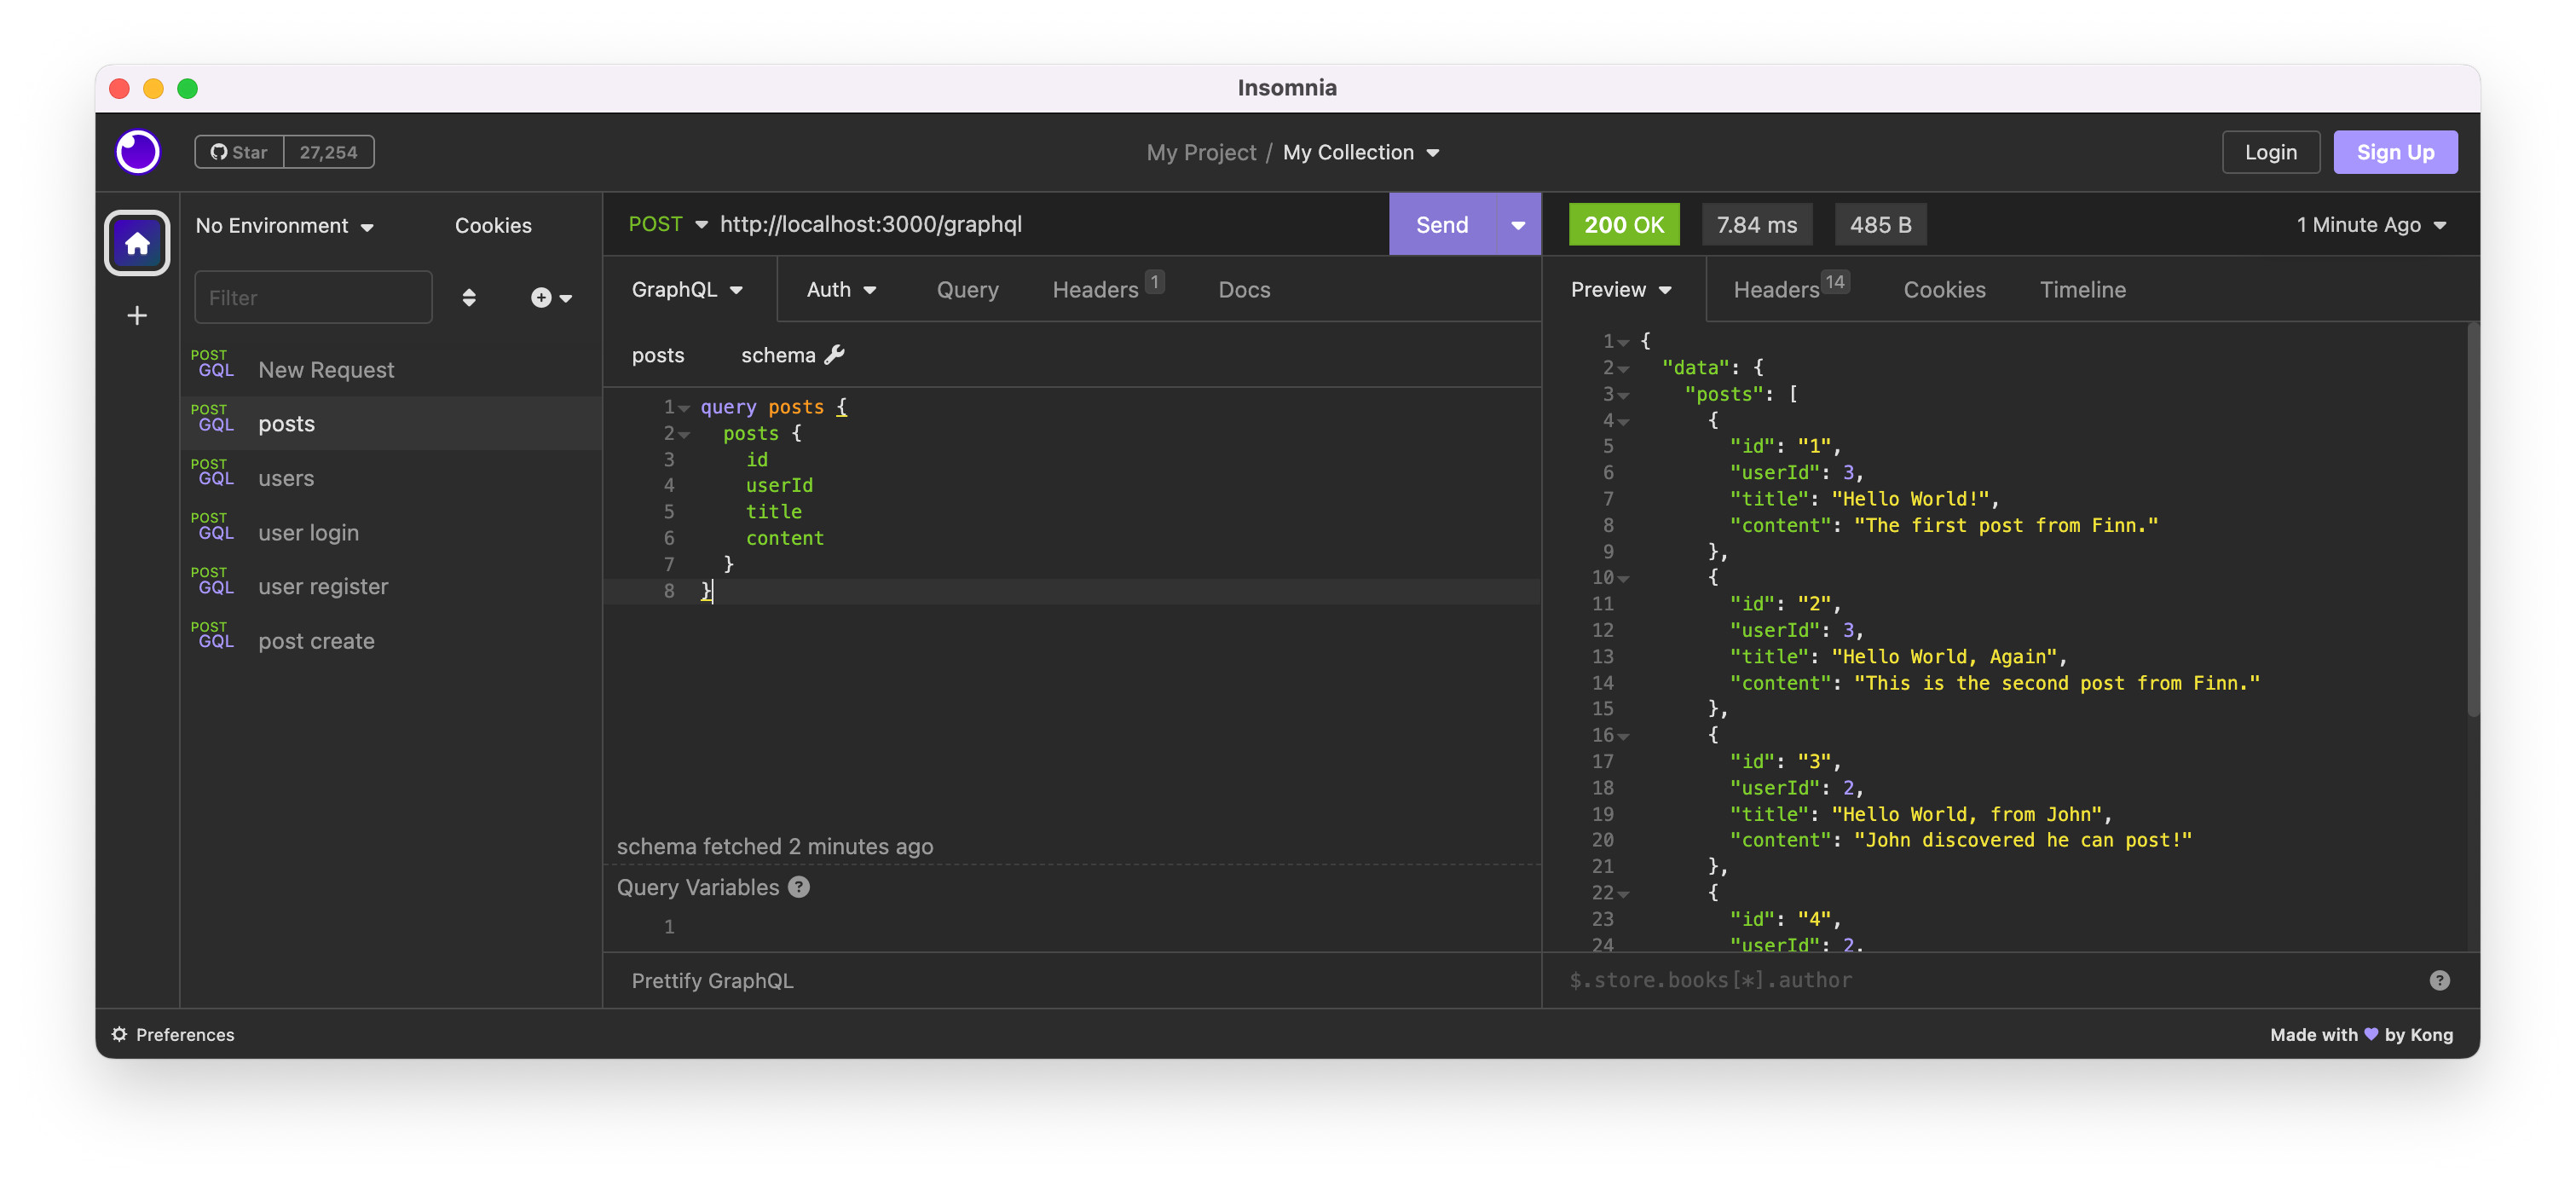
To get all posts by all users, make below query.
query posts {
	posts {
		id
		userId
		title
		content
	}
}
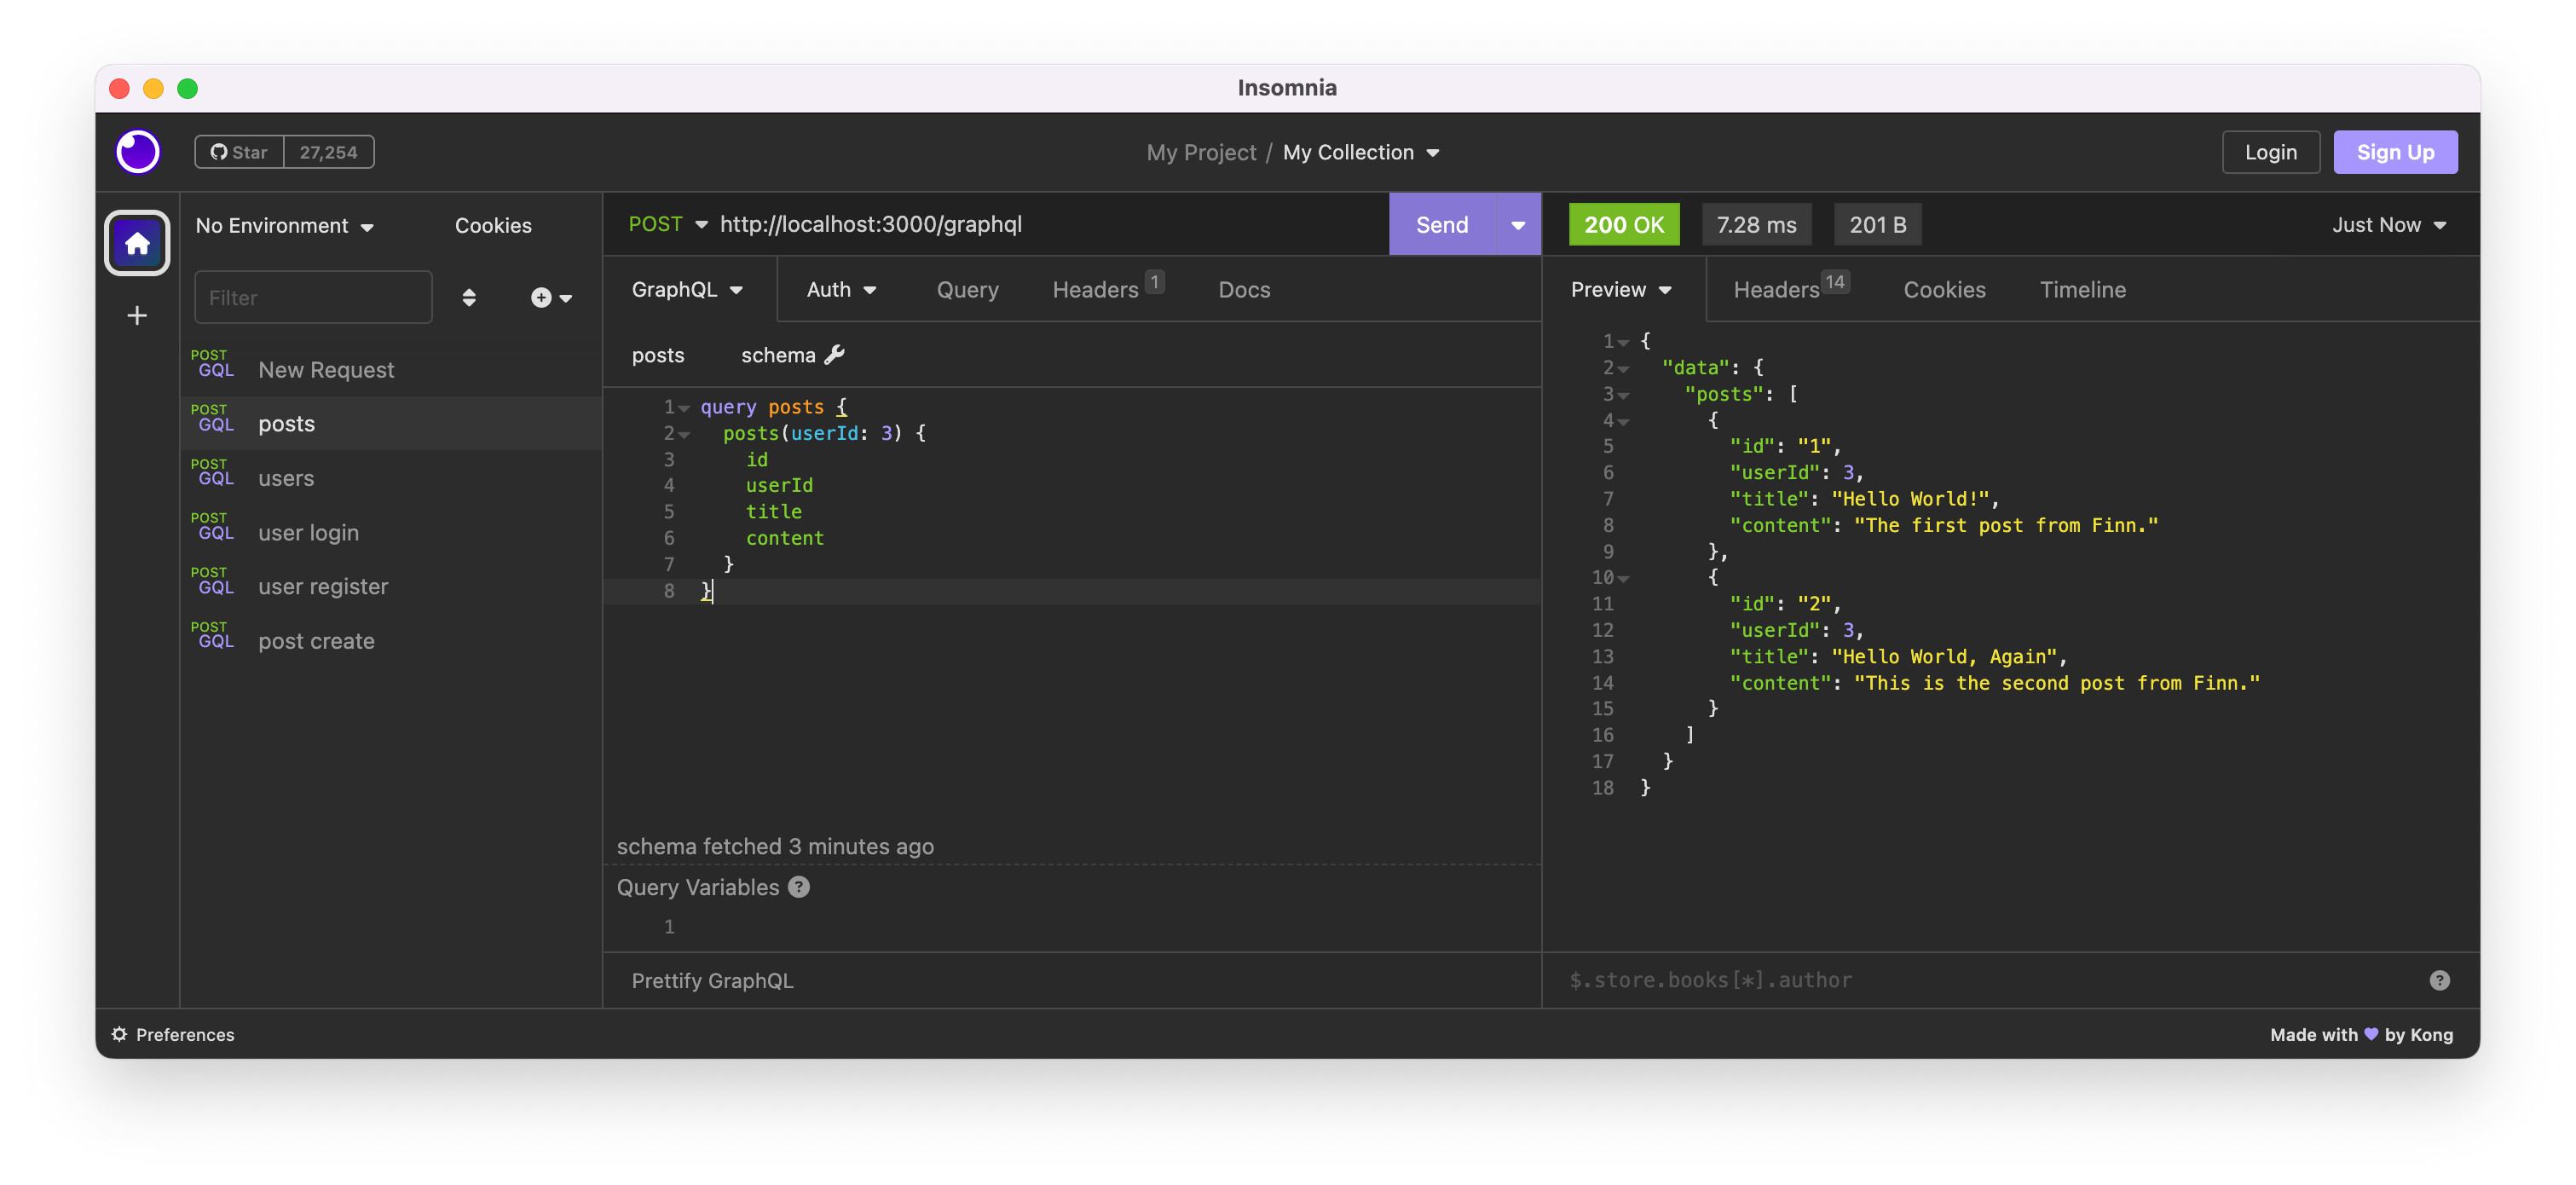
To get all post of a specific user, make below query with user’s id.
query posts {
	posts(userId: 3) {
		id
		userId
		title
		content
	}
}
Code
The example Rails app code is on the GitHub repo. Please see https://github.com/yokolet/mini-blog-2.