Published: Mar 12, 2023
GraphQL is an API standard to provide resources on the server-side to various types of clients. GraphQL itself is a specification and doesn’t provide an implementation. For Ruby on Rails, GraphQL Ruby https://graphql-ruby.org/ is the most popular library.
Not like REST API, GraphQL has only one endpoint. While REST API uses different endpoints (paths or URL) to access multiple types of resources, GraphQL uses schema based queries. The REST API clients receives all fields server returned. However, GraphQL clients can specify what fields they want to receive from the API server.
For REST API, the swagger UI https://swagger.io/tools/swagger-ui/ is often used as a documentation and testing tool. In general, the swagger UI is provided by the REST API server.
In contract, the GraphQL server doesn’t provide such UI tool. Instead, GraphQL desktop apps are out there, which provides UI based documentation and testing tools. The blog post “Top 10 GraphQL clients” lists desktop apps with some explanations. Such apps have ability to pull the schema from GraphQL server and show that on UI. Also, those have features to write GraphQL queries, send those and receive results.
Since Ruby on Rails is designed for REST API, we need additional steps to use Rails as a GraphQL server. This is a memo how to get started GraphQL using Ruby on Rails.
Setting Up
Create Rails App
This memo focuses on creating GraphQL API server. The App will be the API only and have a smaller stack with sqlite3 as a database. Ruby and Rails versions are:
- Ruby: 3.2.1
- Rails: 7.0.4.2
Create .railsrc file with the content below:
--api
--skip-action-mailer
--skip-action-mailbox
--skip-action-cable
--skip-action-text
--skip-active-job
--skip-active-storage
-T
The default location of .railsrc is a home directory just like .zshrc or .bashrc.
If it is created in another directory and/or another filename, use --rc=RC option to specify the file.
Create the Rails app named “mini-blog”, for example:
$ rails new mini-blog --rc=./.railsrc
Test the app is created correctly:
$ cd mini-blog
$ rails s
Then, hit http://localhost:3000/ on a web browser. If you see Rails logo and Ruby/Rails versions, the server could start successfully.
Install GraphQL Ruby gem
Once the Rails app is created, the next step is to install GraphQL Ruby (https://graphql-ruby.org/) gem. Run two commands below:
$ bundle add graphql
$ rails g graphql:install
The second command generates GraphQL basic types, default query/mutation types, and a default schema.
The schema name is [APP_NAME]_schema.rb.
All are located under app/graphql directory.
Also, the command adds a route to /graphql. Have a look at config/route.rb, which looks like:
# config/routes.rb
Rails.application.routes.draw do
  post "/graphql", to: "graphql#execute"
  # Define your application routes per the DSL in https://guides.rubyonrails.org/routing.html

  # Defines the root path route ("/")
  # root "articles#index"
end
Lastly, the second command generates a default GraphQL controller, app/controllers/graphql_controller.rb.
Now, app directory looks like:
app
├── controllers
│   ├── application_controller.rb
│   ├── concerns
│   └── graphql_controller.rb
├── graphql
│   ├── mini_blog_schema.rb
│   ├── mutations
│   │   └── base_mutation.rb
│   └── types
│       ├── base_argument.rb
│       ├── base_connection.rb
│       ├── base_edge.rb
│       ├── base_enum.rb
│       ├── base_field.rb
│       ├── base_input_object.rb
│       ├── base_interface.rb
│       ├── base_object.rb
│       ├── base_scalar.rb
│       ├── base_union.rb
│       ├── mutation_type.rb
│       ├── node_type.rb
│       └── query_type.rb
└── models
    ├── application_record.rb
    └── concerns
Try How GraphQL Looks Like
For now, GraphQL has started working with the minimal setting. The GraphQL gem’s generator already created a very simple API. We can test that.
To test GraphQL, we need a GraphQL client. Previously, Graphiql gem (notice, the name has “i” before ql) was often installed along with GraphQL Ruby gem. However, once the Rails 7 app is configured as API only server, adding UI became not easy. Besides, many free-to-use GraphQL clients are out there as mentioned at the beginning.
Among those desktop apps, below might be the choice.
- GraphiQL https://github.com/skevy/graphiql-app
- Altair https://altairgraphql.dev/
- Insomnia https://insomnia.rest/
This memo is going to use GraphiQL desktop app. If you are on MacOS and have brew, try below to install the app.
$ brew install --cask graphiql
If you have other OS, you can install the desktop app by npm command as well. Additional installations are on the GitHub repo.
When the GraphiQL window is firstly opened, it should look like this:
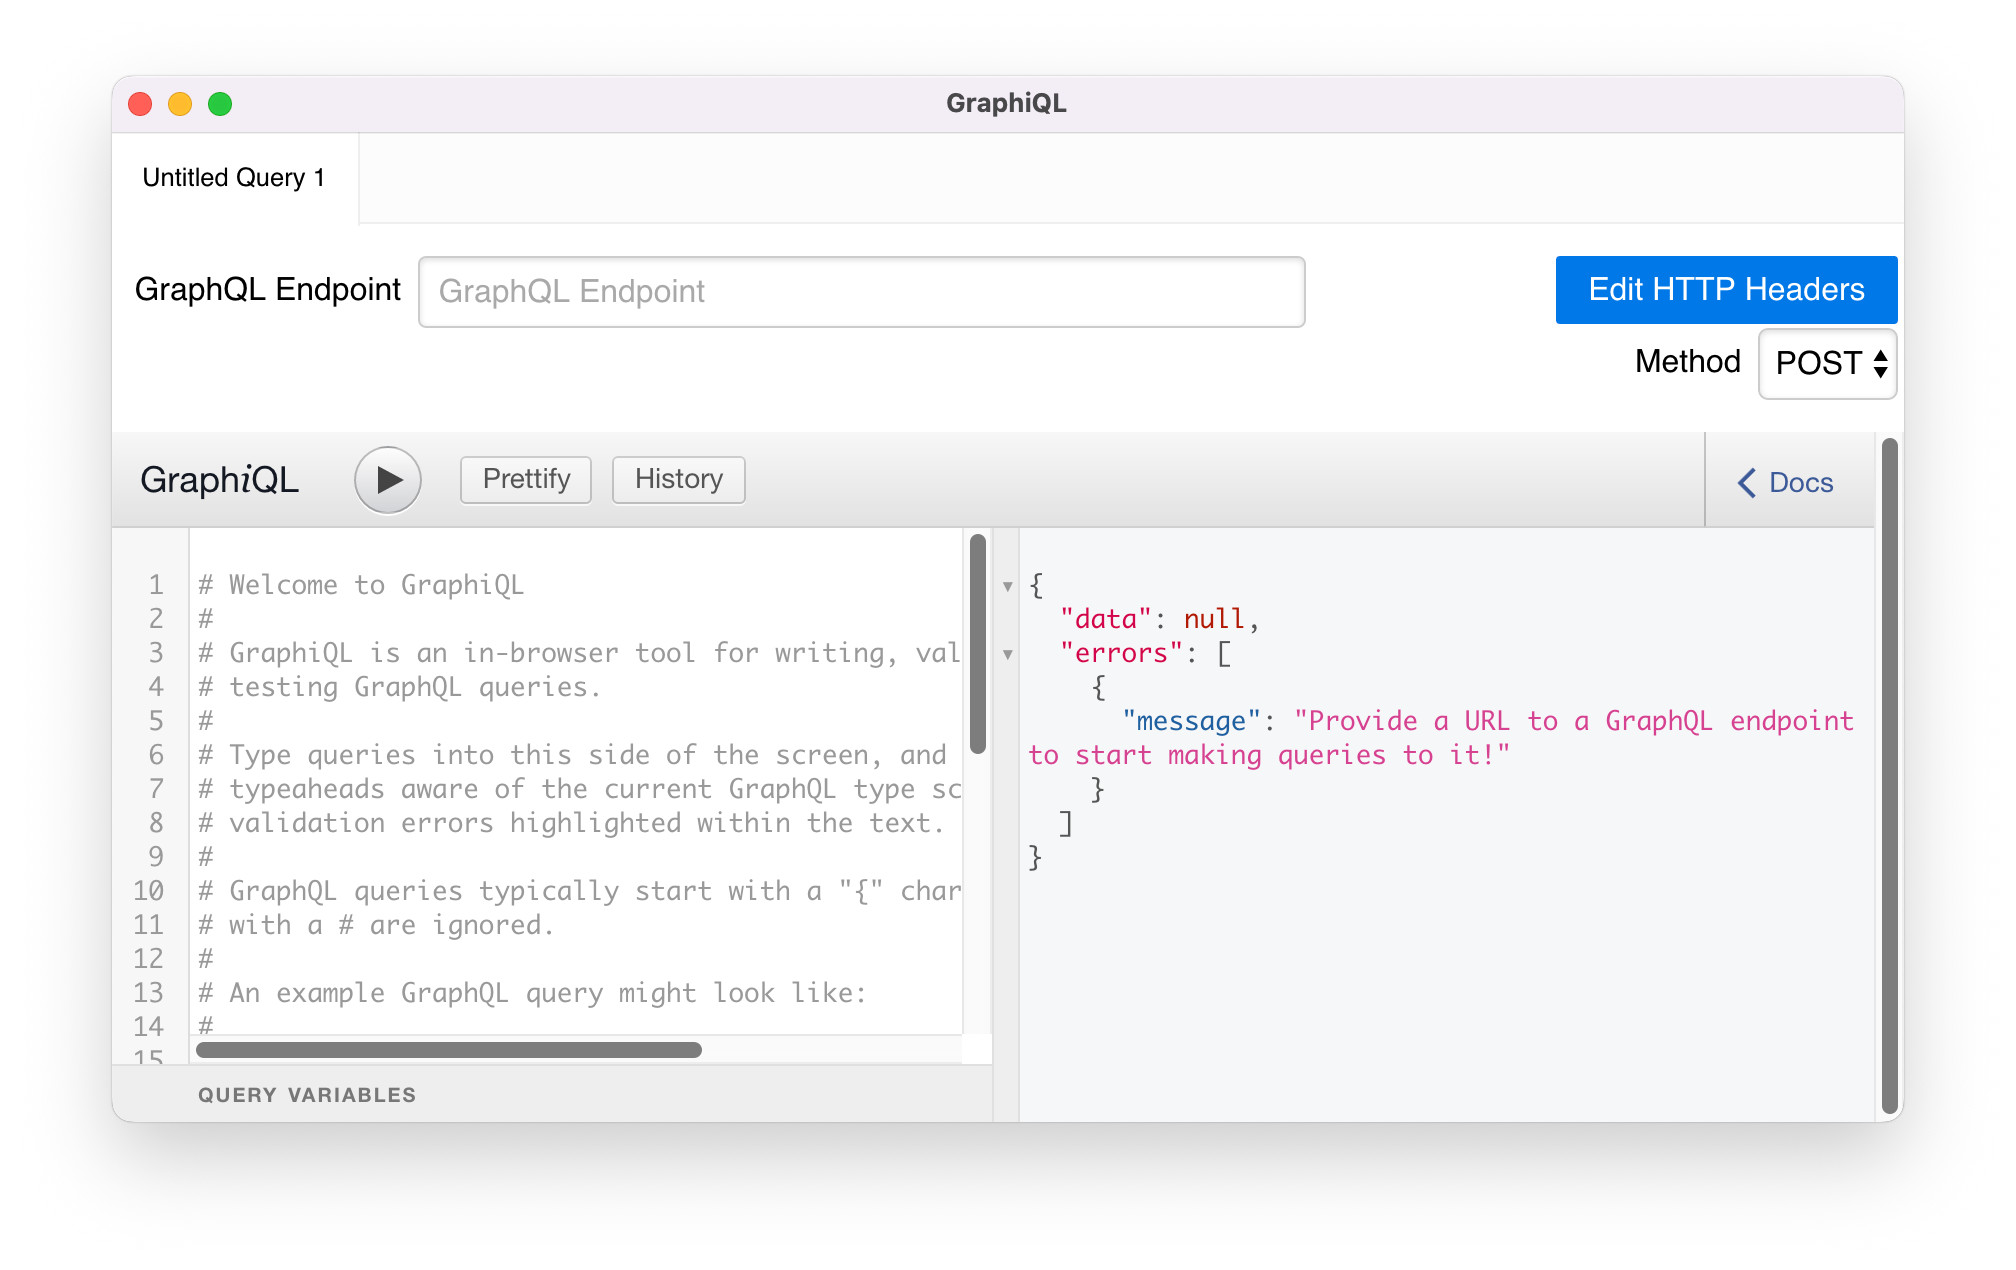
Input http://localhost:3000/graphql in the GraphQL Endpoint field, which is defined in config/routes.rb
Also, check the Method choice. It is defined in config/routes.rb as POST.
Then, GraphiQL app connects to Rails and pulls the schema defined in the app/graphql/types/query_type.rb
and app/graphql/types/mutation_type.rb.
Those schemas show up when “< DOCS” button on the right upper area of GraphiQL window is clicked.
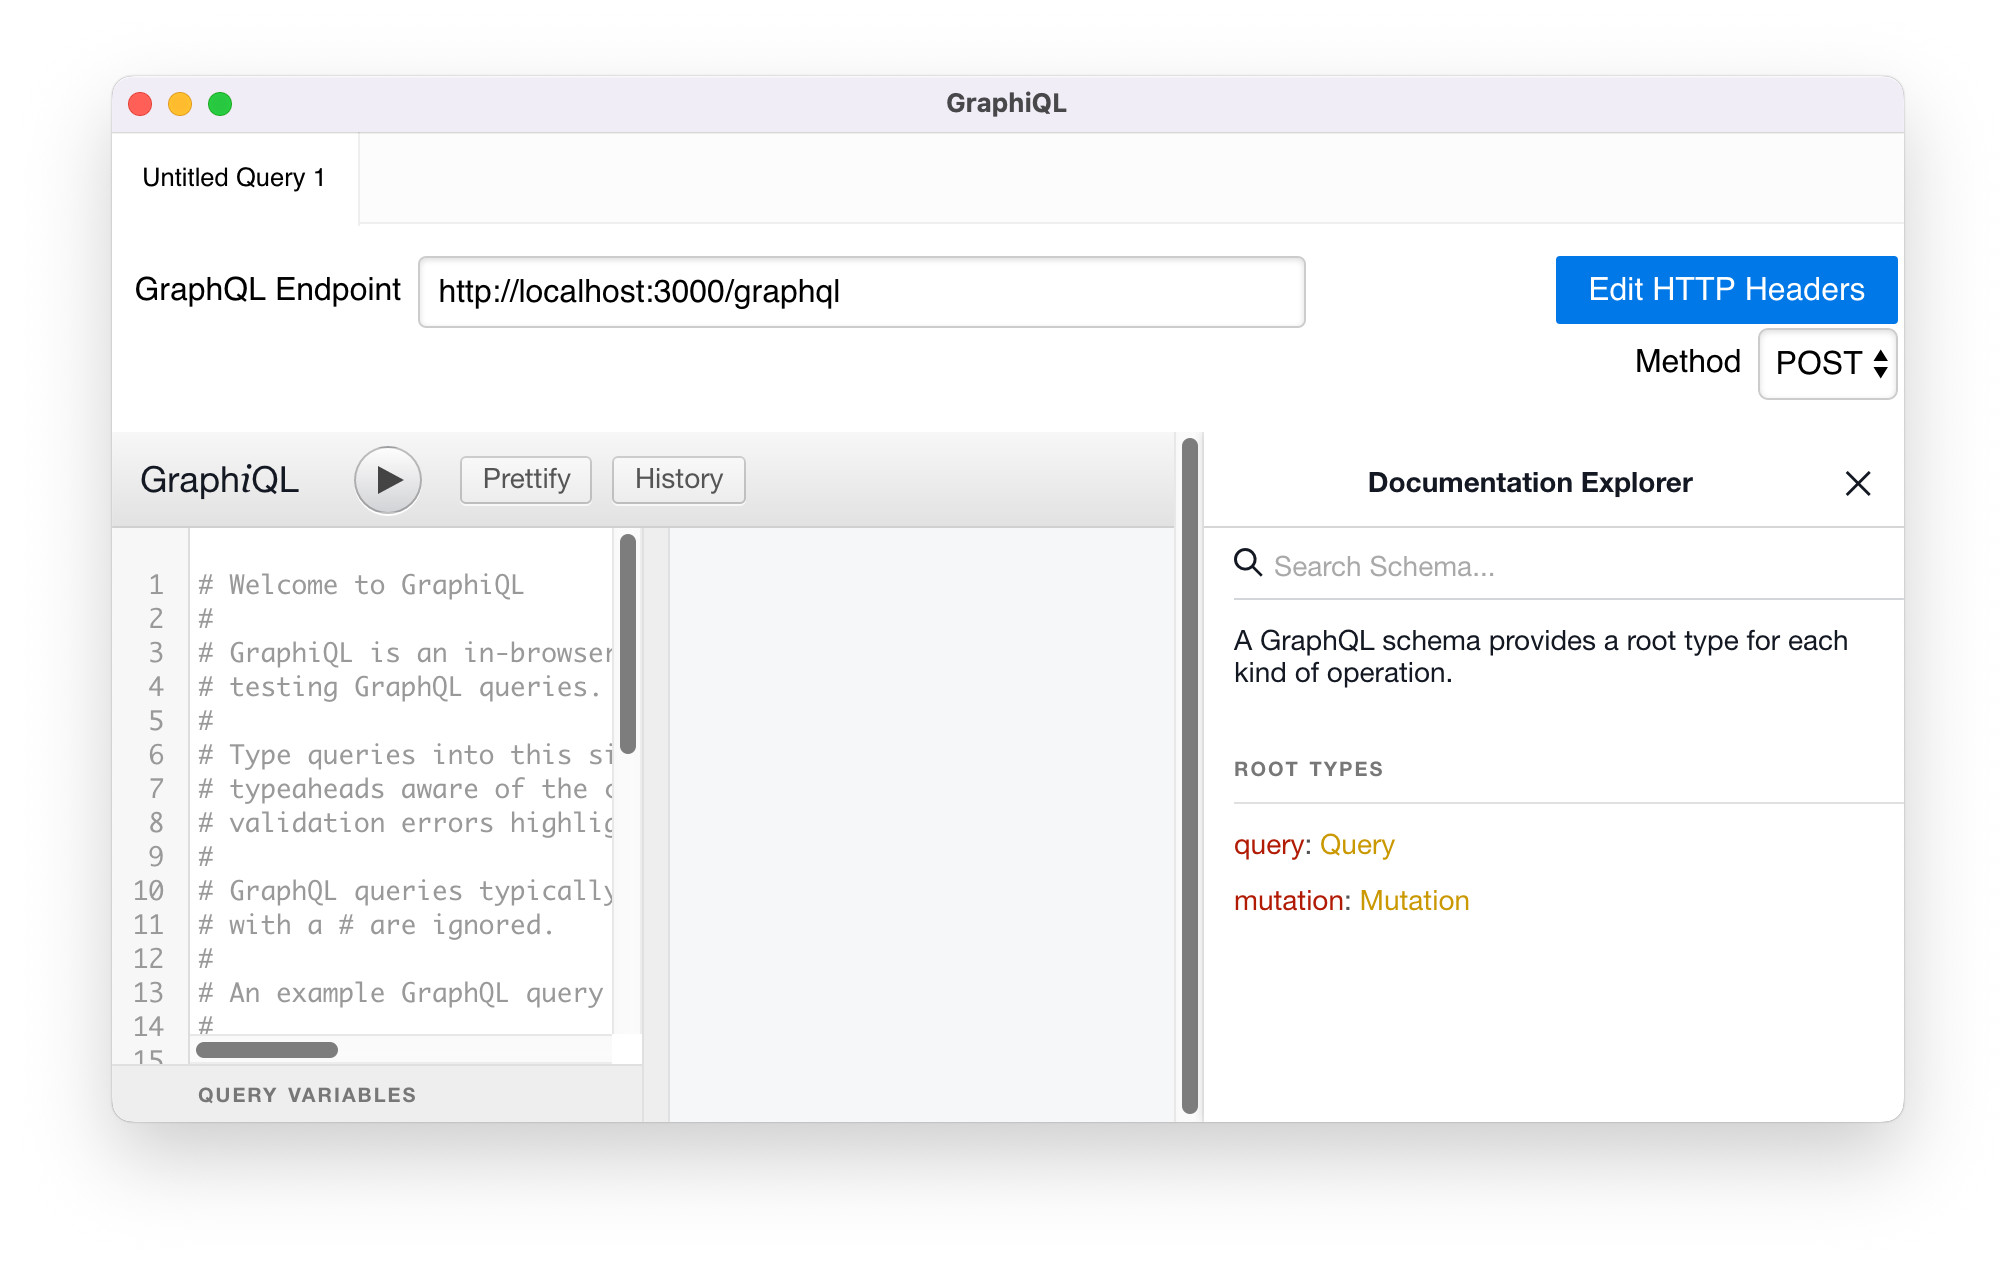
Both Query and Mutation schemas are displayed when the links get clicked.
Let’s make a query to testField. On the leftmost pane, input GraphQL query.
{
  testField
}
Hit the right arrow button above the query input pane.
The result is on the center pane.
The message of “Hello World!” is from app/graphql/types/query_type.rb file.
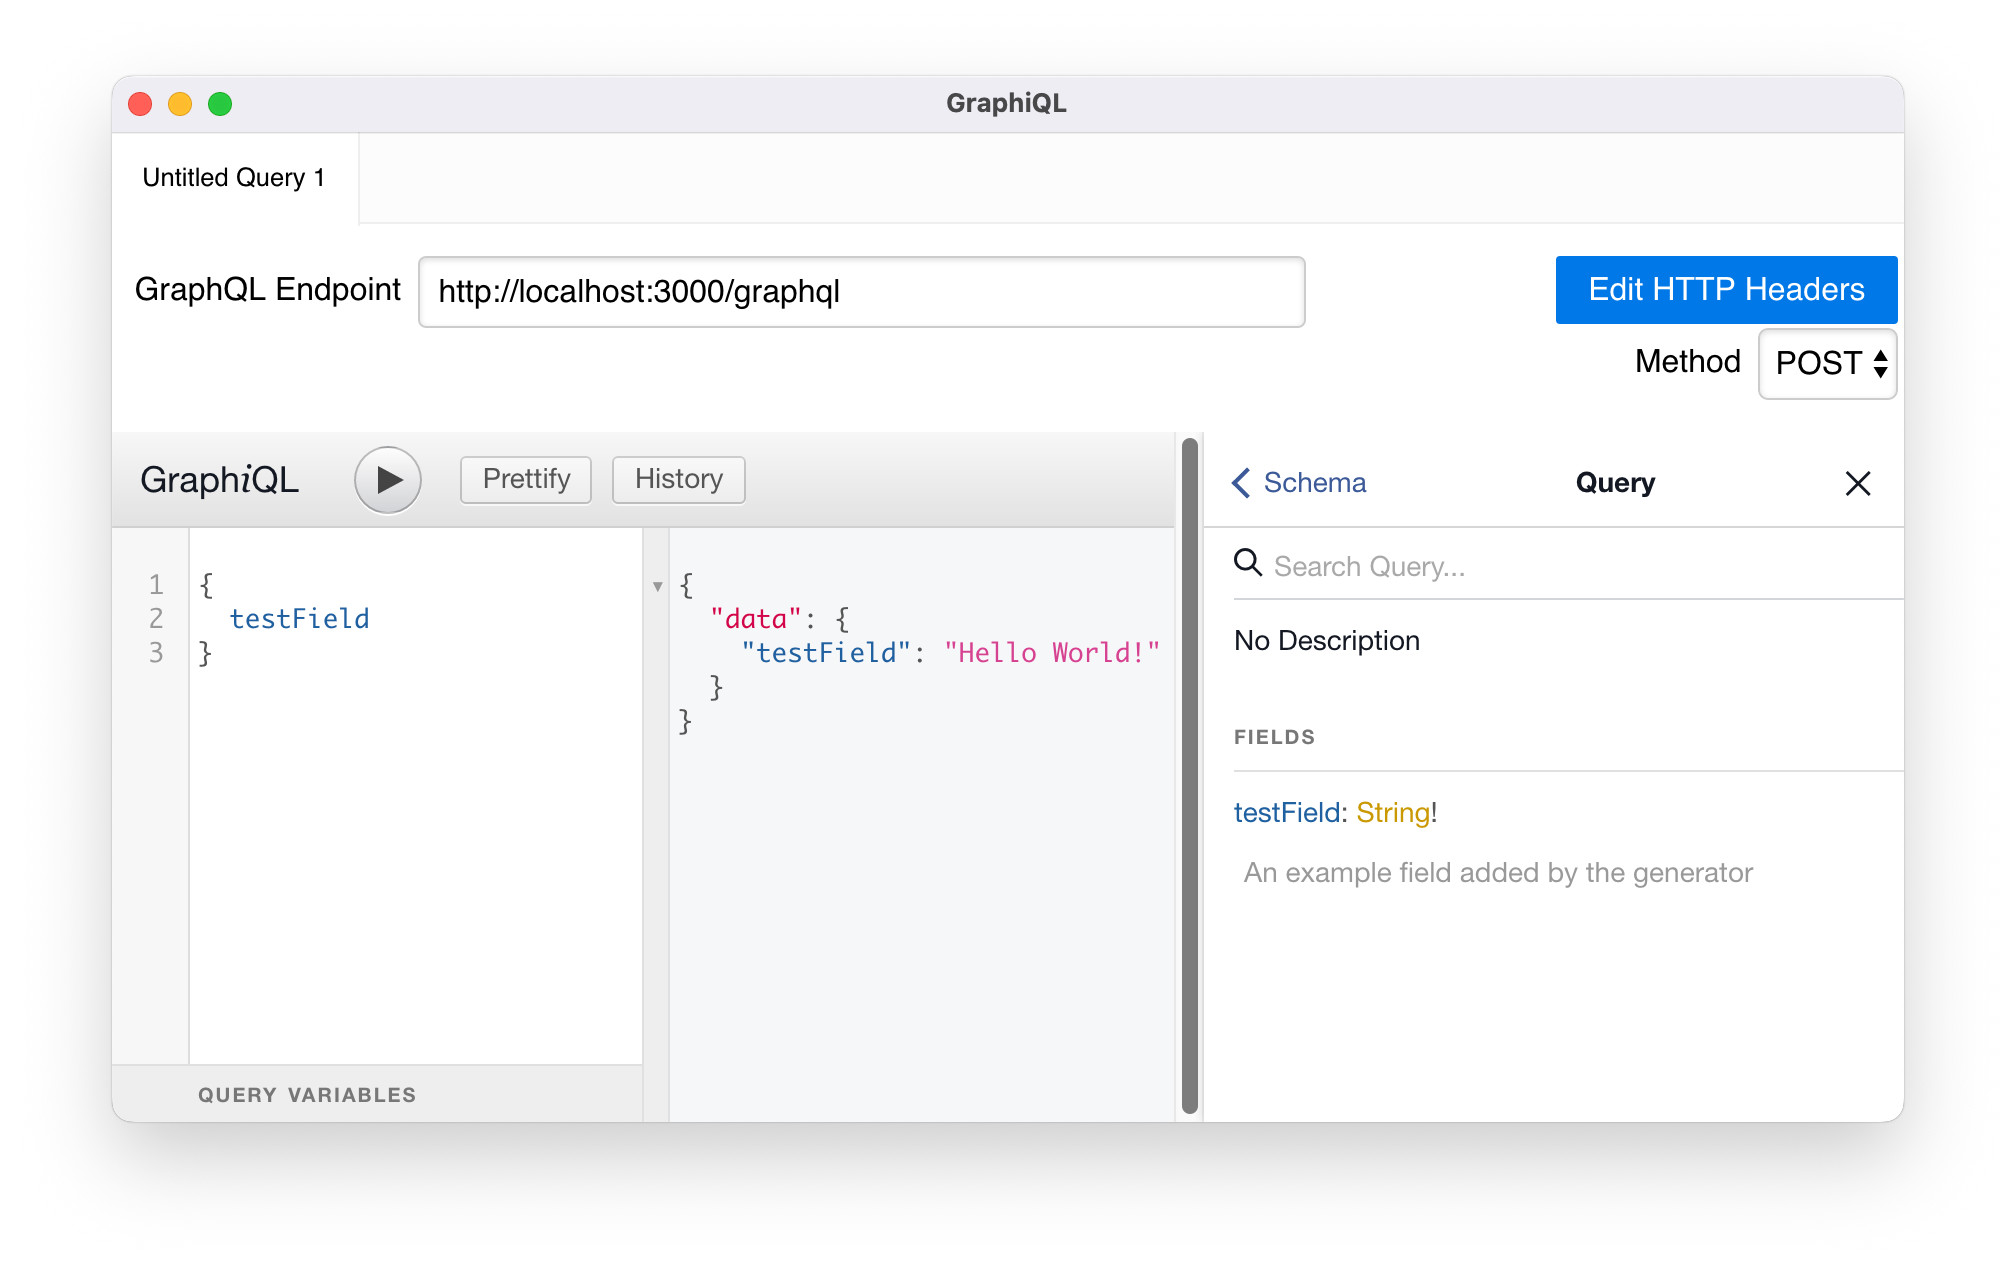
The mutation query can be sent, however, nothing changes since all are static just a test implementation.
Create Models and GraphQL Types
GraphQL itself is independent from the active record world. However, API connects to a database to retrieve or update resources almost always. On Ruby on Rails, creating an active record model is the way to connect to the database.
Well, a GraphQL type is the first? Or, an active record model should come before the GraphQL type? The GraphQL generator can create a type without a model definition. But, certainly, the type definition is almost empty. When the active record model exists already, GraphQL generator looks at the database schema and generates the type. By this, we will get a usable GraphQL type definition.
Define Models
Let’s imagine we will create a blog site. The minimum models would be users and posts whose relation is: a user has multiple posts. The user’s email should be unique so that the same email user won’t be created more than once.
The first thing is to generate user and post models as in below:
$ rails g model User email:string:uniq first_name:string last_name:string
$ rails g model Post user:references title:string{50} content:text
We want to add some more constraints to models. The user model’s email is implicitly non-null since it is an indexed unique value. However, for the graphql generator, it’s better to have non-null constraint explicitly. Additionally, we want post model’s title and content to be non-null fields also. No need to say, we need migrations.
$ rails g migration ChangeEmailNullOnUsers
$ rails g migration ChangeTitleContentNullOnPosts
Then, edit migration files:
#  db/migrate/[DATE TIME]_change_email_null_on_users.rb
class ChangeEmailNullOnUsers < ActiveRecord::Migration[7.0]
  def change
    change_column_null :users, :email, false
  end
end

#  db/migrate/[DATE TIME]_change_title_content_null_on_posts.rb
class ChangeTitleContentNullOnPosts < ActiveRecord::Migration[7.0]
  def change
    change_column_null :posts, :title, false
    change_column_null :posts, :content, false
  end
end
Create tables on the sqlite3 database.
$ rails db:create db:migrate
We should update models as well.
Edit app/models/user.rb to add a has_many association and uniqueness validation.
# app/models/user.rb
class User < ApplicationRecord
  has_many :posts, dependent: :destroy

  validates :email, uniqueness: true
end
Edit app/models/post.rb to add presence validations.
# app/models/post.rb
class Post < ApplicationRecord
  belongs_to :user

  validates :title, presence: true
  validates :content, presence: true
end
The model definitions are ready. It’s time to add some seed data, so that we can see some results.
# db/seeds.rb
user1 = User.create(
  email: "john.doe@example.com",
  first_name: "John",
  last_name: "Doe"
)

user2 = User.create(
  email: "jane.smith@example.com",
  first_name: "Jane",
  last_name: "Smith"
)

Post.create(
  [{
     user: user1,
     title: "Accidentally, I created a Rails app!",
     content: "My days are this, that and blah. Wait! I accidentally created a Rails app!!"
   },
   {
     user: user2,
     title: "Blogging",
     content: "I like blogging. It's fun. One day, I started writing a blog post..."
   },
   {
     user: user2,
     title: "Spring!",
     content: "It's not about a web framework here. I'm talking about a season. Yes, Spring!"
   }
  ]
)
Run the command below to add seed data to the database.
$ rails db:seed
To check above worked correctly, Rails console is one of ways to test it.
$ rails c
Loading development environment (Rails 7.0.4.2)
irb(main):001:0> User.all
...(user query result here)...
irb(main):002:0> Post.all
...(post query result here)...
...
Generate GraphQL Types
For now, active record models are ready. The next step is to generate GraphQL types. Run the command below.
$ rails g graphql:object user
$ rails g graphql:object post
The generator captures the database schema definition in db/schema.rb to create user and post types. Mostly, we can use generated types as those are.
The generated user_type.rb and post_type.rb look like this:
# app/graphql/types/user_type.rb
module Types
  class UserType < Types::BaseObject
    field :id, ID, null: false
    field :email, String, null: false
    field :first_name, String, null: true
    field :last_name, String, null: true
    field :created_at, GraphQL::Types::ISO8601DateTime, null: false
    field :updated_at, GraphQL::Types::ISO8601DateTime, null: false
  end
end
# app/graphql/types/post_type.rb
module Types
  class PostType < Types::BaseObject
    field :id, ID, null: false
    field :user_id, Integer, null: false
    field :title, String, null: false
    field :content, String, null: false
    field :created_at, GraphQL::Types::ISO8601DateTime, null: false
    field :updated_at, GraphQL::Types::ISO8601DateTime, null: false
  end
end
Make GraphQL Queries
So far, we have some seed data in the database. The next step is to make GraphQL queries.
GraphQL query schema is defined in app/graphql/types/query_type.rb, which has been generated when GraphQL Ruby gem was installed.
As we see “testField” in the above section, all query definitions should be in the query_type.rb.
GraphQL examples out there often write every query implementation in the query_type.rb. It’s OK if the API is as simple as examples. However, that might end up in adding bunch of methods in a single file in an actual application. A concern is, the code will have poor readability and/or maintainability. As far as I searched online, it looks no decisive solution exists for this. What I found is a GraphQL Ruby’s Resolver (https://graphql-ruby.org/fields/resolvers.html). Although GraphQL Ruby team wants people to avoid Resolver, it is a good way to decouple each type’s query implementation. For that reason, the Resolver is used here.
Define Resolvers
Queries to be implemented are:
- a single user query, parameter: user id
- all users query, parameter: none
- multiple posts query, parameter: none – all posts, user id – one user’s all posts
The implementations of resolvers for those queries are defined:
# app/graphql/resolvers/user_resolver.rb
module Resolvers
  class UserResolver < GraphQL::Schema::Resolver
    type Types::UserType, null: false

    argument :id, Int, required: true

    def resolve(id:)
      User.find(id)
    end
  end
end
# app/graphql/resolvers/user_collection_resolver.rb
module Resolvers
  class UserCollectionResolver < GraphQL::Schema::Resolver
    type [Types::UserType], null: false

    def resolve(**kwargs)
      User.all
    end
  end
end
# app/graphql/resolvers/post_collection_resolver.rb
module Resolvers
  class PostCollectionResolver < GraphQL::Schema::Resolver
    type [Types::PostType], null: false

    argument :user_id, Int, required: false

    def resolve(**kwargs)
      if kwargs[:user_id]
        Post.where(user: kwargs[:user_id]).all
      else
        Post.all
      end
    end
  end
end
Above three resolvers should be referenced in the query_type.rb. Now query_type.rb becomes below:
# app/graphql/types/query_type.rb
module Types
  class QueryType < Types::BaseObject
    # Add `node(id: ID!) and `nodes(ids: [ID!]!)`
    include GraphQL::Types::Relay::HasNodeField
    include GraphQL::Types::Relay::HasNodesField

    # Add root-level fields here.
    # They will be entry points for queries on your schema.
    field :user, resolver: Resolvers::UserResolver
    field :users, resolver: Resolvers::UserCollectionResolver
    field :posts, resolver: Resolvers::PostCollectionResolver
  end
end
Queries on GraphiQL
We are ready to test newly defined queries. On GraphiQL desktop app, Command + w will delete the tab and initialize UI. Input http://localhost:3000/graphql in the Endpoint text field and hit the return key. The updated schema is pulled, which is displayed in the Docs pane.
To get all users, the query is simple.
{
	users {
    id
    email
    firstName
    lastName
  }
}
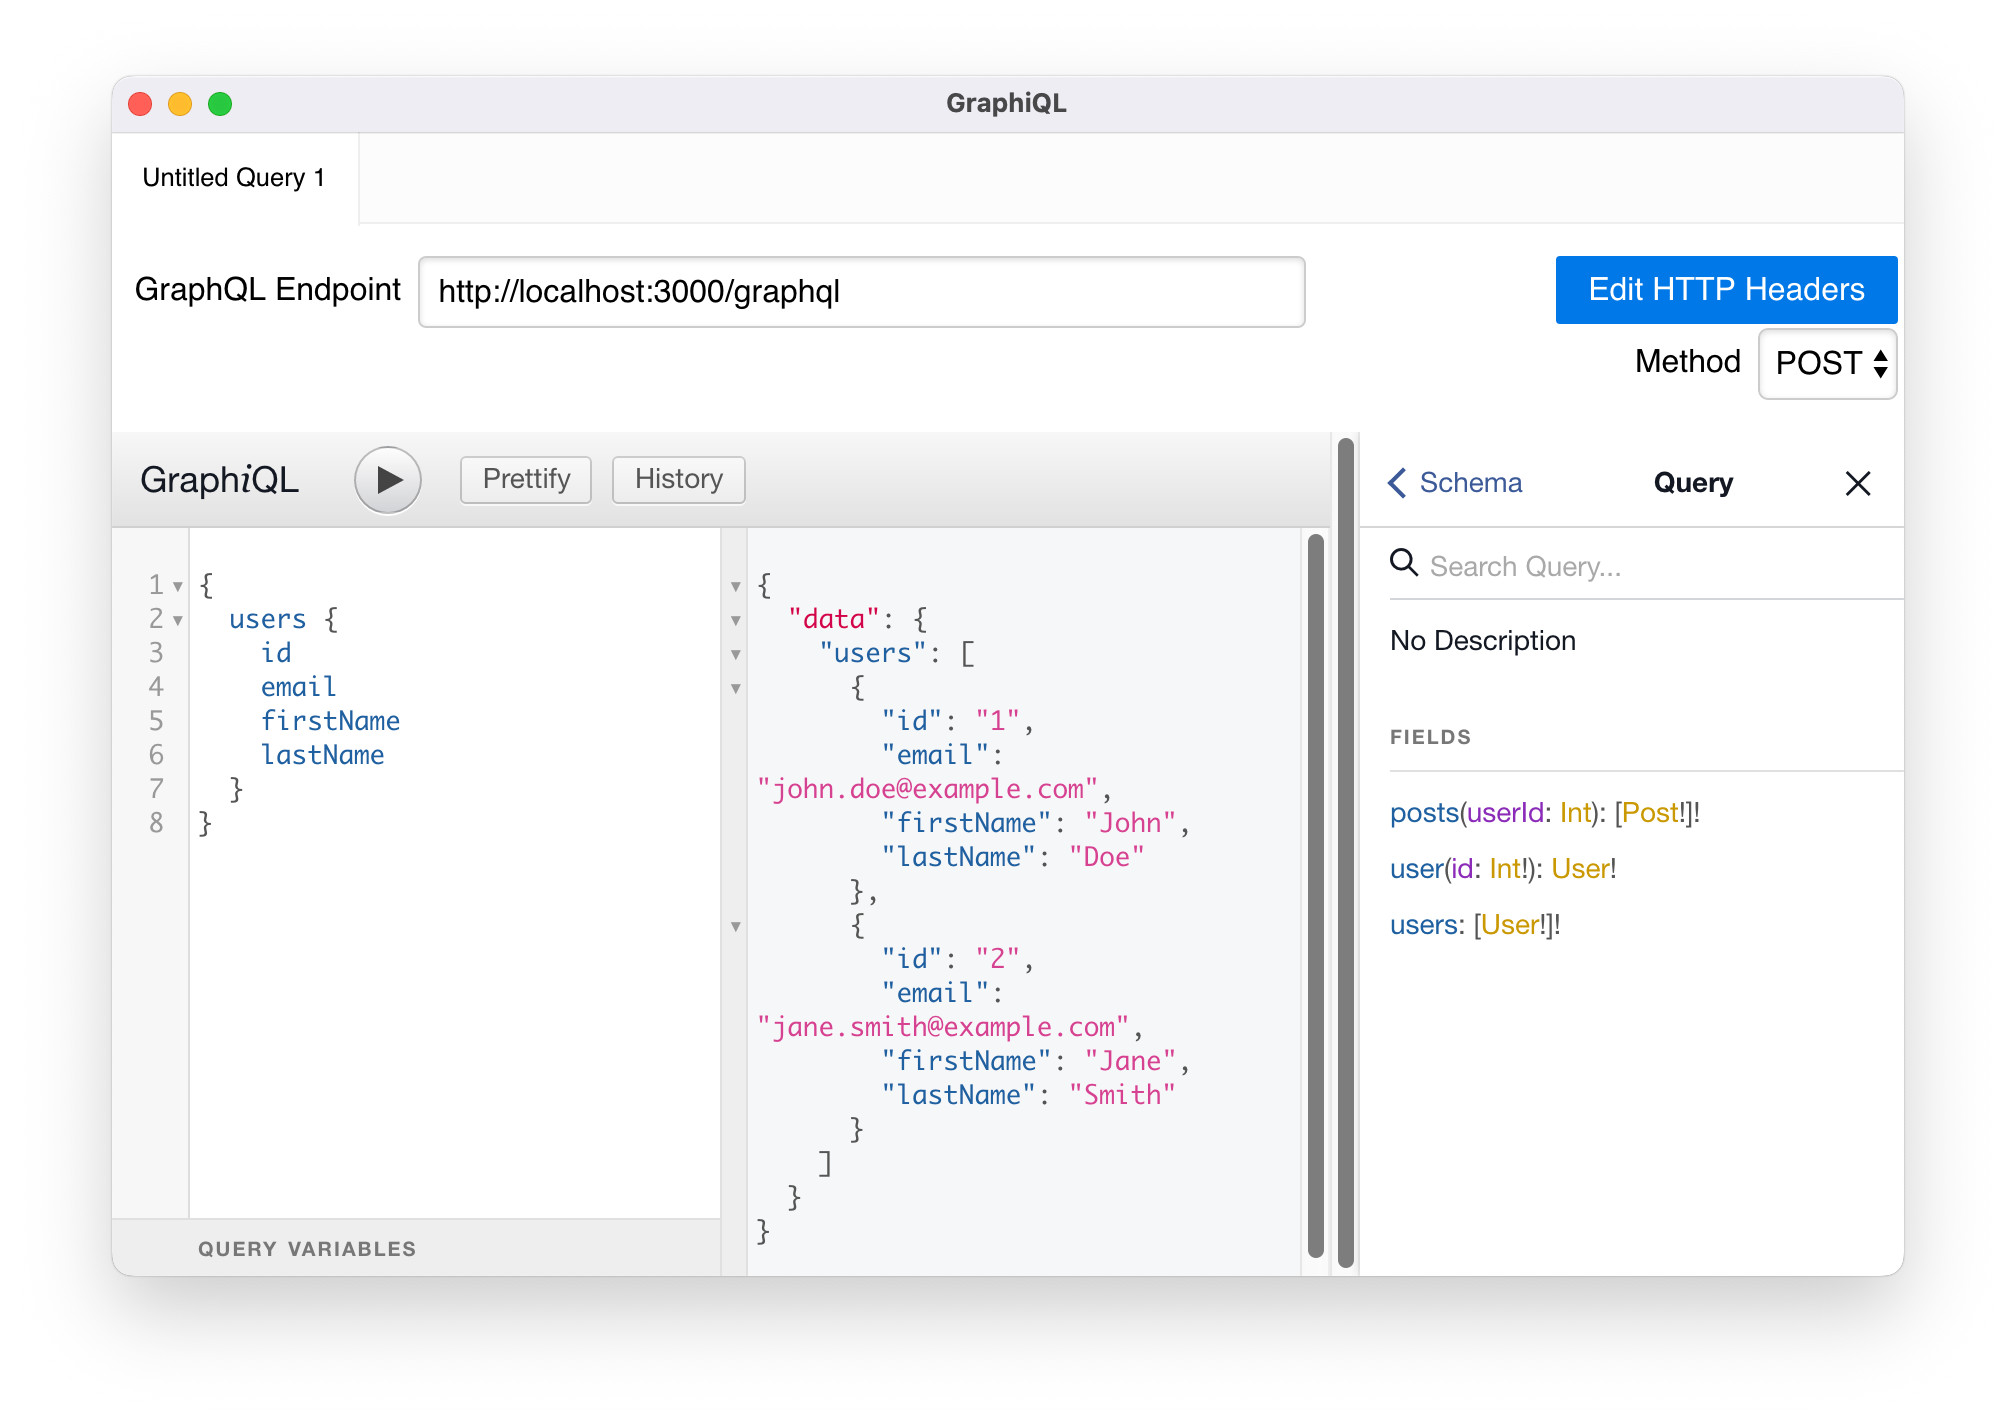
To get one user using user’s id, the query needs a parameter. The simple form is to write id in the query.
{
  user(id: 1) {
    id
    email
  }
}
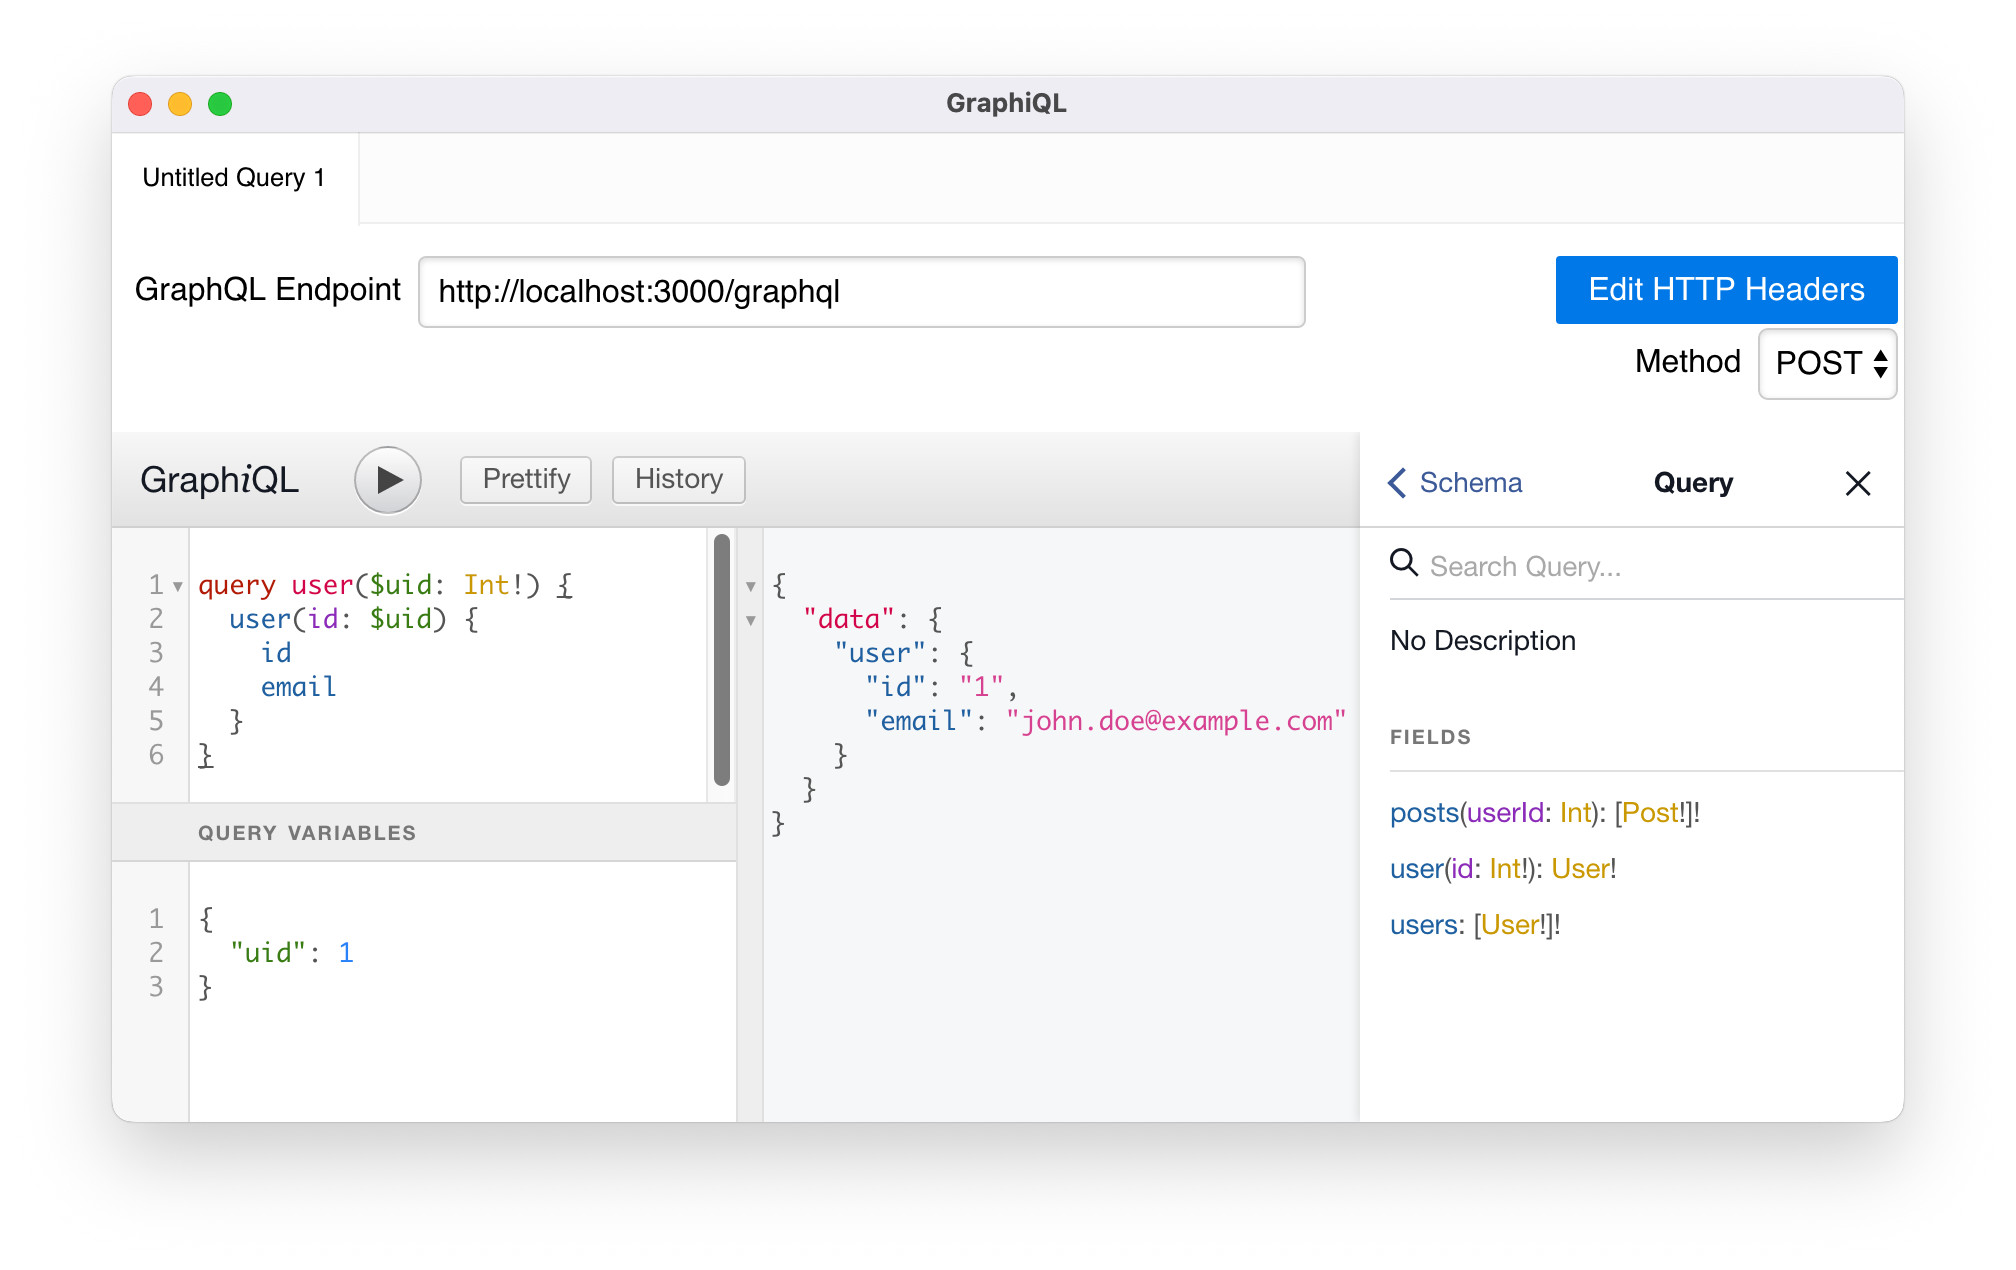
Another form is to use a query variable. In this case, the query needs additional info about the variable.
query user($uid: Int!) {
  user(id: $uid) {
    id
    email
  }
}
Then, pass the variable in the query variables pane.
{
  "uid": 1
}
For post queries, with/without user id are defined. If the user id is not provided, the query gets all posts.
{
  posts {
    id
    userId
    title
    content
  }
}
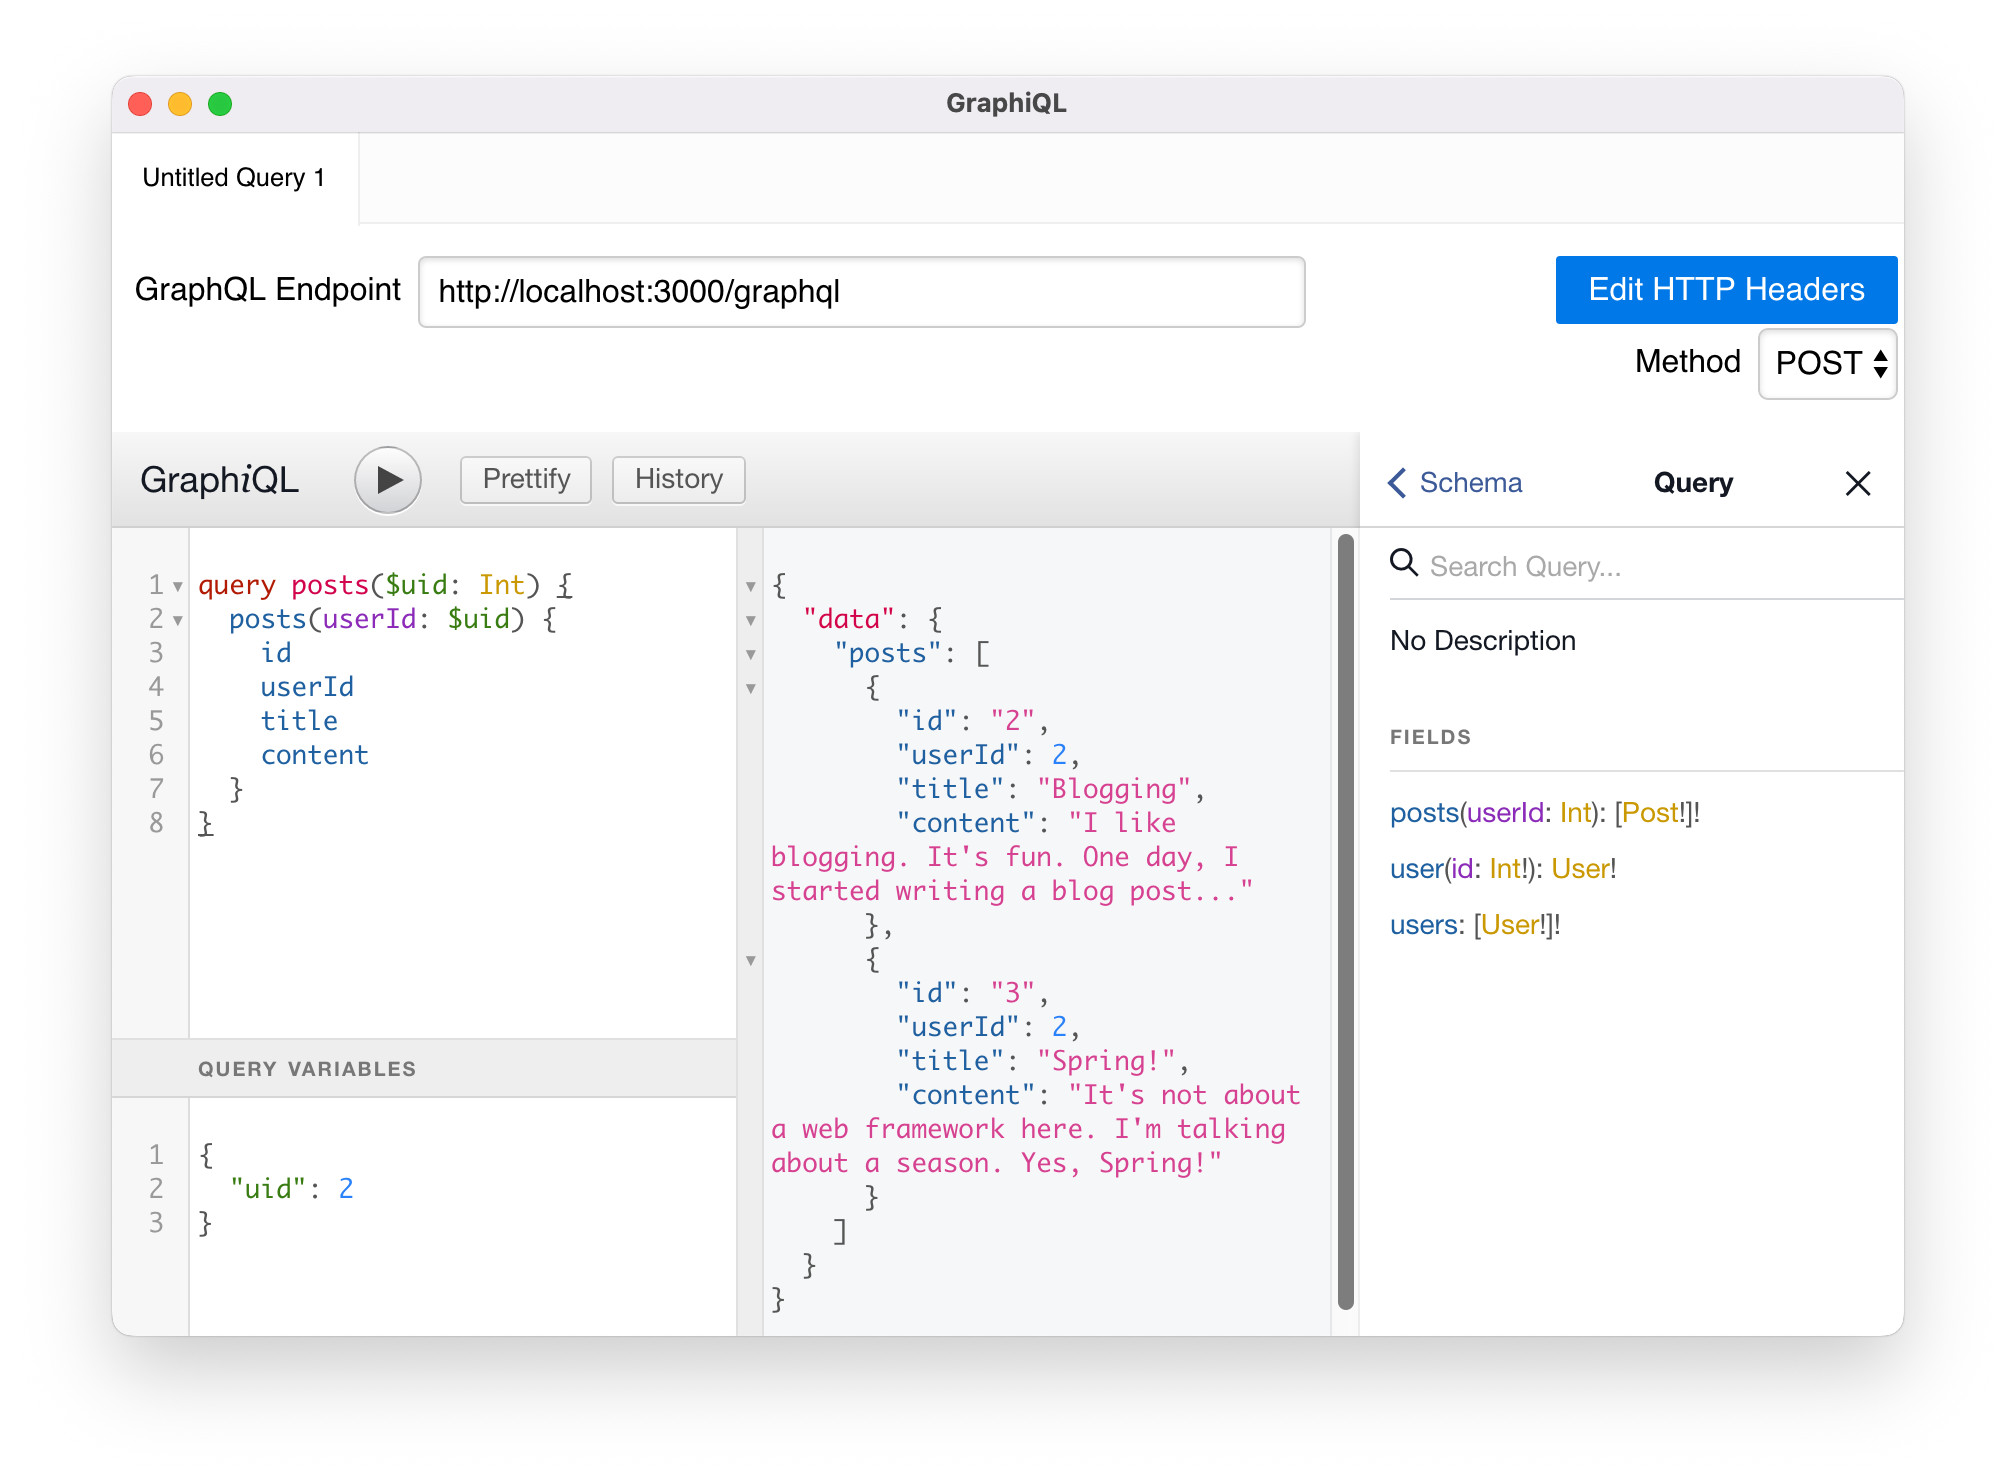
If the user id is given, the query retrieves the specified user’s all posts.
query posts($uid: Int) {
  posts(userId: $uid) {
    id
    userId
    title
    content
  }
}
{
  "uid": 2
}
Create a New Resource by Mutation
GraphQL calls “mutation” to create/update/delete operations over resources. Like queries, mutations need a definition for each types.
User and Post Mutations
GraphQL Ruby provides a mutation generator. It still needs to edit, however, the generator cuts down the amount of coding. Run the command below to create user and post mutation definitions:
$ rails g graphql:mutation_create user
$ rails g graphql:mutation_create post
After editing two mutations, those look like below:
# app/graphql/mutations/user_create.rb
module Mutations
  class UserCreate < BaseMutation
    description "Creates a new user"

    field :user, Types::UserType, null: false

    argument :email, String, required: true
    argument :first_name, String, required: false
    argument :last_name, String, required: false

    def resolve(**kwargs)
      user = ::User.new(**kwargs)
      raise GraphQL::ExecutionError.new "Error creating user", extensions: user.errors.to_hash unless user.save

      { user: user }
    end
  end
end
# app/graphql/mutations/post_create.rb
module Mutations
  class PostCreate < BaseMutation
    description "Creates a new post"

    field :post, Types::PostType, null: false

    argument :user_id, Integer, required: true
    argument :title, String, required: true
    argument :content, String, required: true

    def resolve(**kwargs)
      post = ::Post.new(**kwargs)
      raise GraphQL::ExecutionError.new "Error creating post", extensions: post.errors.to_hash unless post.save

      { post: post }
    end
  end
end
GraphQL Ruby generator has already updated app/graphql/types/mutation_type.rb, so we don’t need to edit this file.
For now, mutation type definition is like this:
# app/graphql/types/mutation_type.rb
module Types
  class MutationType < Types::BaseObject
    field :post_create, mutation: Mutations::PostCreate
    field :user_create, mutation: Mutations::UserCreate
  end
end
Mutations on GraphiQL
Everything is ready. It’s time to create a user and post. The mutations look like below:
mutation {
  userCreate(input: {
    email: "alice.jones@example.com",
    firstName: "Alice",
    lastName: "Jones"
  }) {
    user {
      id
      email
    }
  }
}
mutation {
  postCreate(input: {
    userId: 3,
    title: "Hello World!",
    content: "Hey, I made it to this world!"
  }) {
    post {
      id
      userId
      title
      content
    }
  }
}
After executing create user and post mutations, check the result by GraphQL queries we tried above. A new user, posts should be created. The Rails console is another way to test newly added user and post.