Published: Oct 30, 2019
This post is going to be very different from what I write here. The content is a memo how I create a GCP (Google Cloud Platform) instance for Deep Learning. While I study algorithm stuff, I also have been studying Deep Learning. In my early days, I tried to train my Deep Learning model only on a laptop. My laptop is 2012 model MacBook Pro, so I would say it is reasonably fast. However, when it comes to Deep Learning, the training was quite painful on the such machine. Often, I ran the training over night to get a disappointed result. Still, I didn’t use any of pricey cloud environment since it was my personal study unrelated to my day job. I wanted to save money.
A couple of years later, I took a fast.ai course to study Deep Learning again. During an introductory session, the instructor said “Pay money. That makes the training easy.” Yes, that’s right. Google Colab is fantastic, but it won’t save the instance I create. Every time, I need to upload data, install libraries, start training from the beginning, etc. Since then, I started using GCP for my Deep Learning study.
In the introductory session, the instructor mentioned 4 or 5 platforms. The reason I chose GCP is: it provides a command line tool and allows to ssh to the instance. This style is something I’m familiar with from my past experience on AWS. The cost should not be so expensive as far as the instance is stopped when not using.
I once made a painful mistake while I was studying Kubernetes. I interrupted my study for a reason, just a chore, then totally forgot some instances were up and running. After a week or so, I realized I left those running…ouch! I had to pay some hundred bucks for nothing.
The fast.ai document “GCP” is very helpful. Just following the document, people can easily get their instance running on GCP. One caveat is the document has a fast.ai specific part. For example, fast.ai library is written on top of PyTorch, so the image is pytorch-xxx. Now, I wanted to use TensorFlow, so I should change some of parameters. Additionally, I wanted to figure out what those parameters mean. That’s why I decided to write this memo. This blog post includes resources what I found after some research.
Get Started GCP
I’m a Google platform user since Google App Engine (GAE) was firstly released. The account is the same as GAE, so I didn’t need to create my account for GCP. However, if this is the very first time, you need to create an account. This should be fairly easy. Go to https://cloud.google.com and click “Get started for free” button. Again, if this is the very first time to use Google platform, you will get $300 of an initial credit. In my case, unfortunately, the sweet treat of 300 bucks were disappeared, probably, far back. Even though this is the first time to use GCP (after renamed to it), no free credit to old users.
Don’t forget or postpone to add your credit card to the account. Whether the free credit is there or not, GCP requires the billing setup. Go to https://console.cloud.google.com/billing and create the billing account.
Install or Update Google CLI (SDK)
If you don’t like a command line tool, I believe you can do all using web interface. If you go to https://console.cloud.google.com/, you see menus.
I like the command line tool, so I’m going to write about CLI.
The first step is to install Google CLI or update if already installed. The CLI is called SDK and whose installation document resides at https://cloud.google.com/sdk/docs/quickstarts. Since I’m a macOS user, I followed https://cloud.google.com/sdk/docs/quickstart-macos. The document says it needs Python 2.7, but I didn’t need Python 2.7. The latest SDK version is 269.0.0 as of the end of October 2019. The document says an experimental support of Python 3.4+ is from version 206.0.0 which is much old. In my guess, the document has not been updated for long.
If you have SDK installed already, update it by:
$ gcloud components update
Setting up SDK
The next step is to set up SDK. The document to look at is https://cloud.google.com/sdk/docs/initializing. Type the command below:
$ gcloud init
This command does:
- create/re-initialize/switch configuration
- login authentication
- create/switch project
- set region/zone
The configuration has four types of information: zone, account, project, reporting. You should set parameters except reporting during the configuration. Setting up goes interactive on command line.
Among three parameters, the region/zone choice may confuse you. Have a look at the document https://cloud.google.com/compute/docs/regions-zones/. The document describes an actual location and detailed features. In general, it’s good to choose a geologically close region in terms of a network latency. However, in a real situation, it may be good to choose not so busy or very powerful region. You’d better to try some regions and test in what region the instance starts faster.
Another important point to choose the zone is GPU support. For Deep Learning, definitely, you should use GPU. If you look at the Regions and Zones document, it’s clear what zones support GPUs.
Once the configuration is done, the command shows details in the end. The command below also shows the current configuration.
$ gcloud config list
Create an Instance
To create an instance, a lot of options should be specified. To figure out what those should be, you need to look at multiple documents.
First, the command to create an instance starts from gcloud compute instances create ....
The command reference is: https://cloud.google.com/sdk/gcloud/reference/compute/instances/create.
The options to be specified are below.
-
Instance Name
As the command reference shows, at least one instance name must be provided. The name can be any as long as it satisfies the requirement described in the document, https://cloud.google.com/compute/docs/instances/custom-hostname-vm. The document says the name should be “matching the regular expression
[a-z]([-a-z0-9]*[a-z0-9])?”. Only one instance would be good enough, so only one instance name is good to go. The instance name is a hostname to ssh. -
Zone
This is a zone specified during the config setup.
-
Image Family
For a Machine Learning/Deep Learning purpose, GCP provides images which have packages/libraries frequently used in ML/DL. Look at the document https://cloud.google.com/ai-platform/deep-learning-vm/docs/images. Combinations of framework/version/processor are the differences of images. For example, I’m going to use TensorFlow 2.0 with GPU, my choice is
tf2-latest-gpu.To choose images for Deep Learning,
--image-project=deeplearning-platform-releaseoption should be specified as well. -
Machine Type
The detailed information about machine types is: https://cloud.google.com/compute/docs/machine-types. Deep Learning tends to need more memory. Probably,
n1-highmem-4orn1-highmem-8are the good choices. Also, look at the pricing document which one to choose: https://cloud.google.com/ml-engine/docs/pricing. The price per hour is $0.2368 forn1-highmem-4and $0.4736 forn1-highmem-8.Type the command below to check what machine types are available in your zone.
$ gcloud compute machine-types list --zones=ZONE -
Accelerator
Type the command below to see what accelerators are supported in what zones.
$ gcloud compute accelerator-types listAlso, check the pricing document, https://cloud.google.com/ml-engine/docs/pricing. A budget type NVIDIA_TESLA_K80 is $0.4500/hour, and more powerful type NVIDIA_TESLA_P4 costs $0.6000/hour.
To use NVIDIA accelerator,
--metadata="install-nvidia-driver=True"option should be specified as well. -
Boot Disk Size
To train the Deep Learning model, more data leads to better result. Given that,
200GBmay be a good size. Again, check the pricing document, https://cloud.google.com/compute/disks-image-pricing. Depends on the zones, the same disk size costs differently. -
Budget Type Setting
To save money,
--preemptibleis a nice option to have. The instance automatically shuts down after 24 hours. The details are in the document, https://cloud.google.com/preemptible-vms/. Downside is, the instance stops while using depending on how busy the host machine is. If your preemptible instance stops frequently, try a different zone.Another budget option is
--maintenance-policy=TERMINATE. The option defines the policy when the host machine goes maintenance. This choice isMIGRATEorTERMINATE. When--preemptibleis specified, the instance never migrates. But, it doesn’t harm to specifyTERMINATE.
Considering above, the budget type instance creation would become below.
The instance creation takes a while. When the prompt returns after typing the command above, go to GCP console, https://console.cloud.google.com/. You may need to choose the project whose name is the one you set during the configuration. Then, click the hamburger icon (navigation menu) on the top left, Compute Engine, VM instances. You’ll see your instance is running.

Don’t forget to stop the instance. To stop the instance, click three dots icon on the right side and choose Stop.
To use again, click the three dots icon and choose Start.
Alternatively, you can start/stop the instance from the command line.
# $INSTANCE_NAME is an INSTANCE_NAME environment variable
# which is set when above command gets run

$ gcloud compute instances start $INSTANCE_NAME
$ gcloud compute instances stop $INSTANCE_NAME
Use the Instance
Now, the instance is up an running. It’s time to use it. Since the image is for Deep Learning, it has a setting to start jupyter notebook when the instance is up. An easy way is to use ssh tunneling. Type the command below:
$ gcloud compute ssh jupyter@$INSTANCE_NAME -- -L 8080:localhost:8080
jupyter: default user name on the instance.$INSTANCE_NAME:INSTANCE_NAMEenvironment variable. The name is given when the instance is created.
If it is the first time to login to the instance, the command line tool asks a password to create ssh key.
The public and private keys are saved as
~/.ssh/google_compute_engine.pub and ~/.ssh/google_compute_engine on a local machine.
Once the ssh connection is established, you are logged in to the instance as a user jupyter.
At the same time, jupyter notebook is available to use on a local machine.
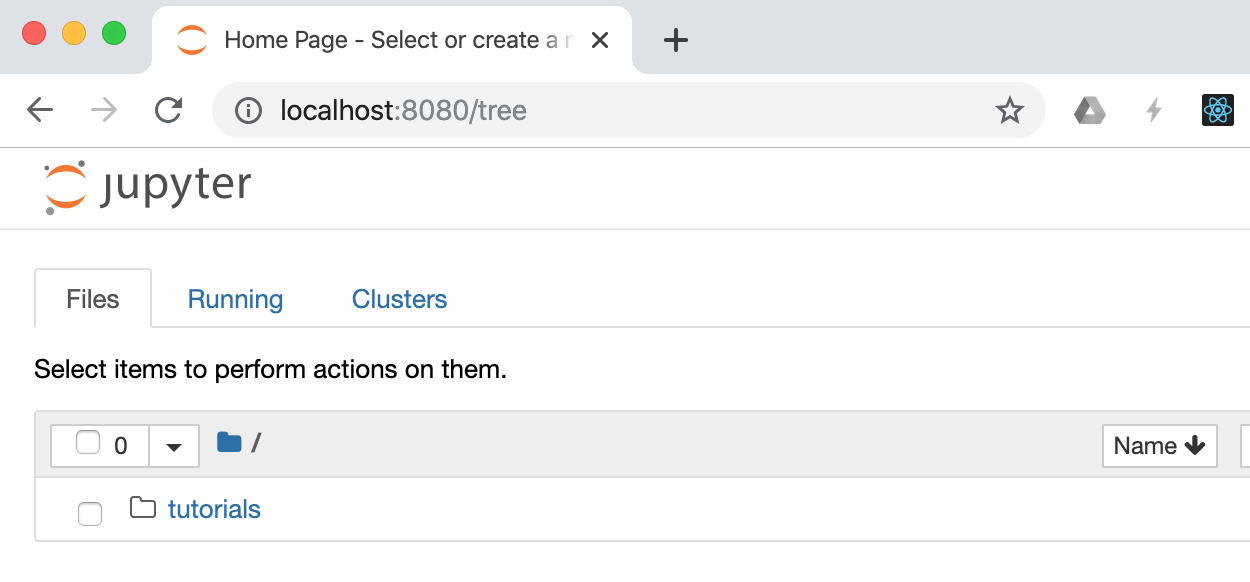
Go to the web browser and hit the URL, http://localhost:8080/tree.
The jupyter notebook below shows up.
Access Github Repositories
You may create a Deep Learning stuff only on jupyter notebook. However, it’s very convenient to have an access to Github repos. Setting up is as easy as you’ve done on a local machine, laptop whatever.
The set up starts from generating an ssh key pair. The good document is, “Generating a new SSH key and adding it to the ssh-agent”.
Click Linux tab since the instance is Debian Linux. Then, follow the instruction.
-
Generate a SSH Key on the instance
jupyter@my-tf2-instance:~$ ssh-keygen -t rsa -b 4096 -C "your_email@example.com" -
Start ssh-agent
jupyter@my-tf2-instance:~$ eval "$(ssh-agent -s)" -
Add ssh private key
jupyter@my-tf2-instance:~$ ssh-add ~/.ssh/id_rsa
Next is to add the generated ssh public key to your GitHub account. Have a look at the document, “Adding a new SSH key to your GitHub account”. Follow the instruction and add the public key created on the instance.
When the set up is finished, you can access GitHub repos from the instance like you do on your local machine.
For example, git clone ..., git pull etc.
Install Python3.7
The GCP instance comes with Python2.7 and 3.5. Python3.5 would work well. However, sometime, an environment setting specifies Python3.7. Rather than editing such setting, installing Python3.7 makes things easy.
A helpful explanation is among StackOverflow questions: “How do I install Python 3.7 in google cloud shell”.
Below is an excerpt from the answer (the version is updated).
# Install requirements
jupyter@my-tf2-instance:~$ sudo apt-get install -y build-essential checkinstall libreadline-gplv2-dev libncursesw5-dev libssl-dev libsqlite3-dev tk-dev libgdbm-dev libc6-dev libbz2-dev zlib1g-dev openssl libffi-dev python3-dev python3-setuptools wget

# Prepare to build
jupyter@my-tf2-instance:~$ mkdir /tmp/Python37
jupyter@my-tf2-instance:~$ cd /tmp/Python37

# Pull down Python 3.7, build, and install
jupyter@my-tf2-instance:~$ wget https://www.python.org/ftp/python/3.7.4/Python-3.7.4.tar.xz
jupyter@my-tf2-instance:~$ tar xvf Python-3.7.4.tar.xz
jupyter@my-tf2-instance:~$ cd /tmp/Python37/Python-3.7.4
jupyter@my-tf2-instance:~$ ./configure
jupyter@my-tf2-instance:~$ sudo make altinstall
Python3.7 should be installed under /usr/local/bin.
Now, three Pythons are installed in a single instance. So that three Pythons can be switched, it’s a good idea to install those as alternatives. The command below does that.
jupyter@my-tf2-instance:~$ sudo update-alternatives --install /usr/bin/python python /usr/bin/python2.7 2
jupyter@my-tf2-instance:~$ sudo update-alternatives --install /usr/bin/python python /usr/bin/python3.5 3
jupyter@my-tf2-instance:~$ sudo update-alternatives --install /usr/bin/python python /usr/local/bin/python3.7 4

jupyter@my-tf2-instance:~$ sudo update-alternatives --config python
There are 3 choices for the alternative python (providing /usr/bin/python).

  Selection    Path                      Priority   Status
------------------------------------------------------------
* 0            /usr/local/bin/python3.7   4         auto mode
  1            /usr/bin/python2.7         2         manual mode
  2            /usr/bin/python3.5         3         manual mode
  3            /usr/local/bin/python3.7   4         manual mode

Press <enter> to keep the current choice[*], or type selection number: 0

# Do the same installation for pip

jupyter@my-tf2-instance:~$ sudo rm /usr/bin/pip
jupyter@my-tf2-instance:~$ sudo update-alternatives --install /usr/bin/pip pip /usr/bin/pip2 2
jupyter@my-tf2-instance:~$ sudo update-alternatives --install /usr/bin/pip pip /usr/bin/pip3 3
jupyter@my-tf2-instance:~$ sudo update-alternatives --install /usr/bin/pip pip /usr/local/bin/pip3.7 4
jupyter@my-tf2-instance:~$ sudo update-alternatives --config pip
There are 3 choices for the alternative pip (providing /usr/bin/pip).

  Selection    Path                   Priority   Status
------------------------------------------------------------
* 0            /usr/local/bin/pip3.7   4         auto mode
  1            /usr/bin/pip2           2         manual mode
  2            /usr/bin/pip3           3         manual mode
  3            /usr/local/bin/pip3.7   4         manual mode

Press <enter> to keep the current choice[*], or type selection number: 0
Setup Pipenv
The cloned Deep Learning project may have Pipfile/Pipfile.lock.
This is a “Pipenv” setting file.
The Pipenv is a Python’s package manager like JavaScript’s npm/yarn or Ruby’s bundler.
Automatically started jupyter notebook doesn’t have Pipenv setting on the instance.
This section is about to use Pipenv on the GCP instance.
-
Look at system services
To control the jupyter process, you need to use a
systemctlcommand. Thesystemctlcommand controls background processes on Debian Linux. For example, type below:jupyter@my-tf2-instance:~$ sudo systemctl statusThe command above lists services controlled by the system.
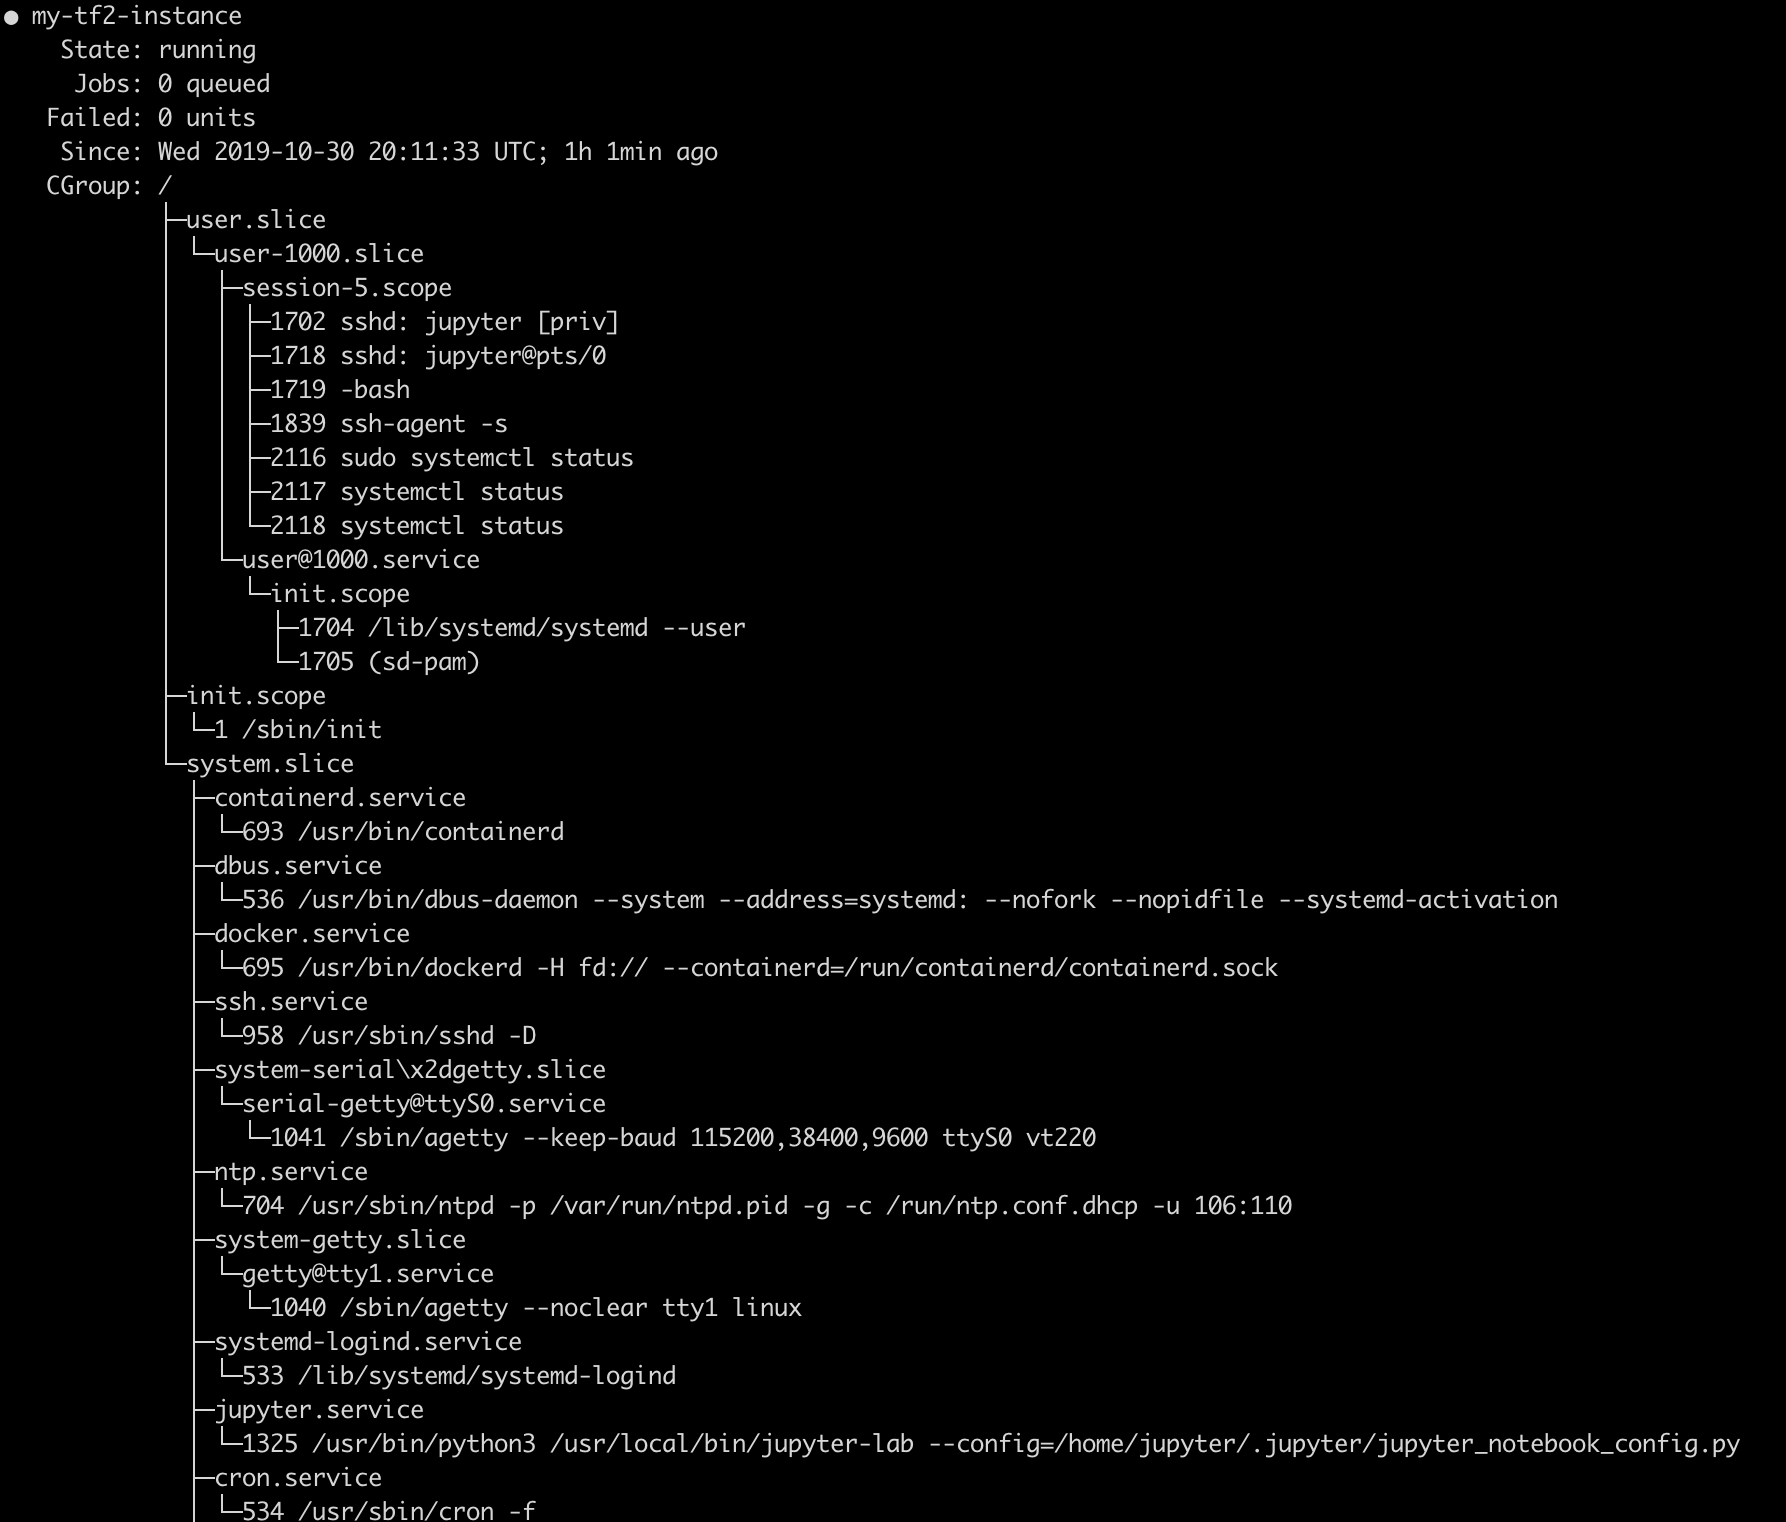
The
jupyter.serviceis among them. -
Stop and disable
jupyter.servceIf you recognize
Pipfilein the project, you want to run jupyter notebook under a particular environment. GCP’s default jupyter startup service won’t be used in such case. Run the commands below to stop and disable jupyter service.$ sudo systemctl stop jupyter $ sudo systemctl disable jupyter -
Create environment
Python3.7 comes with virtual environment tool,
pyvenv. It is handy to create a project specific environment. Go to the directory which has thePipfileand run the commands below. The command prompt will have a prefix(env).jupyter@my-tf2-instance:~/intro-to-deep-learning$ python -m venv env jupyter@my-tf2-instance:~/intro-to-deep-learning$ source env/bin/activate (env) jupyter@my-tf2-instance:~/intro-to-deep-learning$ -
Install
pipenvFor some reason, when
pipenvis simply installed bypip install pipenv, thepipenv installcommand raises a confusing error. The solution for this error is discussed on the GitHub issue, https://github.com/pypa/pipenv/issues/3468.(env) jupyter@my-tf2-instance:~/intro-to-deep-learning$ pip install -e git+https://github.com/pypa/pipenv.git@master#egg=pipenv -
Install
pipenvenvironmentNext is the installation by the
pipenvcommand to create the same runtime environment specified in thePipfile.(env) jupyter@my-tf2-instance:~/intro-to-deep-learning$ pipenv install (env) jupyter@my-tf2-instance:~/intro-to-deep-learning$ pipenv shell # Do some more installation, for example (env) jupyter@my-tf2-instance:~/intro-to-deep-learning$ jupyter contrib nbextension install --user (env) jupyter@my-tf2-instance:~/intro-to-deep-learning$ jupyter nbextensions_configurator enable --user -
Start
jupyter notebookEverything is ready. Let’s start up the
jupyter notebook.(env) jupyter@my-tf2-instance:~/intro-to-deep-learning$ jupyter notebookAbove may raise some errors since newly installed jupyter doesn’t have some extensions installed. However, the notebook itself starts running.
Be careful about installing extensions, especially labextension. The installed extensions may load Python 3.5. As a result, whole notebook will use Python 3.5 even though the Python to start
jupyter notebookis 3.7. -
Connect to
jupyter notebookThe
jupyter notebookis running on the port 8080. The tunneling has been enabled on the port 8080, so like you did already, go to the web browser and hithttp://localhost:8080/tree. You’ll see project files on the notebook. -
Deactivate the virtual environment
After shutting down the notebook, you should deactivate the virtual environment. The command below does that. After deactivated, the command line prompt changes.
 (env) jupyter@my-tf2-instance:~/intro-to-deep-learning$ deactivate
 jupyter@my-tf2-instance:~/intro-to-deep-learning$
Continue to Work on Another Day
All installations have been done. When you continue to work on another day, what to do is much less.
-
Start the instance
$ gcloud compute instances start $INSTANCE_NAME -
SSH to the instance with tunneling
$ gcloud compute ssh jupyter@$INSTANCE_NAME -- -L 8080:localhost:8080 -
Activate the environment
This memo assumes the environment setting is provided by
Pipfile, so go to the project directory which hasPipfile. Then, activate the environment.jupyter@my-tf2-instance:~$ cd intro-to-deep-learning jupyter@my-tf2-instance:~/intro-to-deep-learning$ source env/bin/activate (env) jupyter@my-tf2-instance:~/intro-to-deep-learning$ pipenv shell -
Start
jupyter notebookand use itStart the
jupyter notebook, then go to the web browser. The URL ishttp://localhost:8080.(env) jupyter@my-tf2-instance:~/intro-to-deep-learning$ jupyter notebook -
Add SSH from the instance to GitHub
When you login to the instance, the SSH identity to access GitHub repos is not saved. Startup ssh authentication agent and add identity.
jupyter@my-tf2-instance:~$ eval "$(ssh-agent -s)" jupyter@my-tf2-instance:~$ ssh-add ~/.ssh/id_rsa -
After the work
Shutdown the notebook, deactivate the virtual environment, and exit the shell. Don’t forget to stop the instance.
In The End
This type of work tends to take time, experience hard time. Sometime, it is frustrating since some don’t work as in the documents. Sometime, the document is missing something, or something is different in my box.
My memo may not help you. My memo may have extra you don’t need. Often, what people want to do are a bit different from other people do. Also, there are a couple or many ways to accomplish that.
This memo is just an example how I set up those. I’m pretty sure I’ll forget how I did. This memo will help future myself to recall how I could setup my GCP instance in the past. If this memo helps you, that’s more than happy to me.